Day 474 Total Spent So Far: $146,501.80 30 Yard Dumpsters Filled: 5.5
We’ve finally gotten most all of the windows replaced in the house, save a few in the small studio AirBnB Windsor’s Rest. The priority now though has switched to finishing the flooring in the kitchen area (we are half way there having already done the living room) because the kitchen is literally sitting in boxes right now. It’s taking up our entire living room waiting to be installed. What a mess half our house is – rendered completely unusable right now. Very soon, by the end of November, this place will be so much nicer as the flooring and kitchen gets done – and we can put our lives back together.
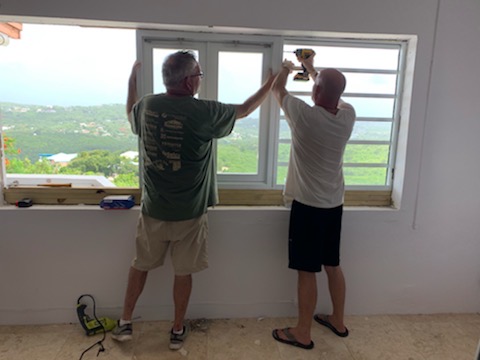
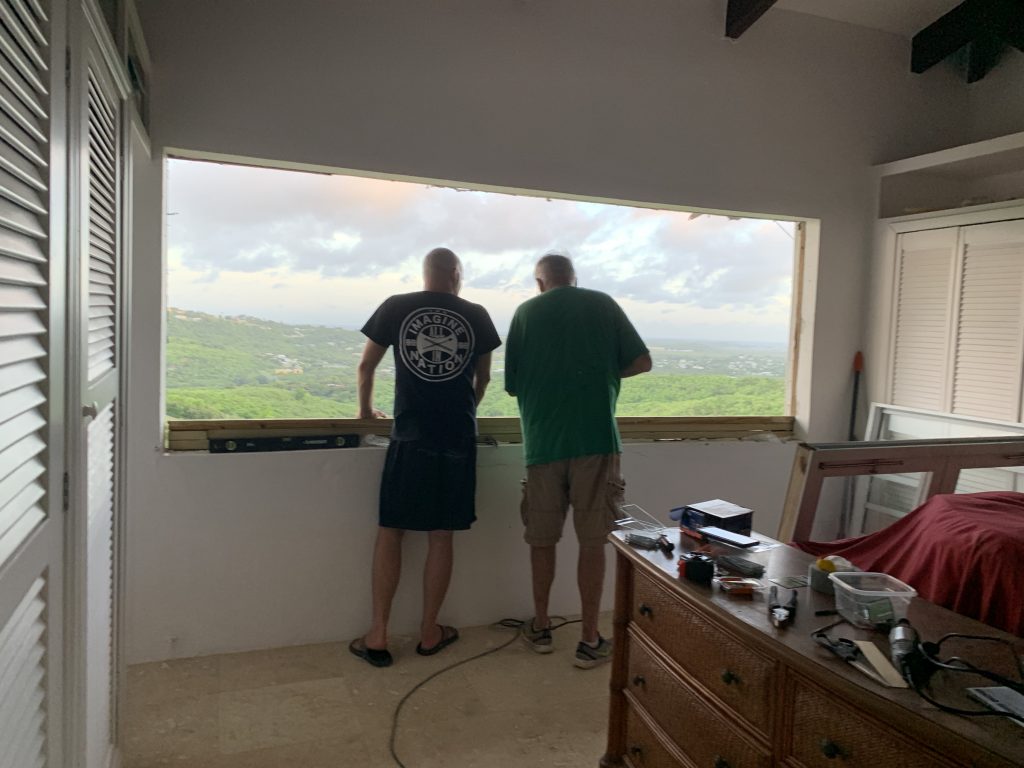
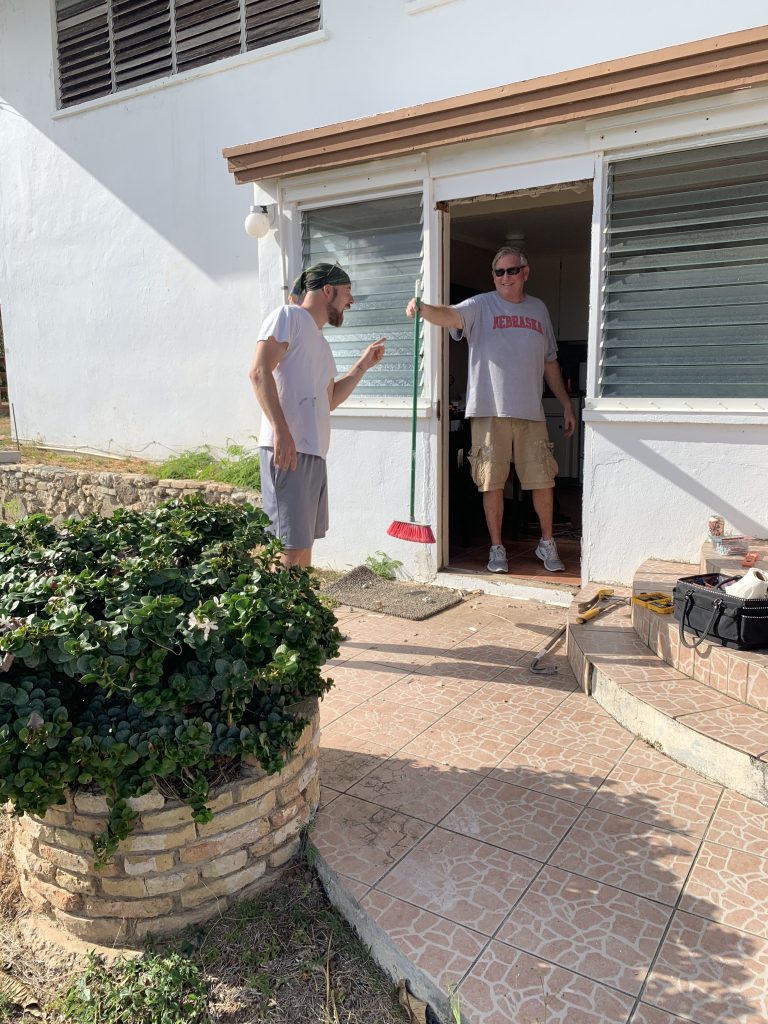
The windows were a huge job! And of course, Dave came down to save the day again. He may have earned himself a second lifetime timeshare week without on-going expenses at The View this last trip. I will say I’m not sure how I would have done this part of the remodel without him. It’s literally impossible to put some of these windows in by yourself. You have to have someone hold it while the other person screws it into the wall.
Removing Hall Window
Takes Two to Tango
Upstairs Windows
Working Late
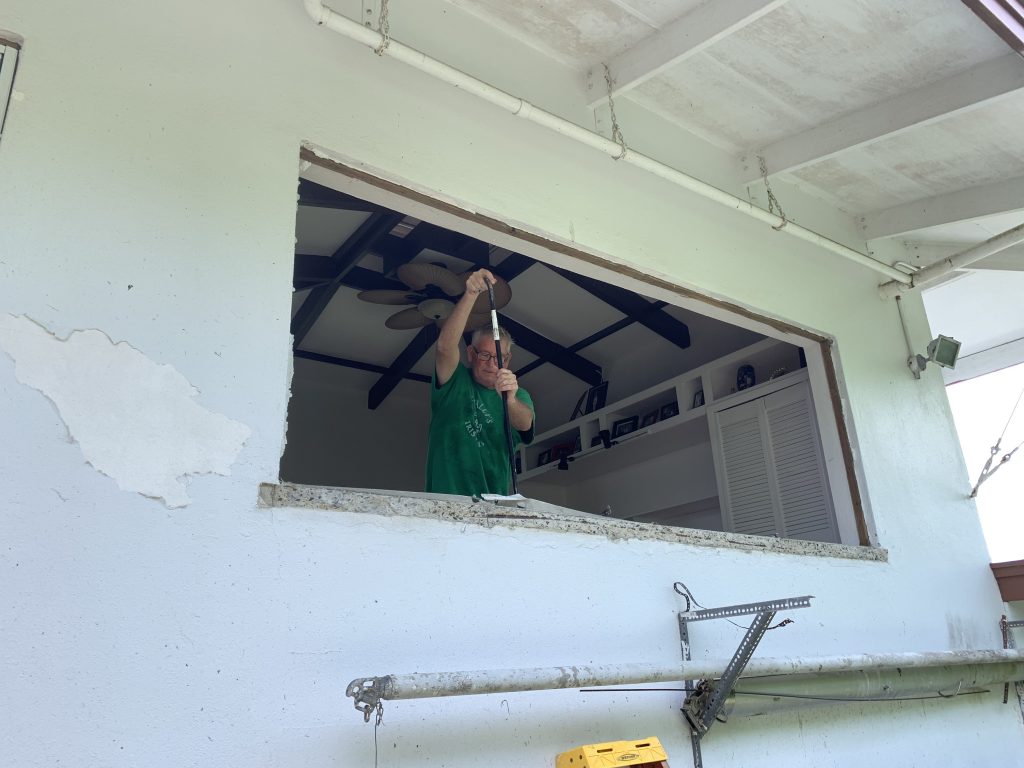
Demo Dave
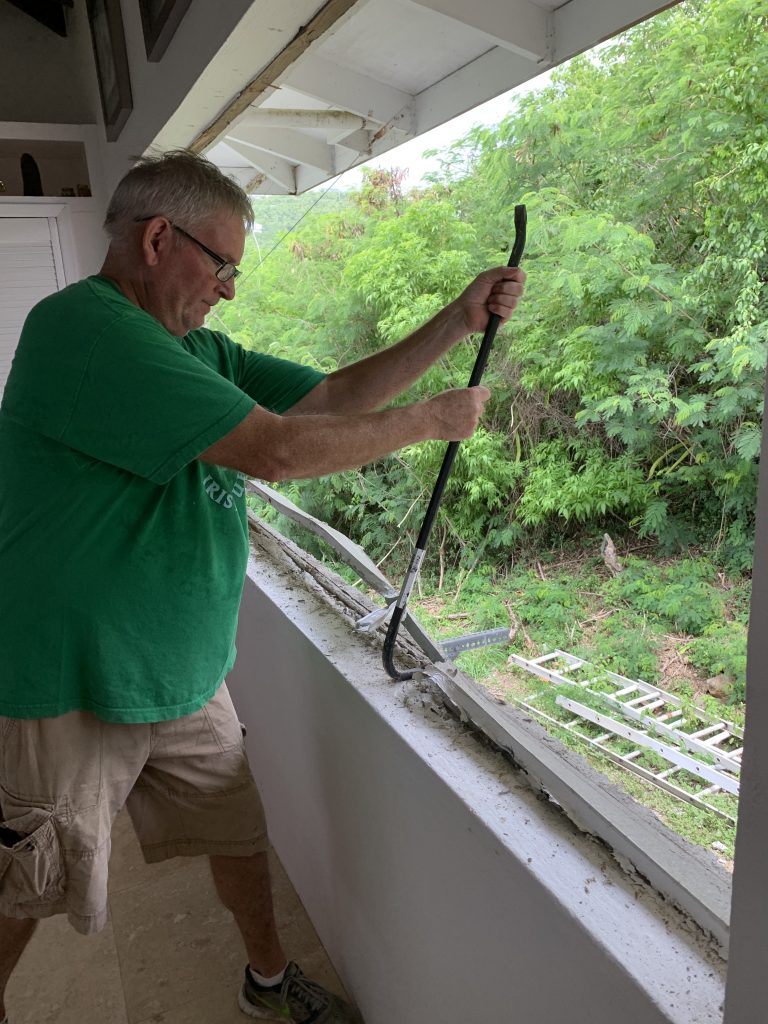
Demo Dave, Again
Checking Out the New View
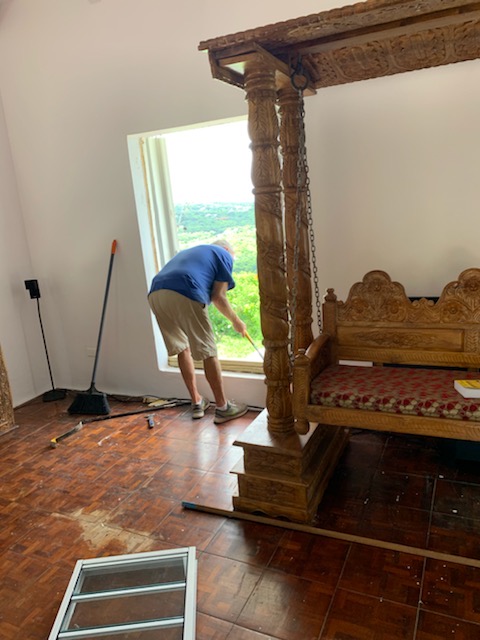
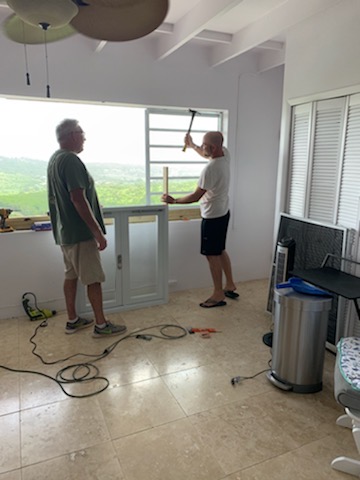
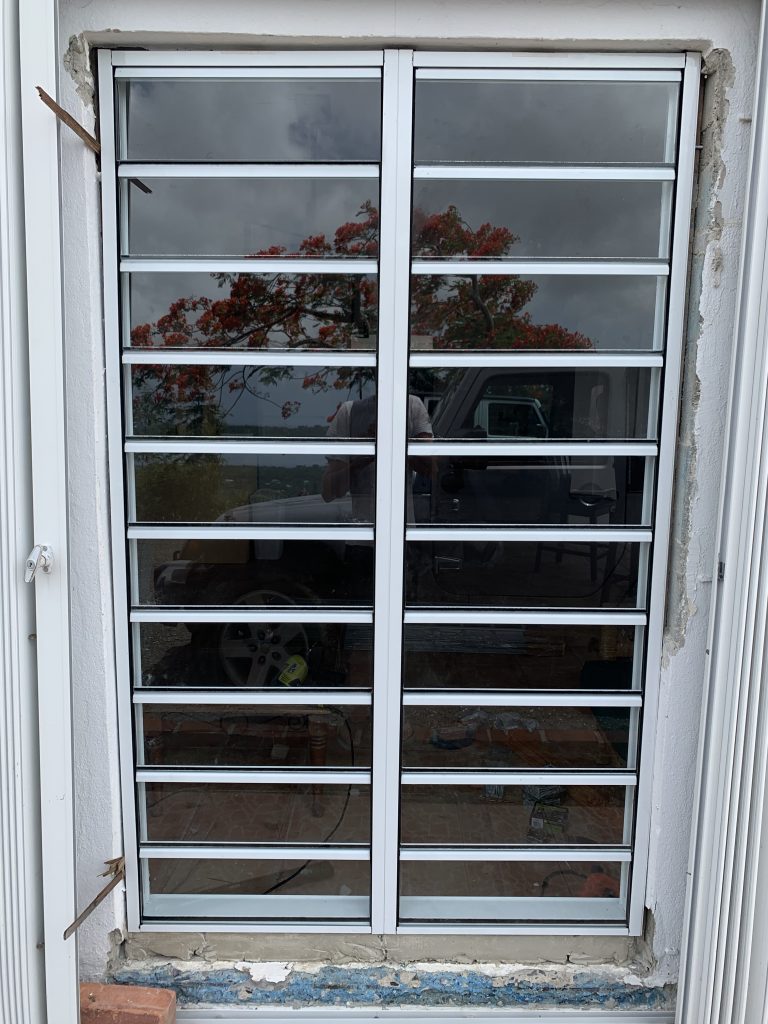
Prepping The Casement Window
We used 4-5″ tap cons throughout the installations to ensure these were solid and secured deep into the surrounding concrete walls. We put 3-4 up each side (depending upon the height) and at least one in the top and bottom of each window. Afterwards, we are plastering up the gaps and space around it to finish it, before painting.
One thing to note on jalousie type windows is that they only come in fixed height sizes. While you can order them to whatever rough opening width you’d like, height wise is dependent upon fixed sizes that divide evenly by your window pane height. For example, a 3″ jalousie comes in height adjustments every 3″ or so… a 4″ jalousie every 4, and so on. Ours were 6″ jalousie panes to ensure the most view – but it also gave us the largest vertical gap to fill at times.
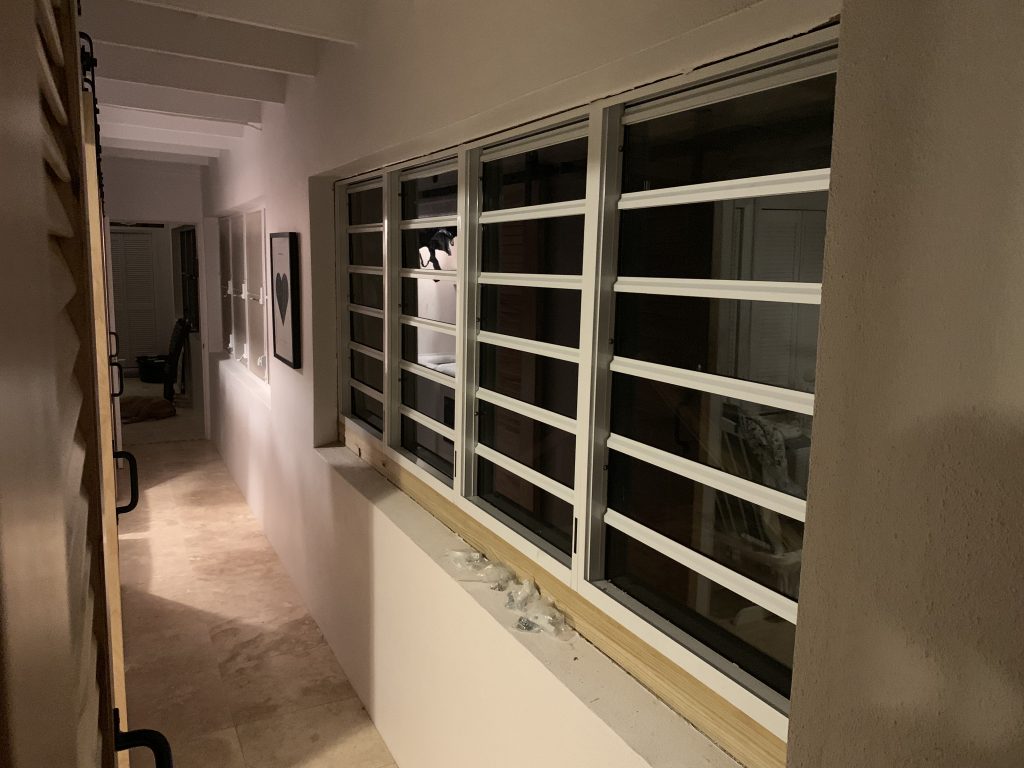
Freshly Installed
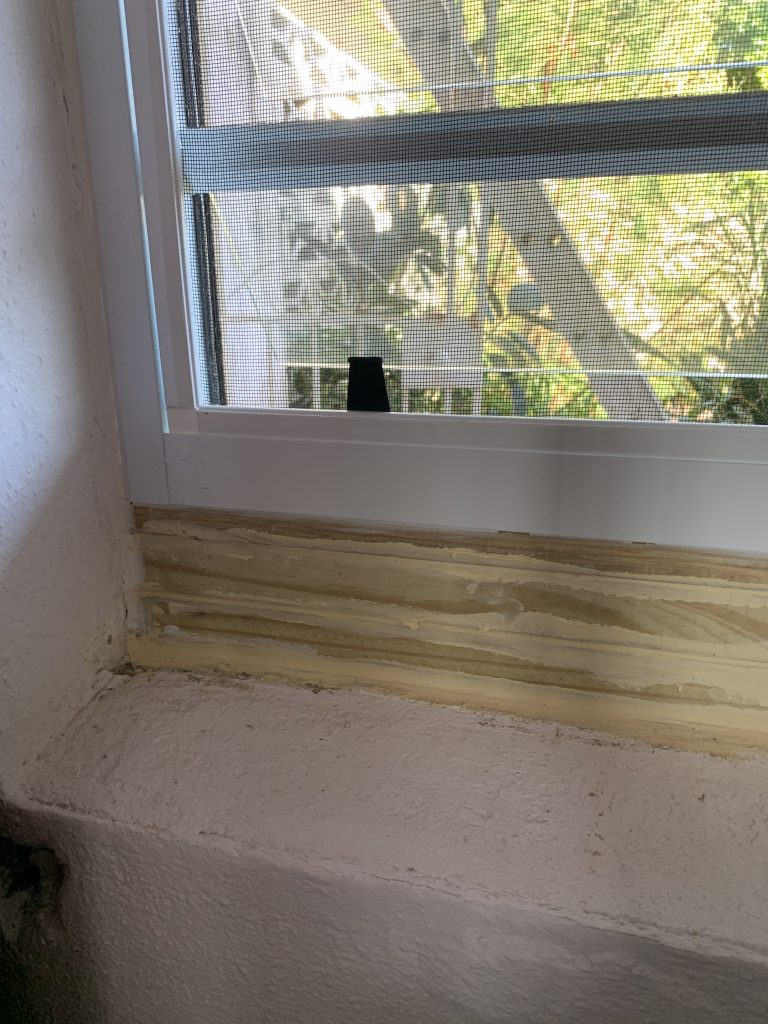
Wood & Caulk
Plastered & Painted
We built up the windows that were shorter than the rough openings with treated lumber, all tap-conned into the concrete. We then sealed any gaps with caulking for water intrusion, and then covered over with plaster and paint. After painting, the finished product looks great.
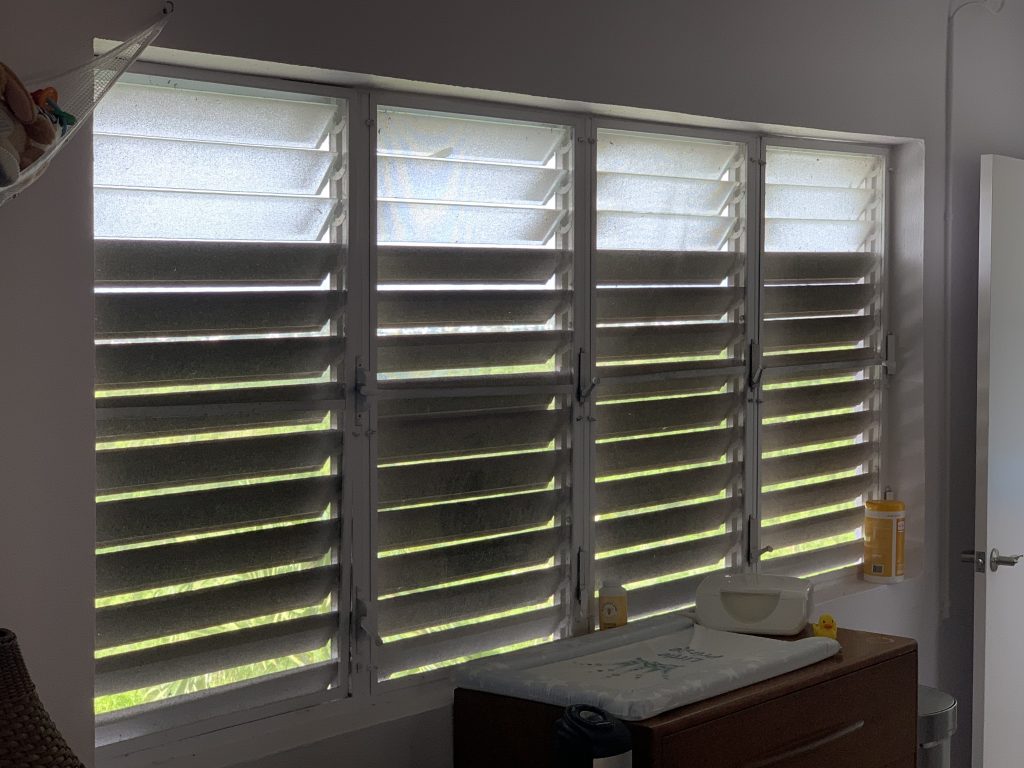
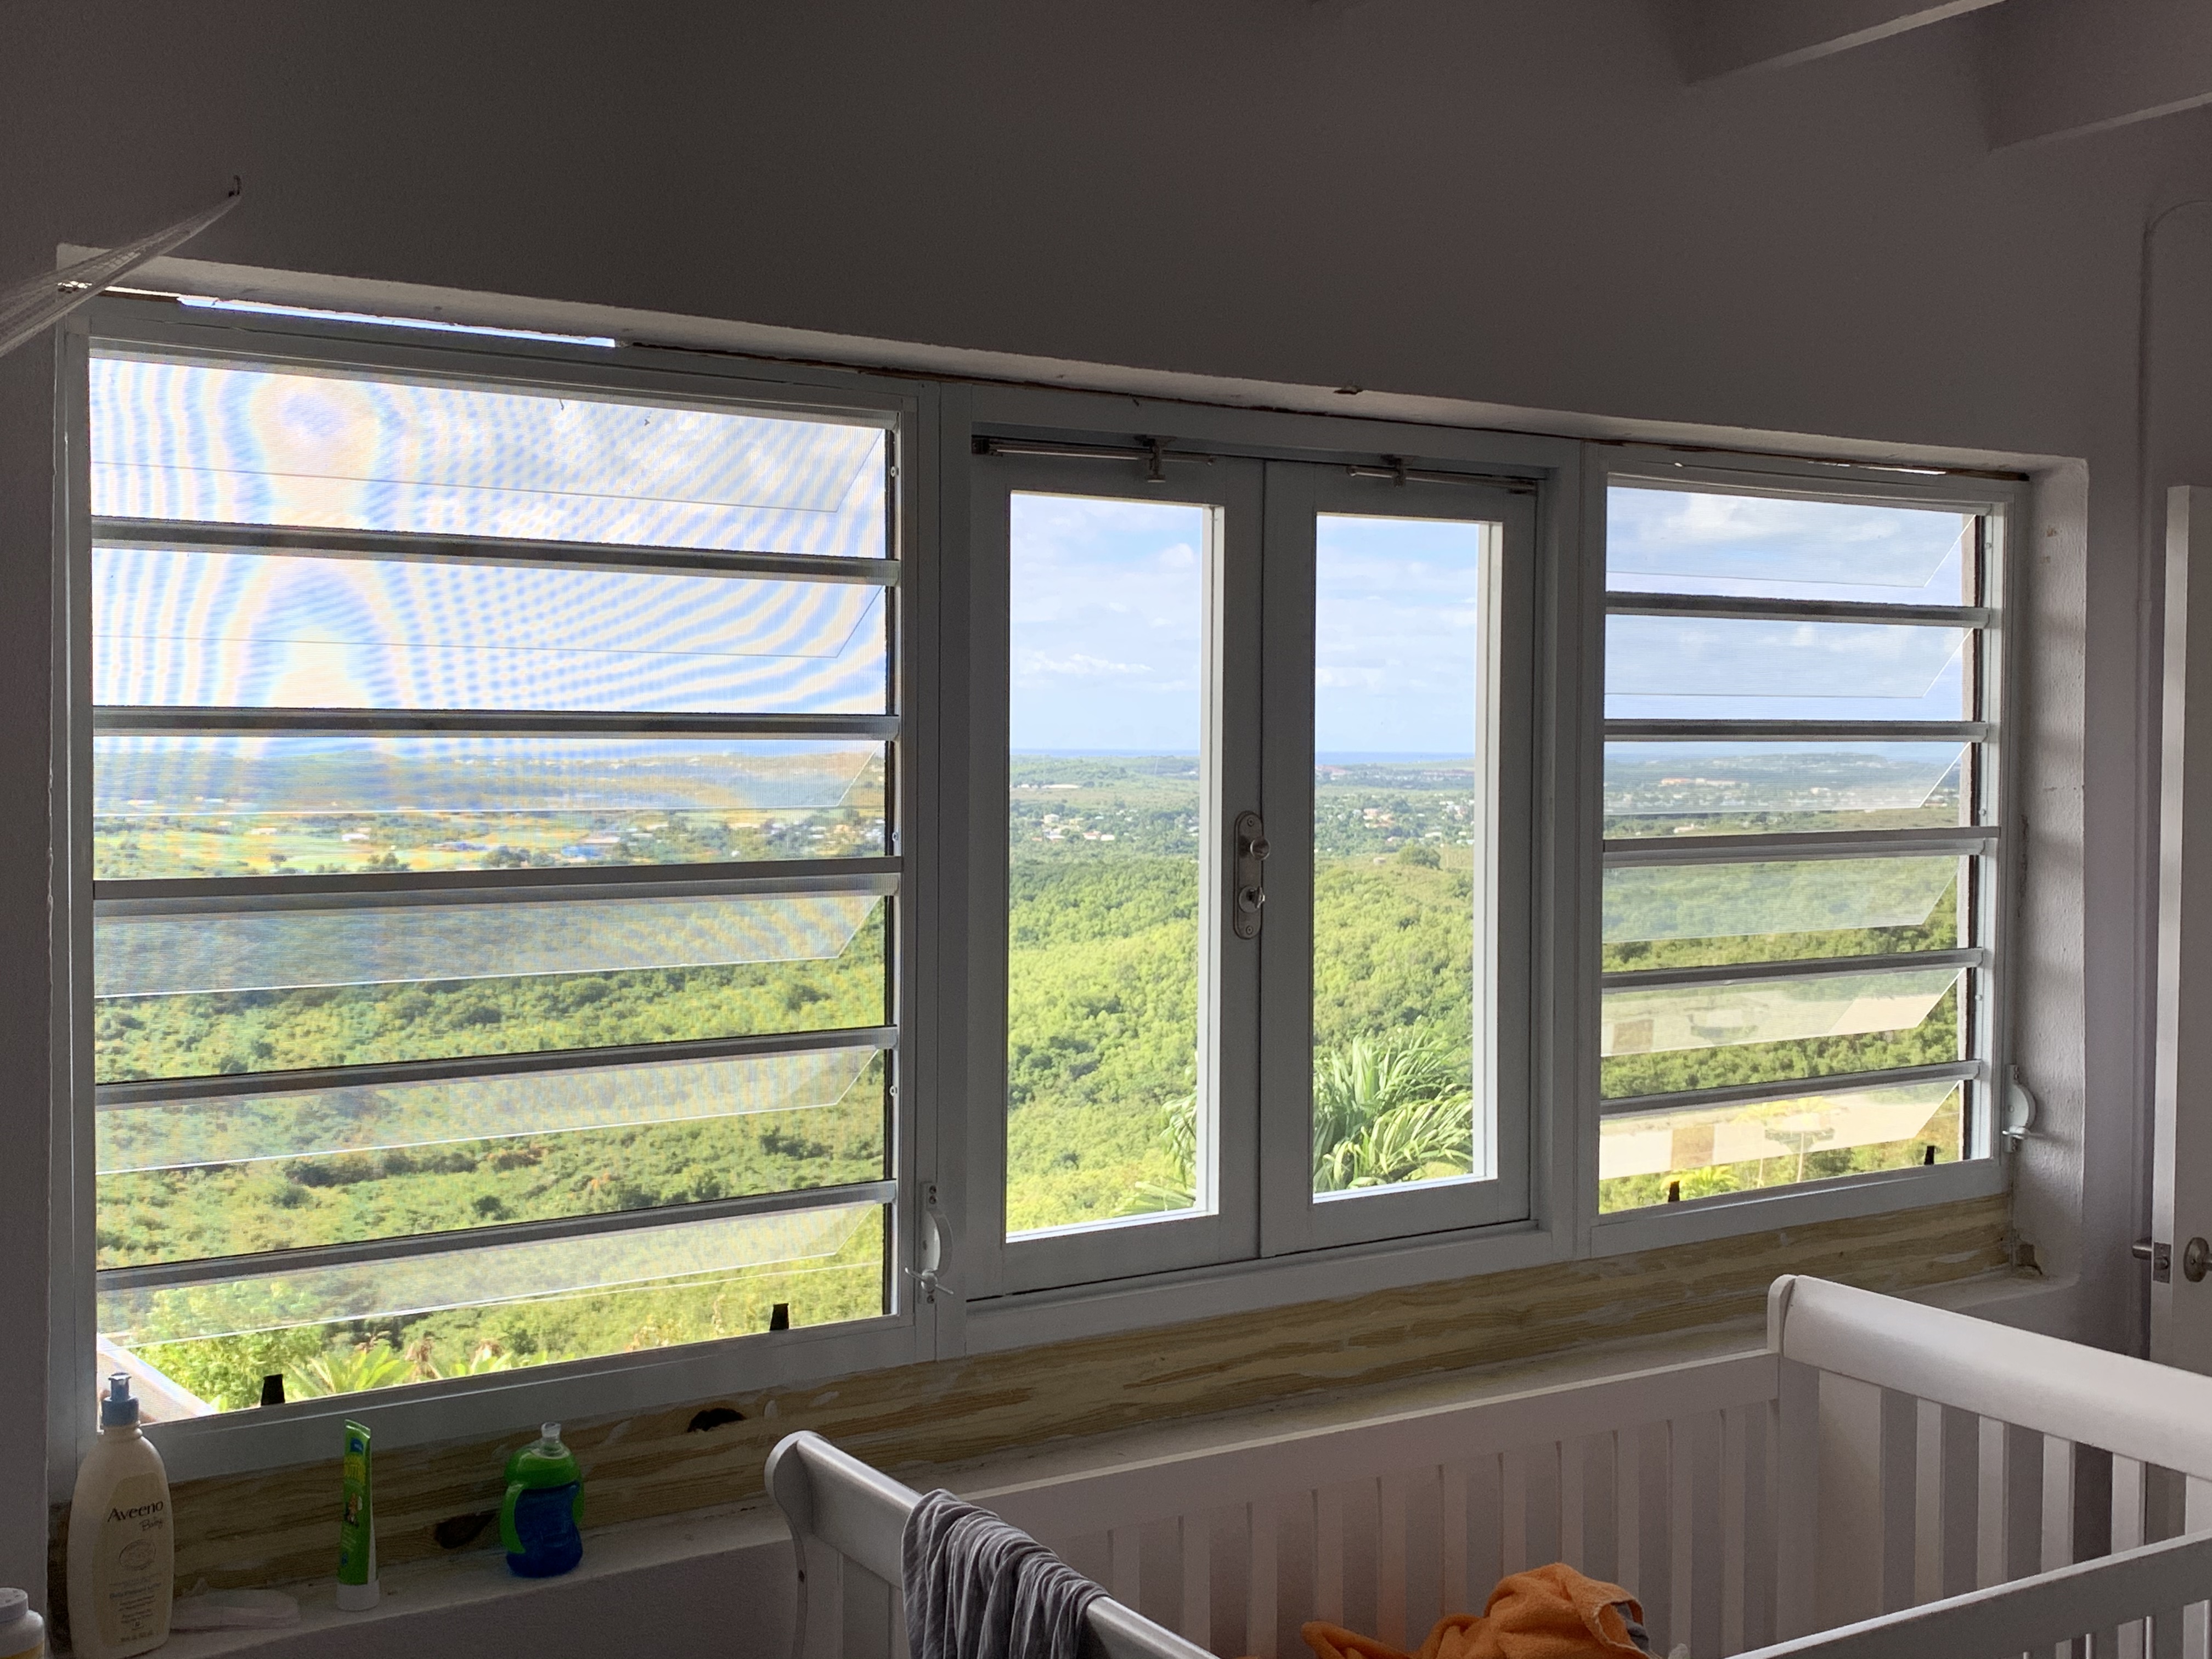
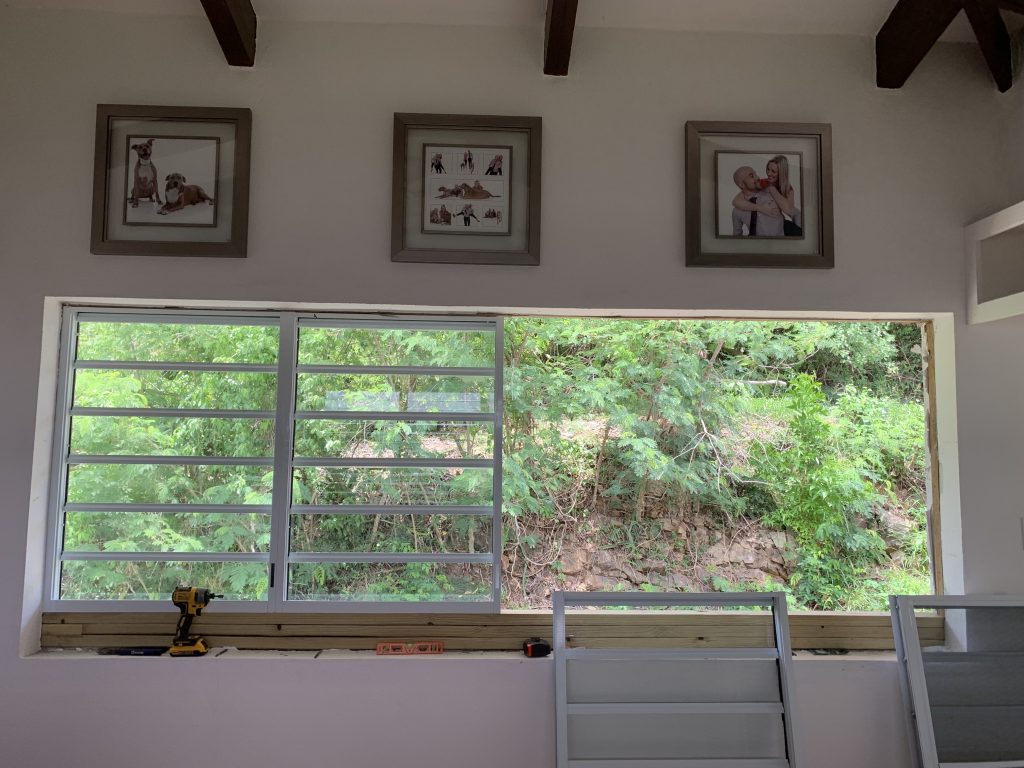
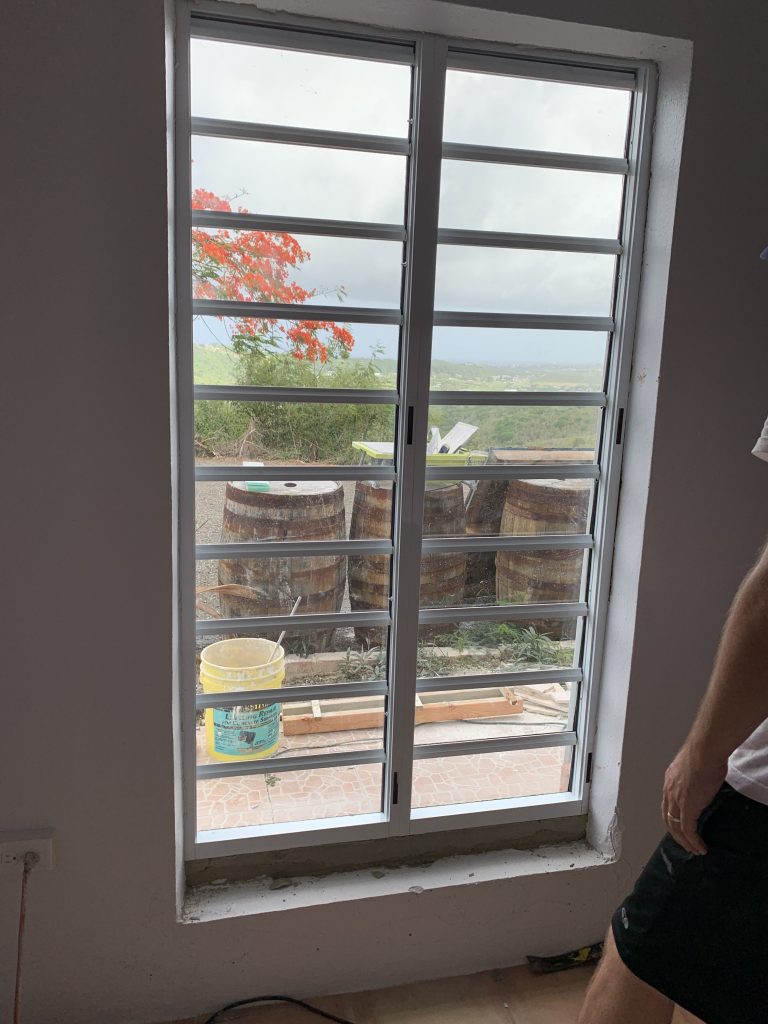
Liam’s Room BeforeLiam’s Room After (Well, before caulk, plaster and paint) – BUT LOOK AT THAT VIEW!
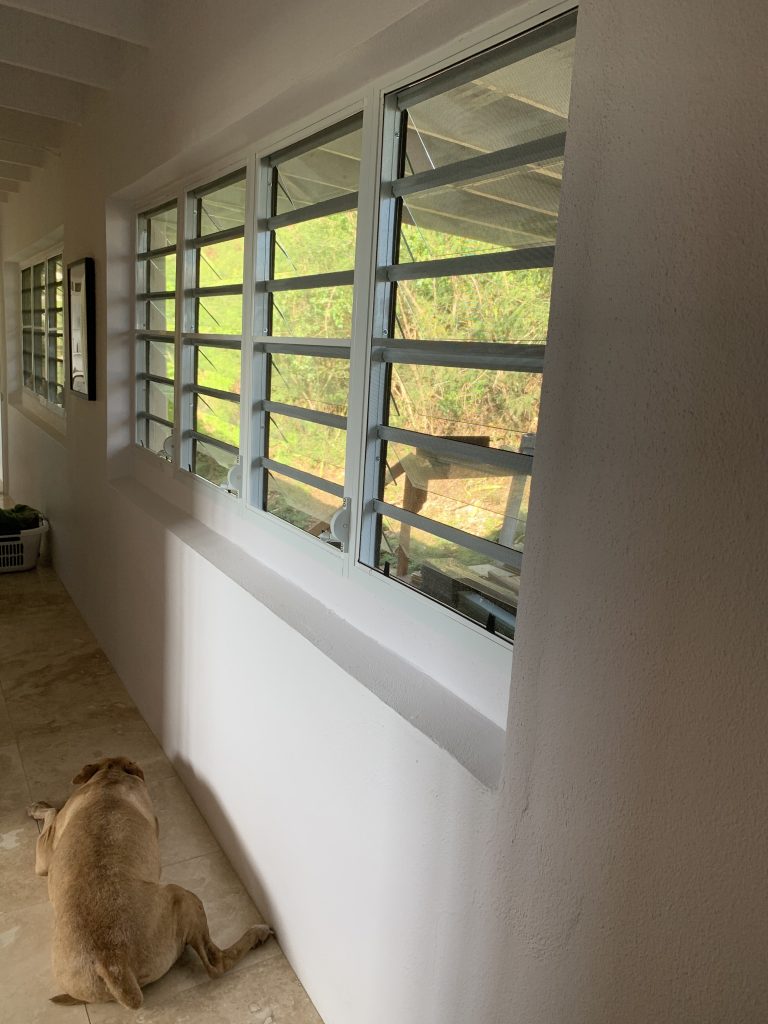
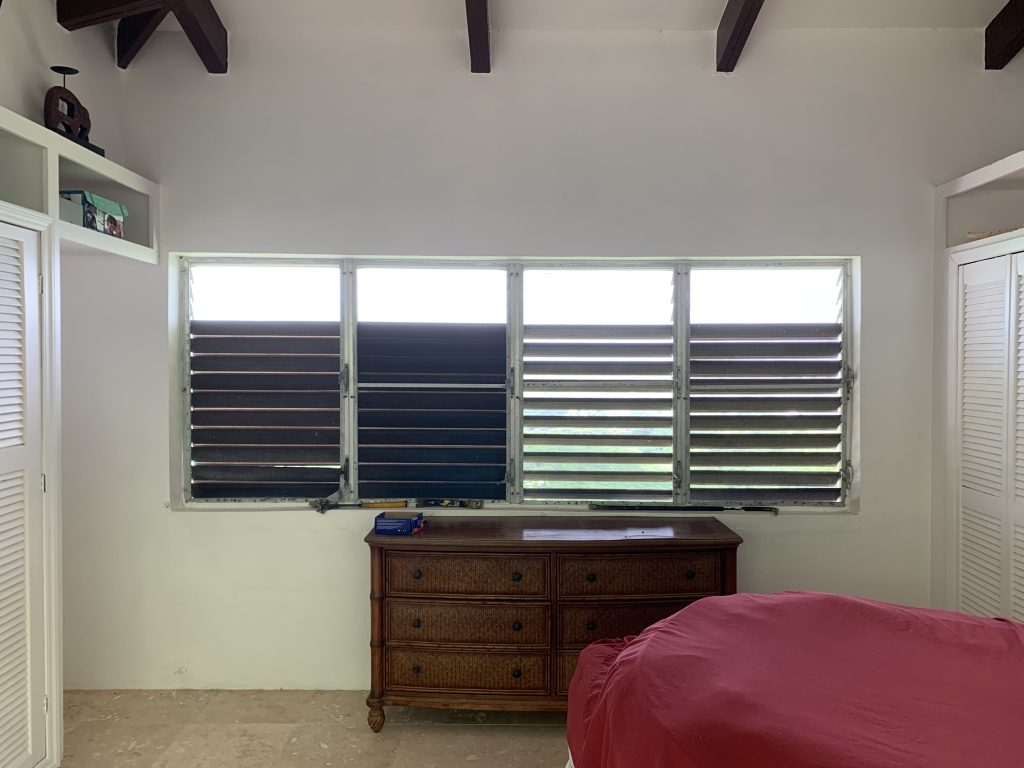
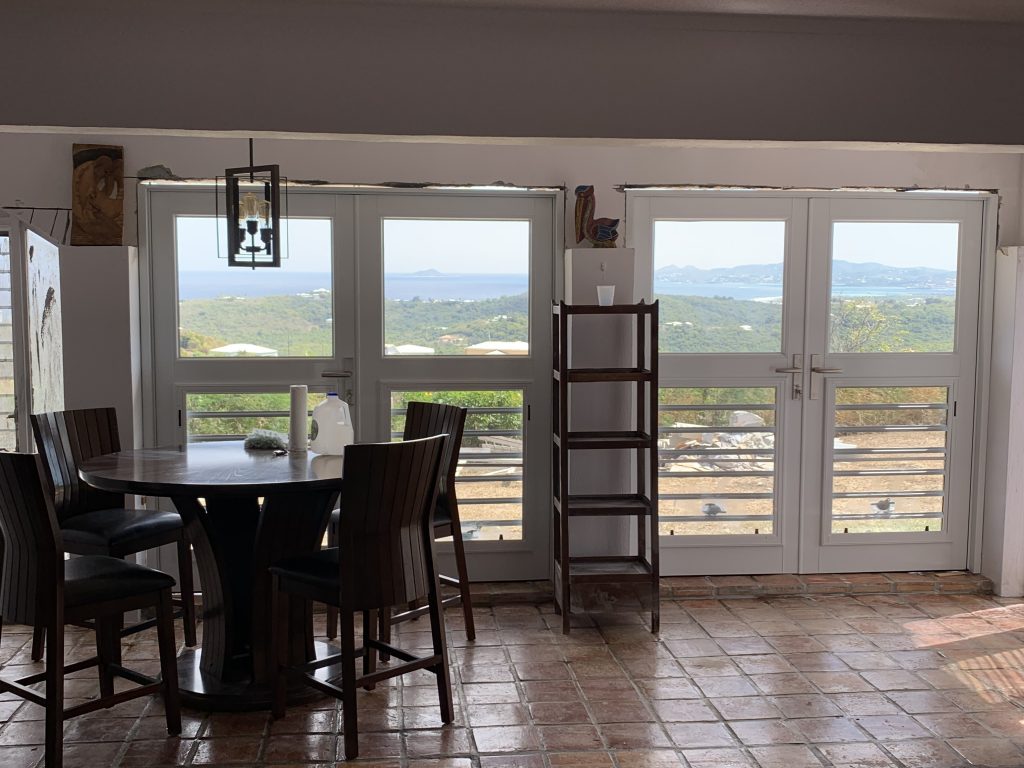
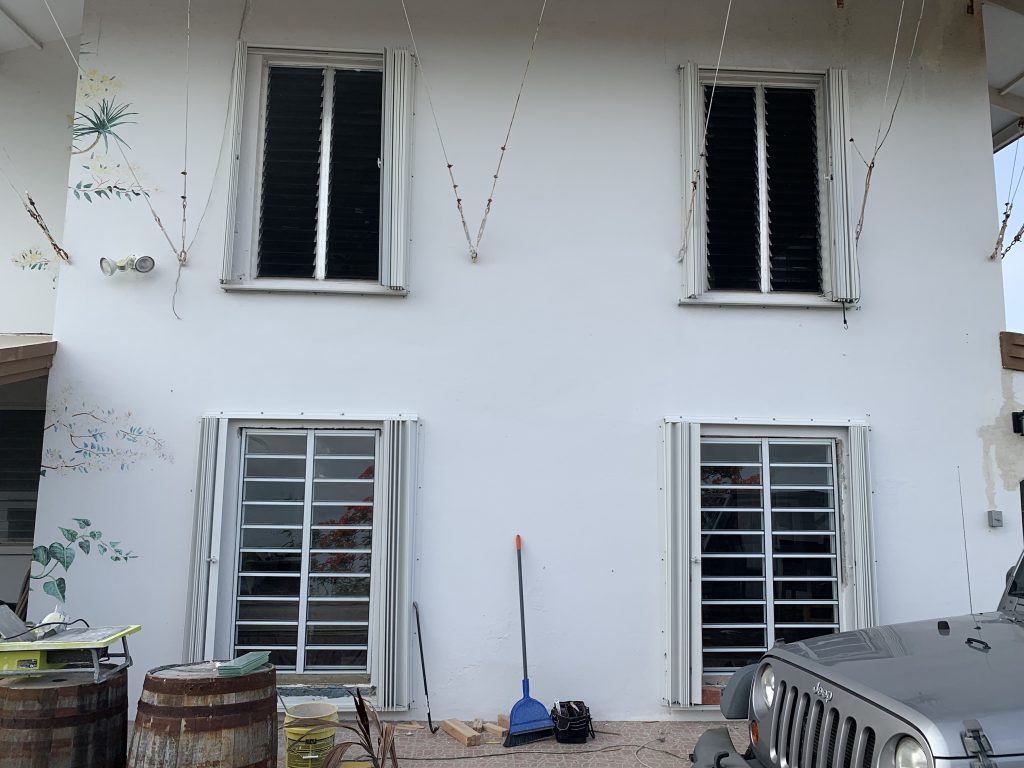
These windows and screens are very easy to clean. It changed the view from the bedrooms and hallways in a major way. Before – we literally had wood window slats, you couldn’t even see through… A cheap way to allow ventilation in, and protect against hurricanes, all while completely blocking the view. Who does that!?!? lol.
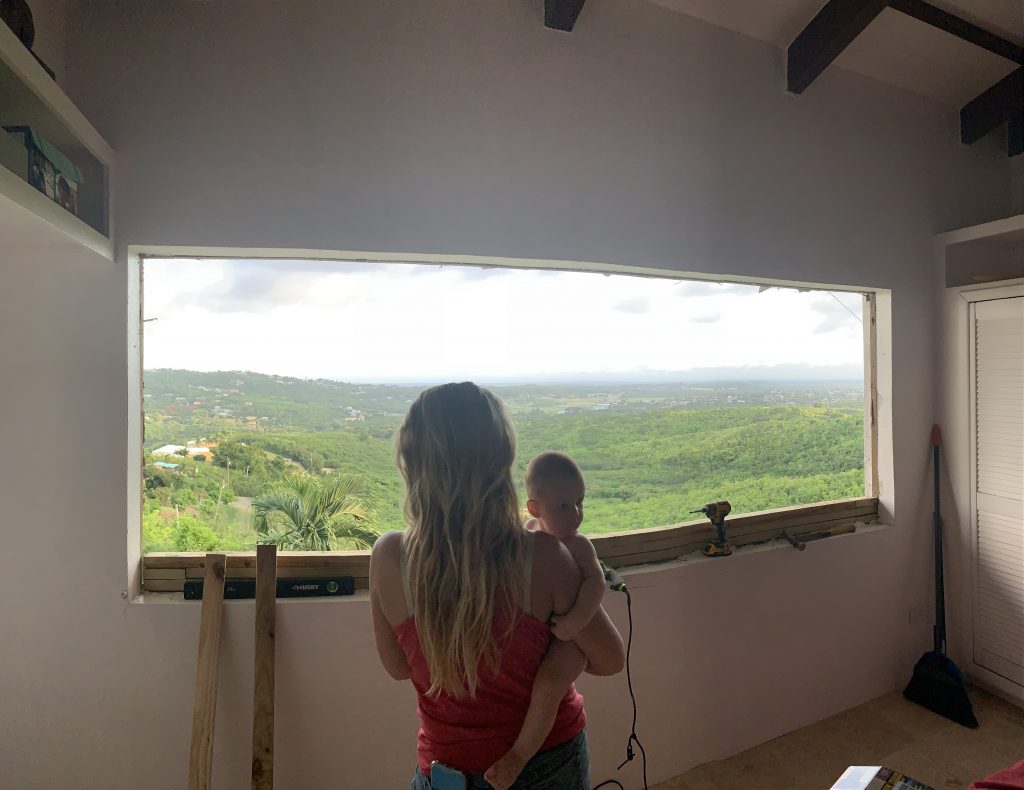
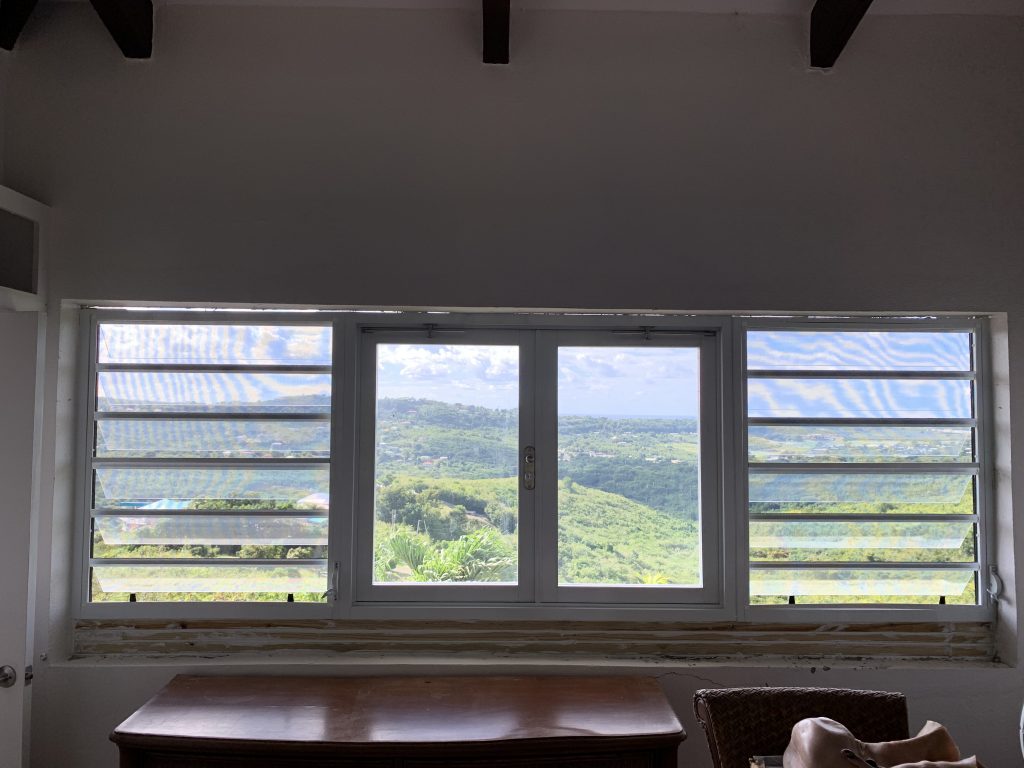
Checking Out The Never-Before-Seen Master Bedroom View
I commented previously, but the quality control process at AirMaster windows completely sucks out of Puerto Rico. While the finished product is of quality it seems, the manufacturing process is shabby. For example, the glass has fallen out of a few windows because they didn’t put enough silicone inside the metal bars that hold them in. We’ve been waiting for a couple months now for replacements. They forgot the connecting screw hardware in our windows, a $180 credit Home Depot had to give me to buy more, and they were even missing some of the window cranks and such. All fixable things I guess, but annoying none the less. They need someone checking the quality when the product comes off the line, so not to inconvenience the home owner or installer. I wouldn’t recommend these windows after our hassle ordering, waiting, installing and fixing, although I have to say I’m happy with the final product once it’s installed and has all the missing pieces replaced.
Demo Demo
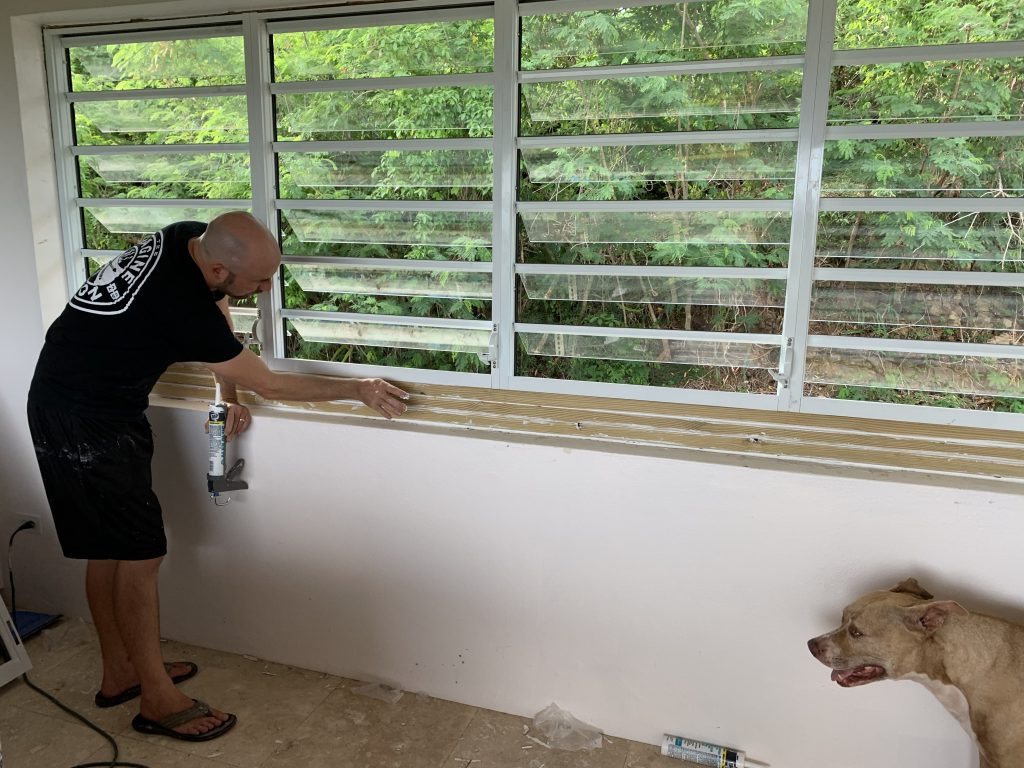
Caulking Windows
Installing Windows
Removing the Wood Panes That Blocked The View
This process took us about 20 days of work in total, about 15 with two people working, and we installed 42 windows and doors. It would be much faster if this wasn’t a concrete house. I’ve got another 5 windows to do, which will probably add another 5 days worth of work once it’s all plastered and painted.
Before Master Bedroom ViewNew Master View (Before Caulking, Plaster and Paint)Hallway starting to look pretty nice!
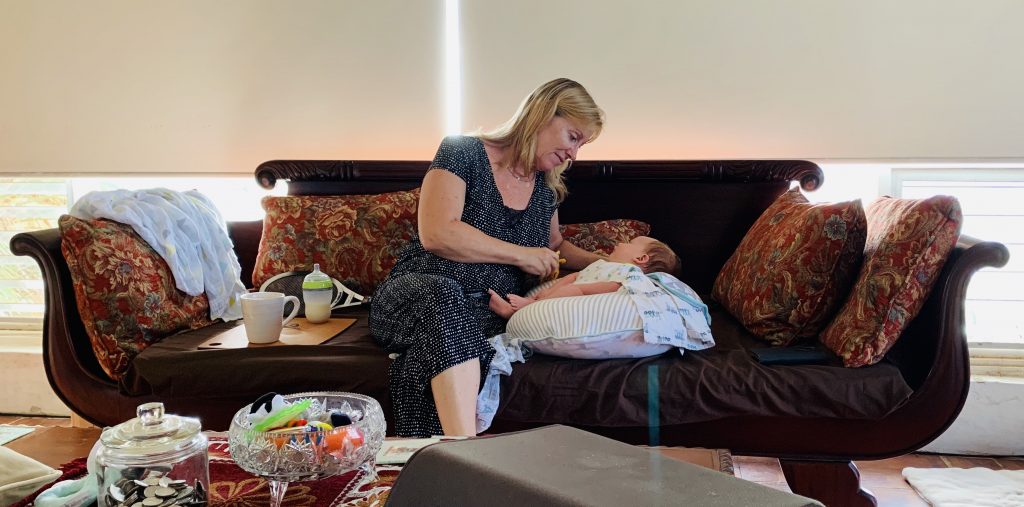
Finally, I’ll end with Liam – who is growing up incredibly fast. So far, he enjoys driving, and sailing as his main hobbies, other than eating, sleeping, and pooping.
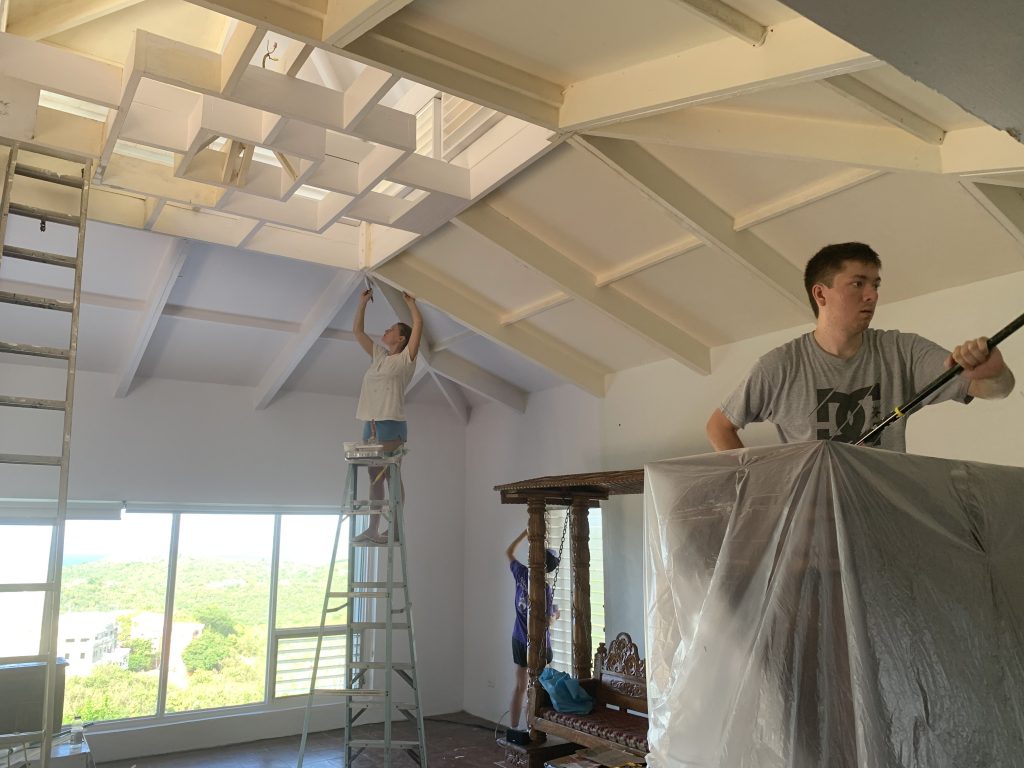
My cousin Kira came down again to help us with our living room painting job. This was the biggest room of all to paint. Many hands make light of work, as they say.
Team Painting the Great Room – Lots to Be Done!
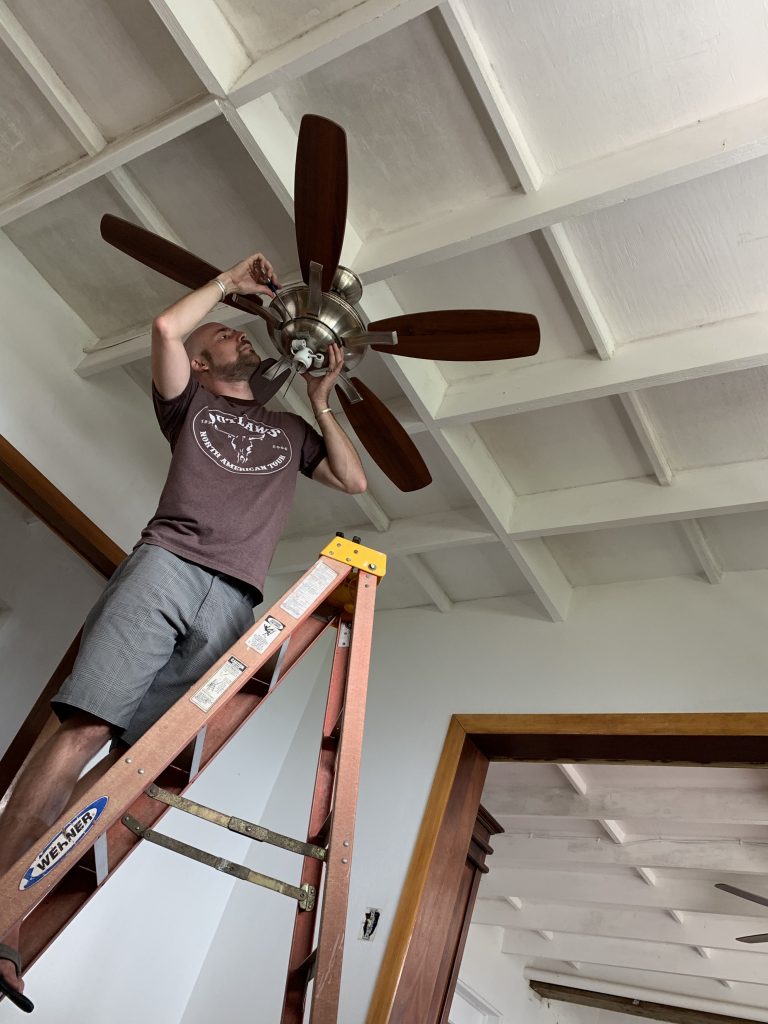
Everyone chipped in a little, including Sebastian. We painted the walls, and the entire ceiling. I had to rebuild three vents within the cupola that were still boarded up from the hurricanes (Maria and Irma) that blew them out before I purchased the home so we could finish the ceiling. I will be covering that rebuild in a future post as I have more to do on the back bedroom cupola currently still.
To get up into the lattice work, I needed a tall extension ladder, extended about 18-20′. It’s pretty high when you’re up there – not going to lie.
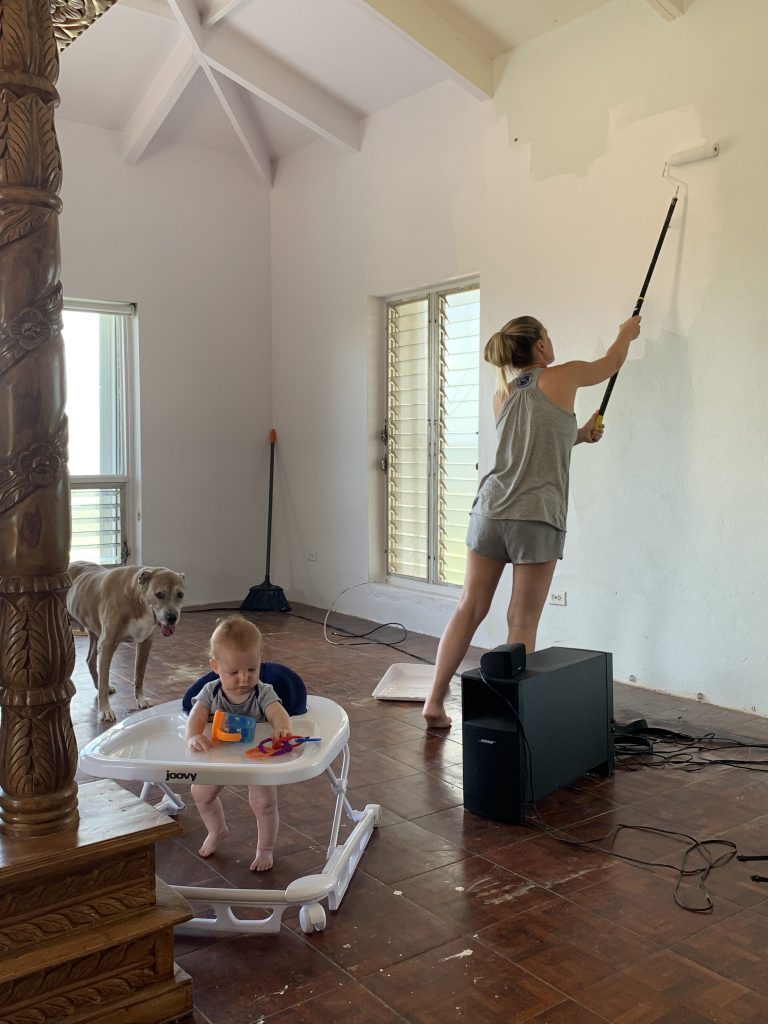
Shaleece Painting the Wall
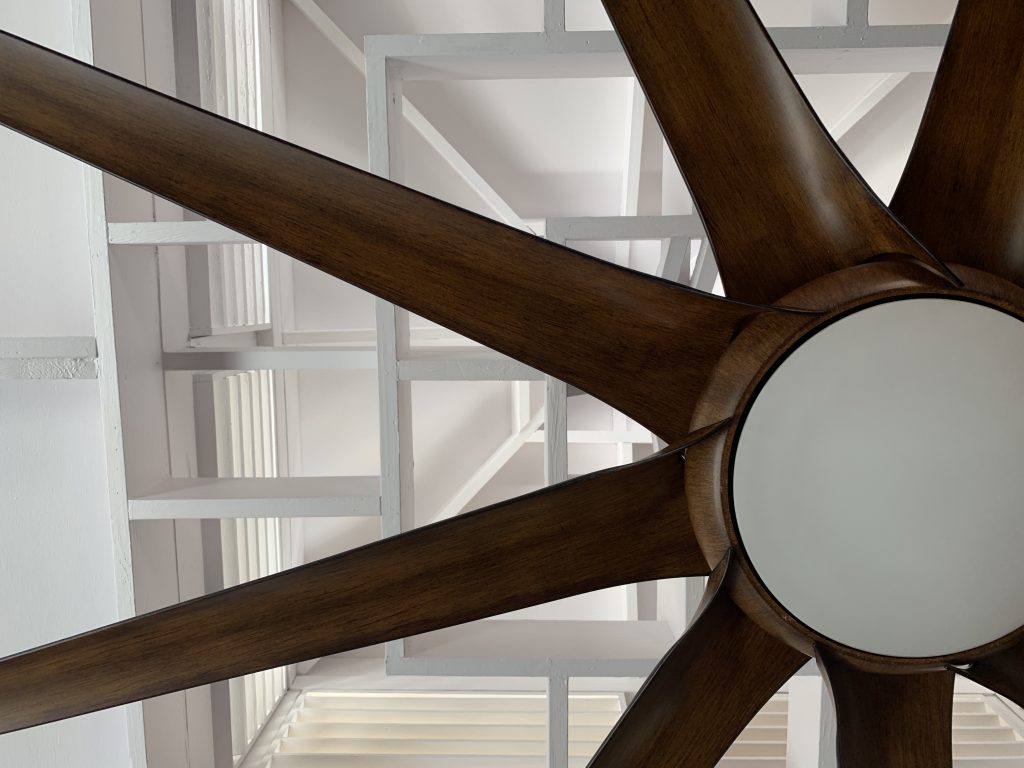
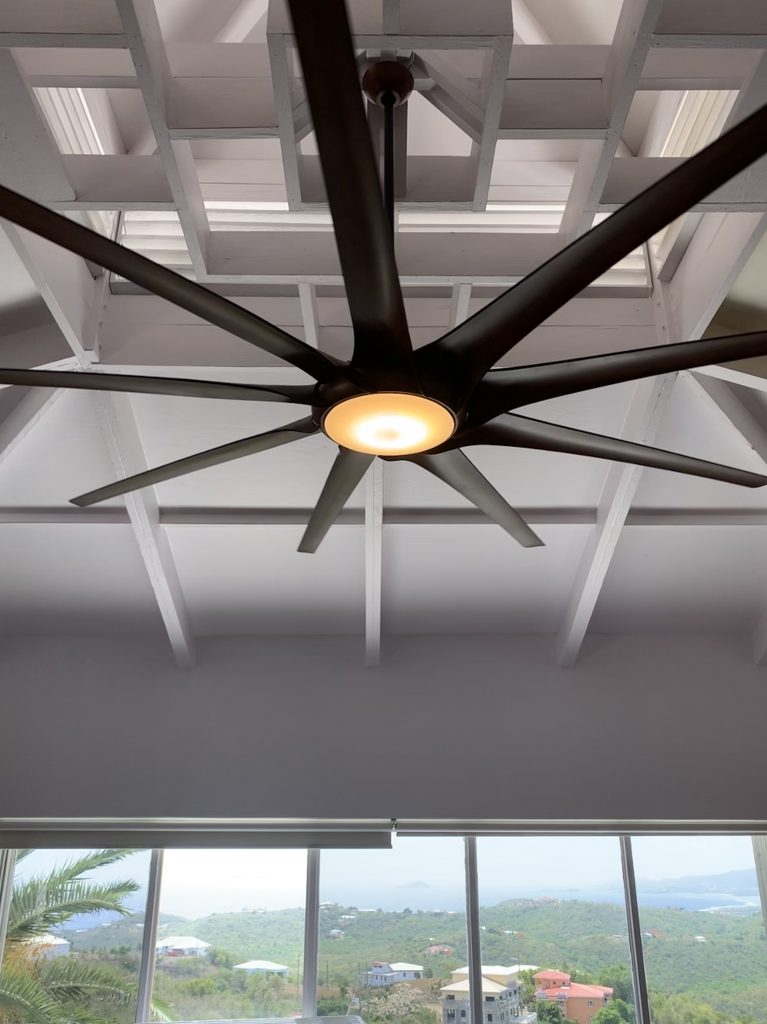
By the end of the week – we were able to hang our prize jewel – the 8′ ceiling fan. This thing is amazing and puts off a great amount of air. It’s remote controlled and can both pull air up into the cupola to be ejected out of the vents, or blow air down on us creating a very nice indoor breeze.
8′ Minka Air Fan8′ Minka Air FanMmmmm… Air
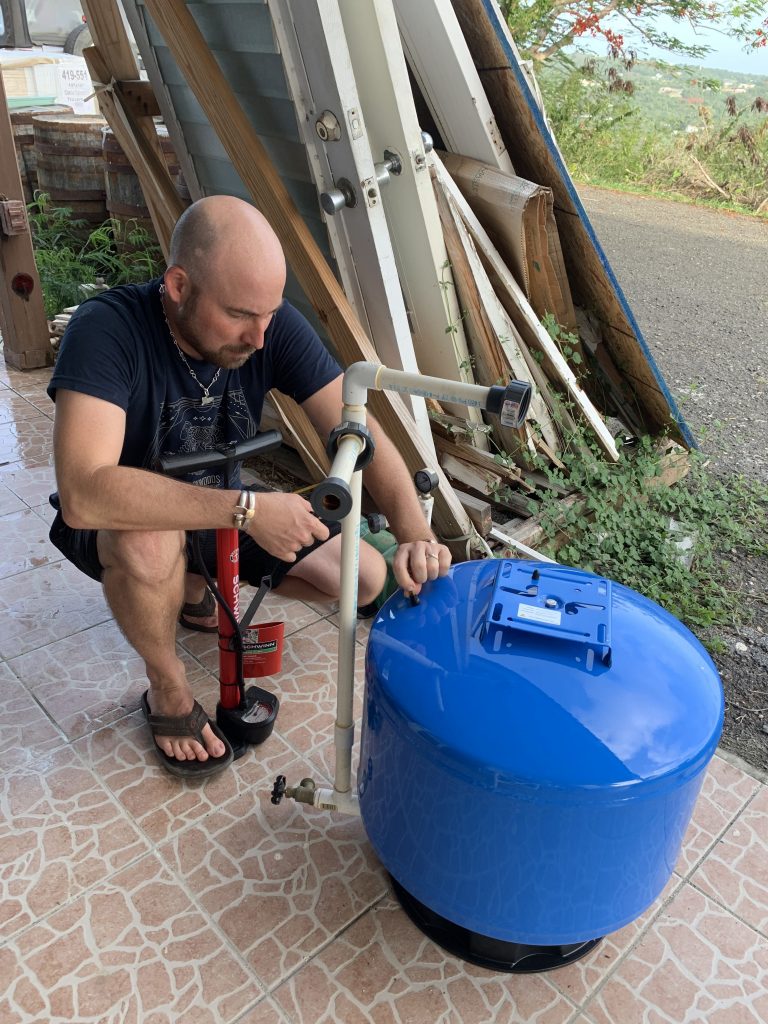
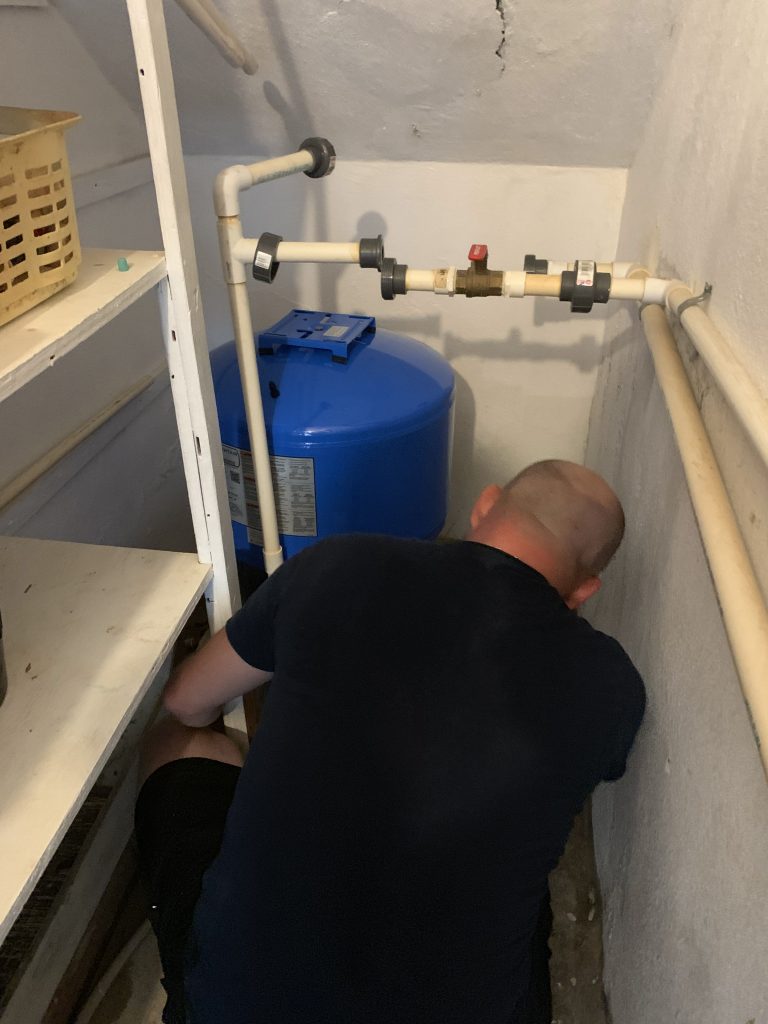
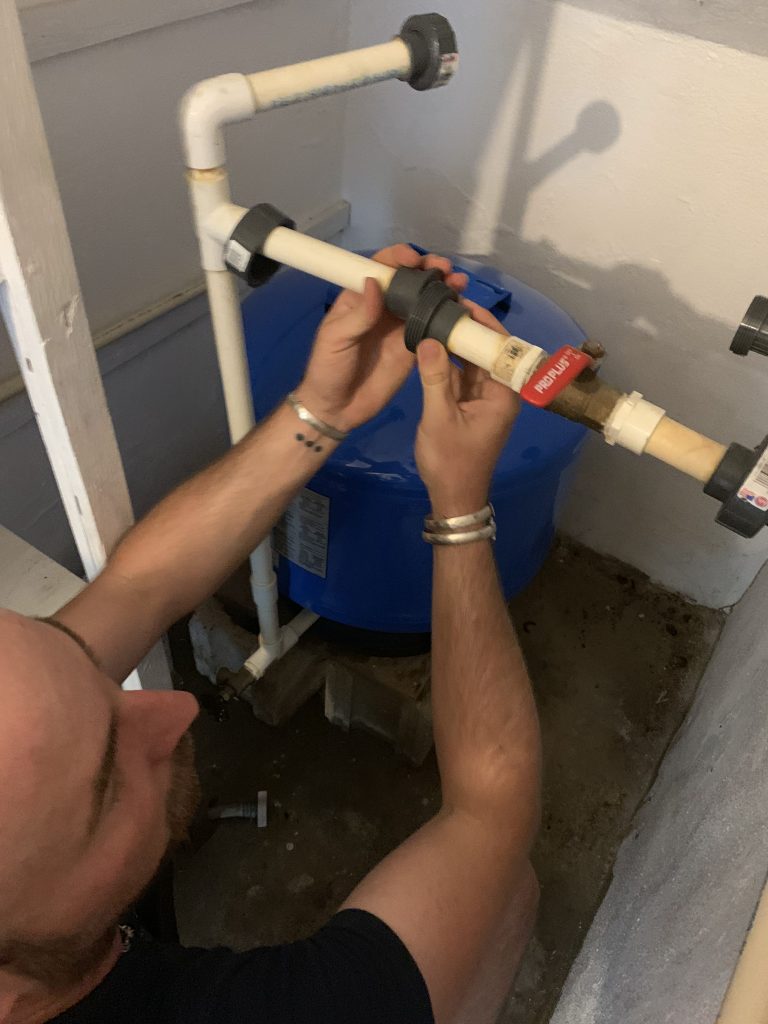
I’ve had a few other small projects that popped up as well. I replaced the entry doors in The View with the french doors that Dave and I didn’t get around to last time he was here, and I also replaced and plumbed a new water pressure tank in the house.
Setting the Proper Pressure on the Water Tank
Installing New Water Pressure Tank
Plumbing the Water Pressure Tank
Replacing The View’s French Door Entrance
Installing New Header for French Doors in the View
Day 458 Total Spent So Far: $131,622.64 30 Yard Dumpsters Filled: 4.5
We’re getting pretty close to “caught up” on these blog posts so I’m going to start including where we are budget and dumpster bin wise again since it more or less aligns. The above includes the kitchen cabinet order and cupola repair as well which we’ll talk about in the next couple of articles.
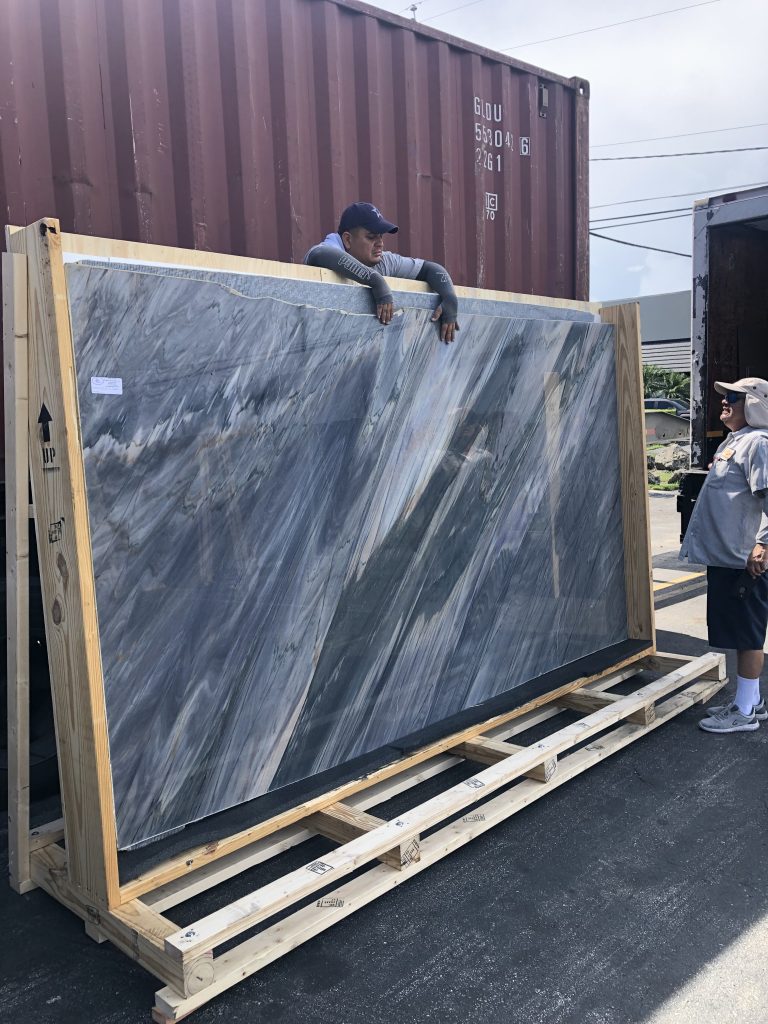
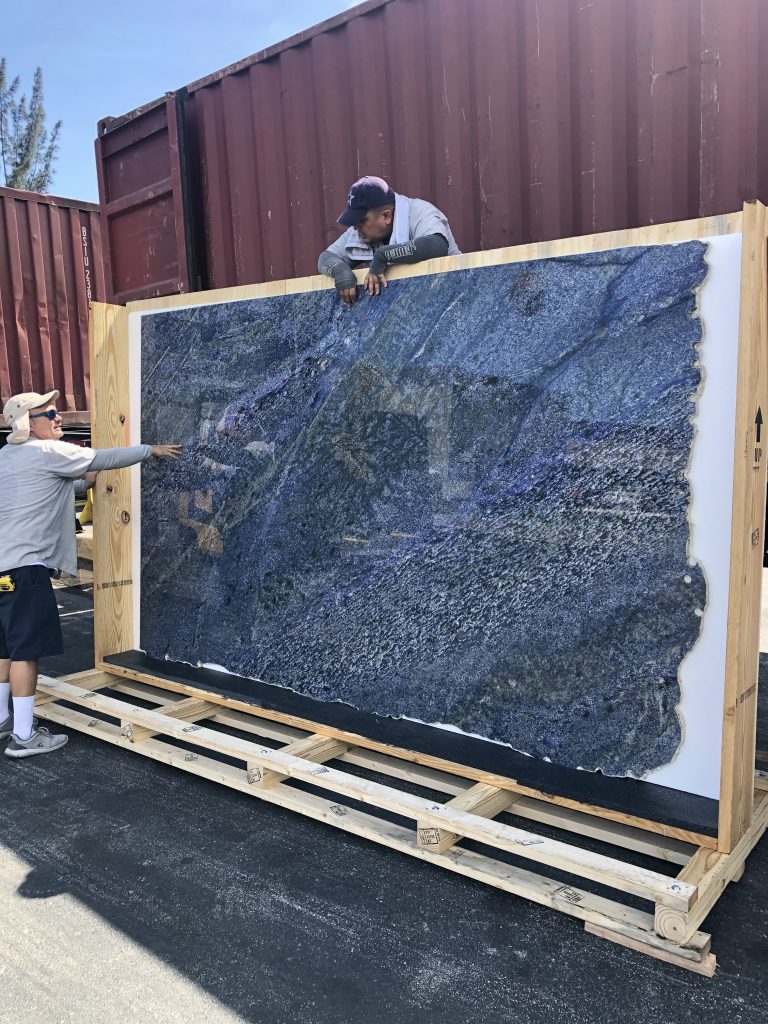
On the way back from our annual music festival trip in Arkansas, Liam, Shaleece, and I stopped in South Florida before flying home to hand pick some granite slabs for our kitchen and bathroom counter tops. We knew that we wanted “Blue Bahia”, which is a rare deep blue granite out of Bahia Brazil to pull in the ocean view we have even more. Our floors are sand colored, walls white, and with the counter top a bright blue – we really feel our ocean view will pop and we’ll bring the outside in.
Liam Searching for Granite with Us
The reason we wanted to hand pick the pieces though, is because we could see from online, and were told, that the granite could vary greatly depending upon the lot it was cut from, anywhere from a light blue-green to a deep dark blue. We really wanted the deepest darkest blues with the least amount of green – so making sure we saw what we were getting was key. At $4,000 a slab – plus $400 in shipping down to the island, you don’t want something showing up you aren’t happy with, especially when you are buying 3-4 slabs.
Blue Bahia Color Variation
Blue Bahia Color Variation
Blue Bahia Color Variation
We stopped by four different granite places, which varied wildly not only in price, but in color as well. At our most expensive quoted place, we played a little golf in their waiting room. Liam was helping me to read the green. No wonder why they are so expensive.
Liam Reading the Green
We LUCKED OUT when we hit the last spot we checked out. A small warehouse with some very helpful people. Immediately we knew it was the right color we were looking for as soon as we saw it (love at first sight) and could only hope their pricing was going to beat out the other places we had already stopped – and they did! After negotiating with the guy a bit, we got what one company had quoted $22,000 for, for just $15,000 – and in the right color mix we wanted too! This included 4 slabs total (3 Blue Bahia for the kitchen from Pantai Granite) and a 4th slab we actually purchased from one of the other places we checked Blue Bahia at (named Blue Bahia Marble and Granite). The fourth slab is for the bathrooms and is called Blue Imperial.
Blue Bahia for the KitchenBlue Imperial for Bathrooms
The Blue Imperial is supposedly some of the last of its kind. The mine is closed now and they are no longer pulling any from the Earth. There were only a few slabs left and it was EXPENSIVE. However, we found one with cracks in the top and bottom, making it a harder slab to sell for the vendor… but for us, our bathroom counter pieces were able to fit within the usable areas of the slab still. We got a steal of a deal on this giant slab after they knocked down the price 30% to $3,600. Even with the non-usable areas of the slab, we will definitely have some of this left over (it’s a big one) and I’m trying to think of other places we will get some use out of this beautiful stone. I will probably add some details in the shower and on the bathroom window sills to tie in the counters, for example.
Granite Crating Company
We paid a crating company in Miami $780 to put all four slabs in a giant crate for shipping down to St. Croix. I was shocked at first at the price, but after seeing the crate, I totally get it. It ended up being a lot of wood, and it safely transported 3,300 lbs of granite standing on end from there to here, without issue. Don’t underestimate the value of a great crate! The same thing was important when we shipped our doors from California. The last thing you want is something you spent $10k-$20k on arriving to the island in shambles. Not only does it set you behind weeks, but recouping the funds may be difficult as well. We shipped them down via VICargo which ended up costing us $1600.
Granite Crating Company
After it arrived on island, I had to hire a trucking company, Bates Trucking, who did an amazing job at getting it here with the right crane truck down our mountainous, bumpy, steep, dirt road. I can’t recommend these guys enough as I can never believe how they get these large Mack trucks down my road and turn around in my drive way. If you saw what they were working with here, you’d understand.
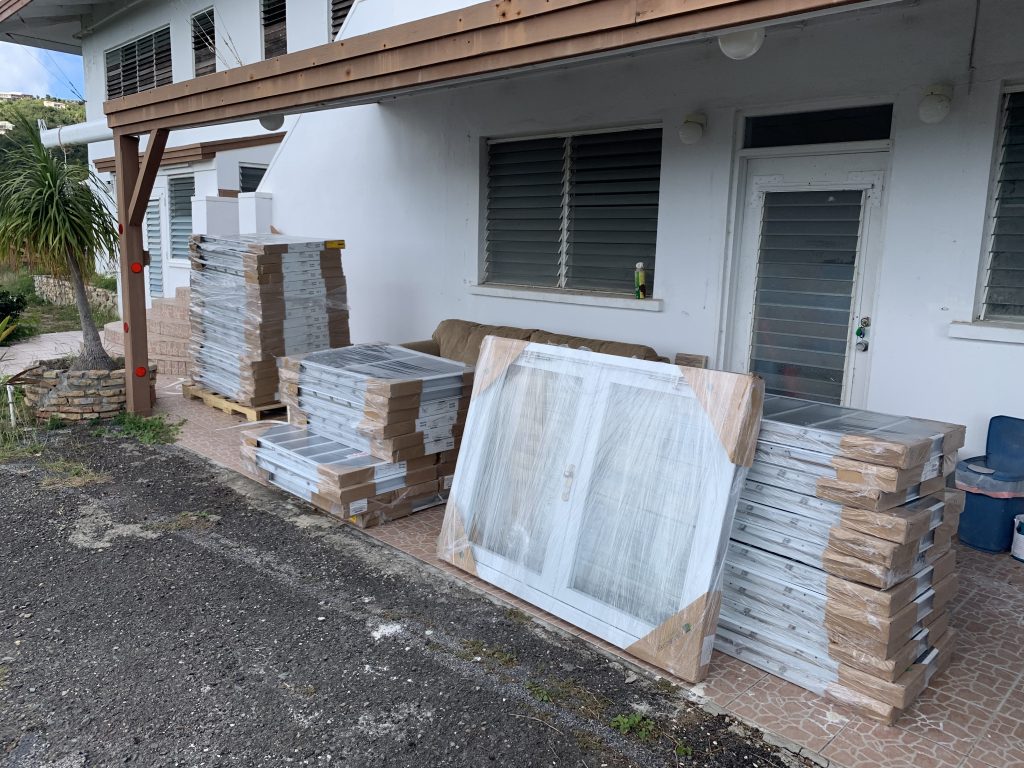
Bates Trucking Crane Truck on St. Croix
So, now these beautiful pieces of granite are sitting in our driveway, along with 5 more pallets of travertine stone flooring ready for install. It will probably be a few months before we’re ready. The floors need to be finished upstairs, and cabinets installed first. The cabinets have been ordered and are on their way. (Not here yet as of this writing.) In the next post, I’ll show you the kitchen design we put together with the help of my friend Dave and Home Depot super star Bibi. We are SO excited about the kitchen. Until then…
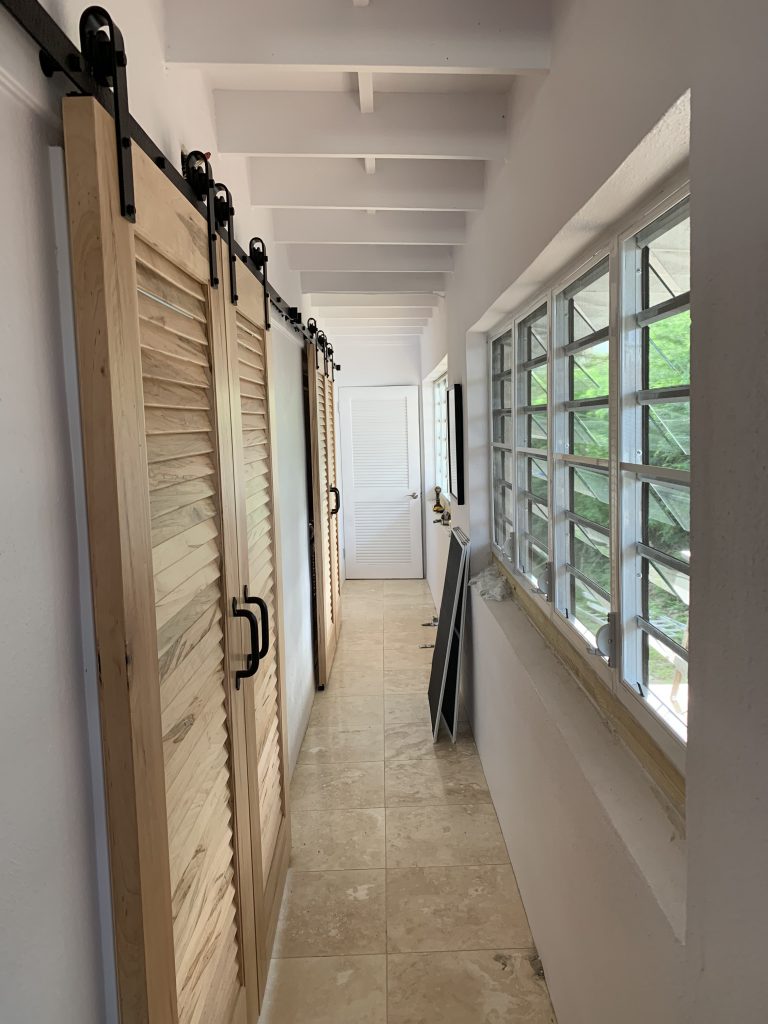
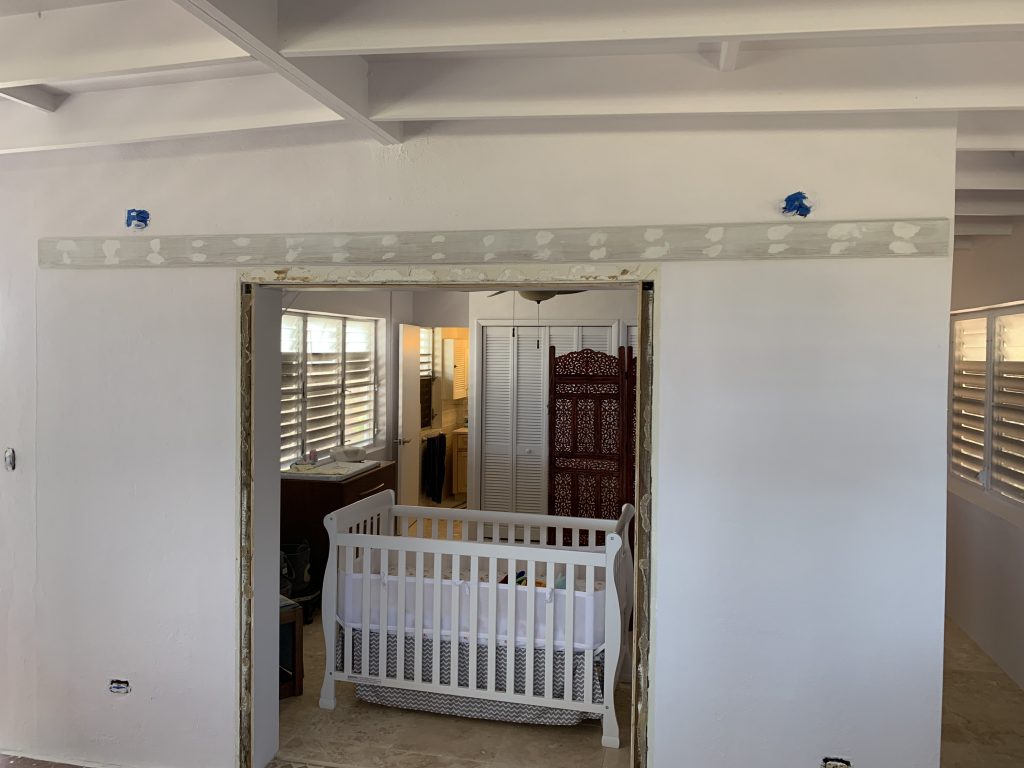
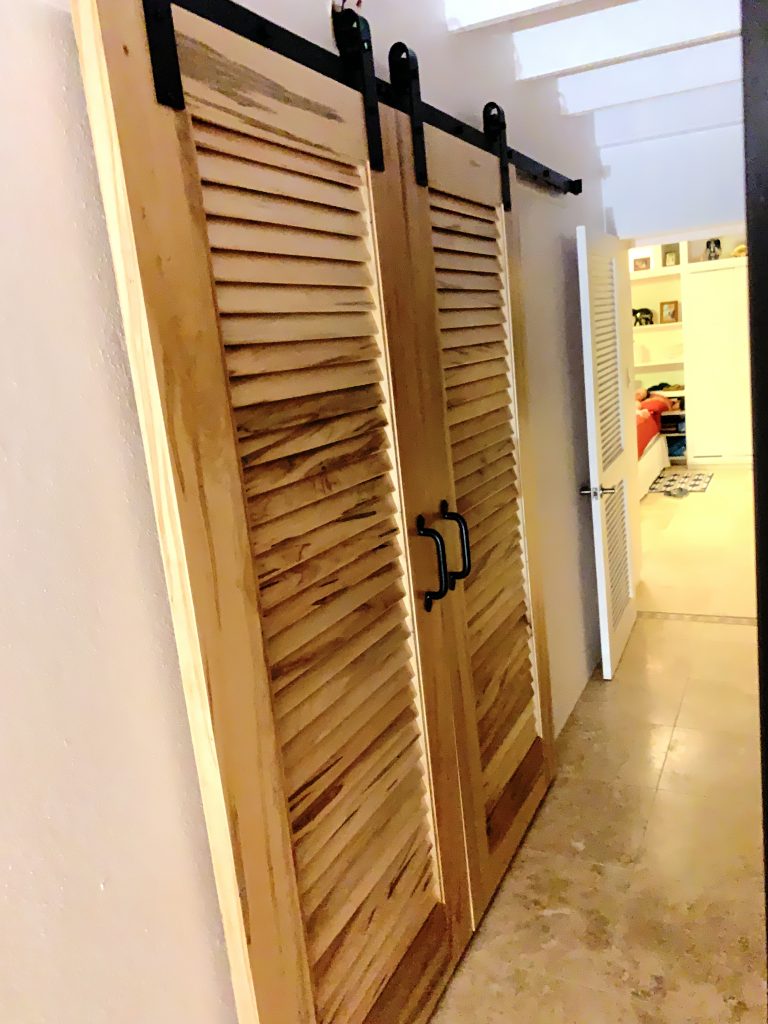
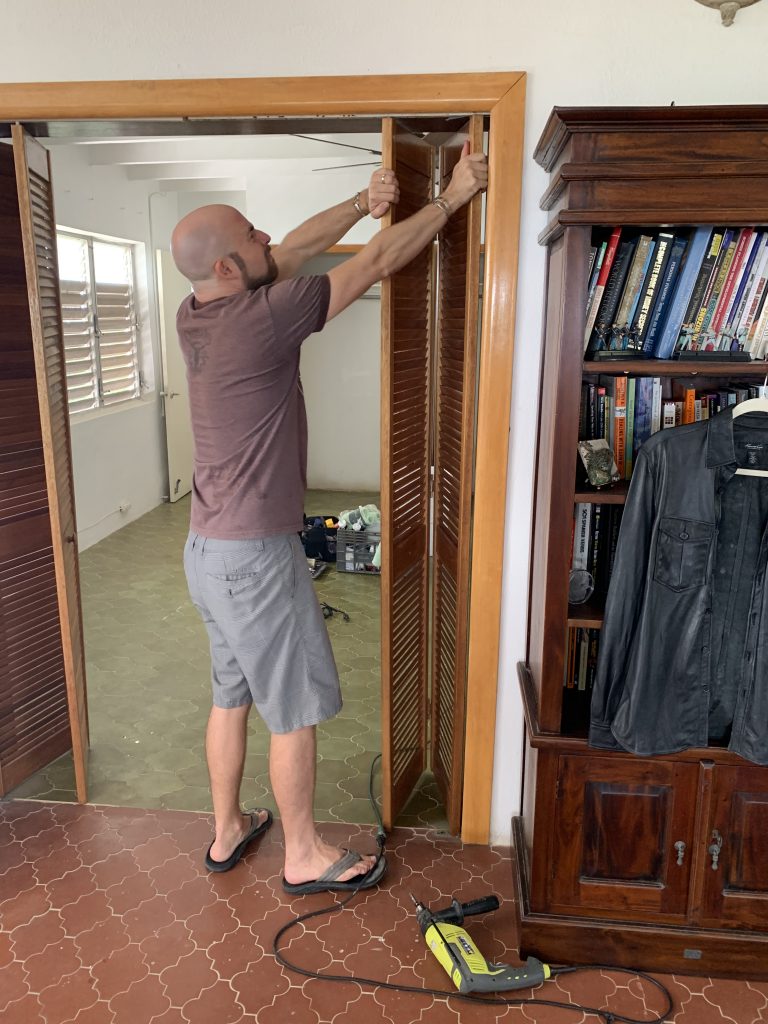
I started this project before I left for Backwoods at Mulberry Mountain this year, and it’s still un-finished. I’d say it’s 95% there. The main reason it’s not finished is that I have to have the tile completed in the dining room before I can screw down the floor tracks that keep two of the 6 doors from swinging back and forth bumping the wall. I have indeed finished 4 of the 6, the ones that run down the hallway and cover Liam’s room and the laundry room.
This project was much bigger than I anticipated. In the end, the doors and hardware cost me around $14,000 by the time everything was shipped here, and of course as all prices outlined in this blog, not including my labor. They sure are beautiful though and worth every penny.
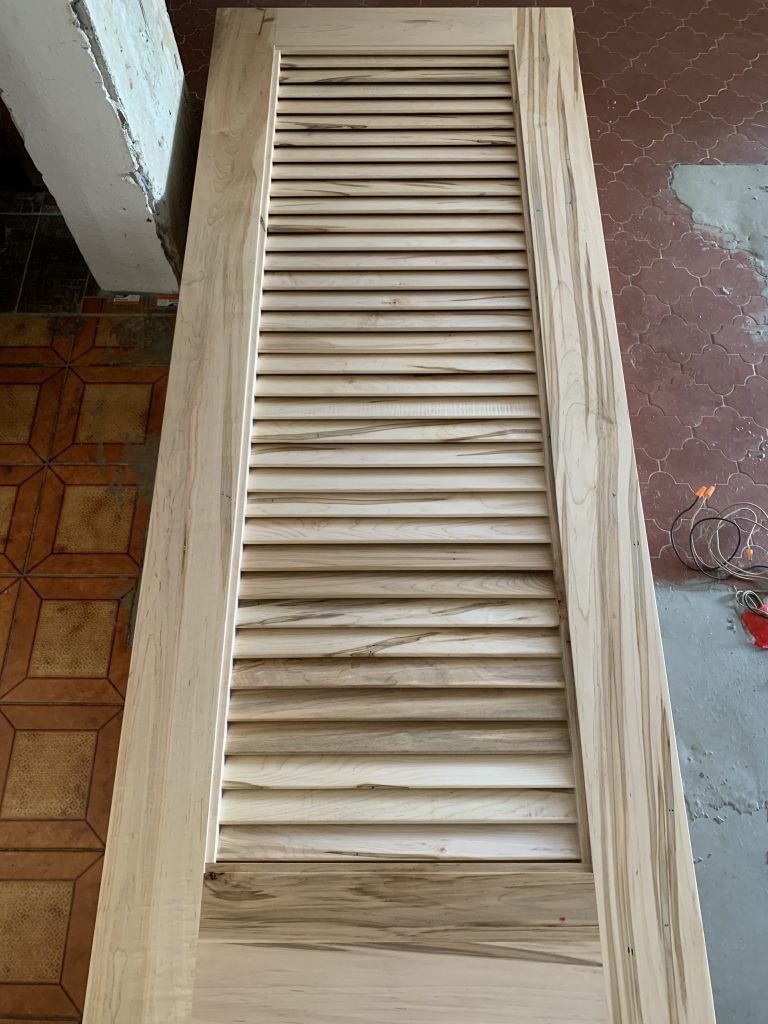
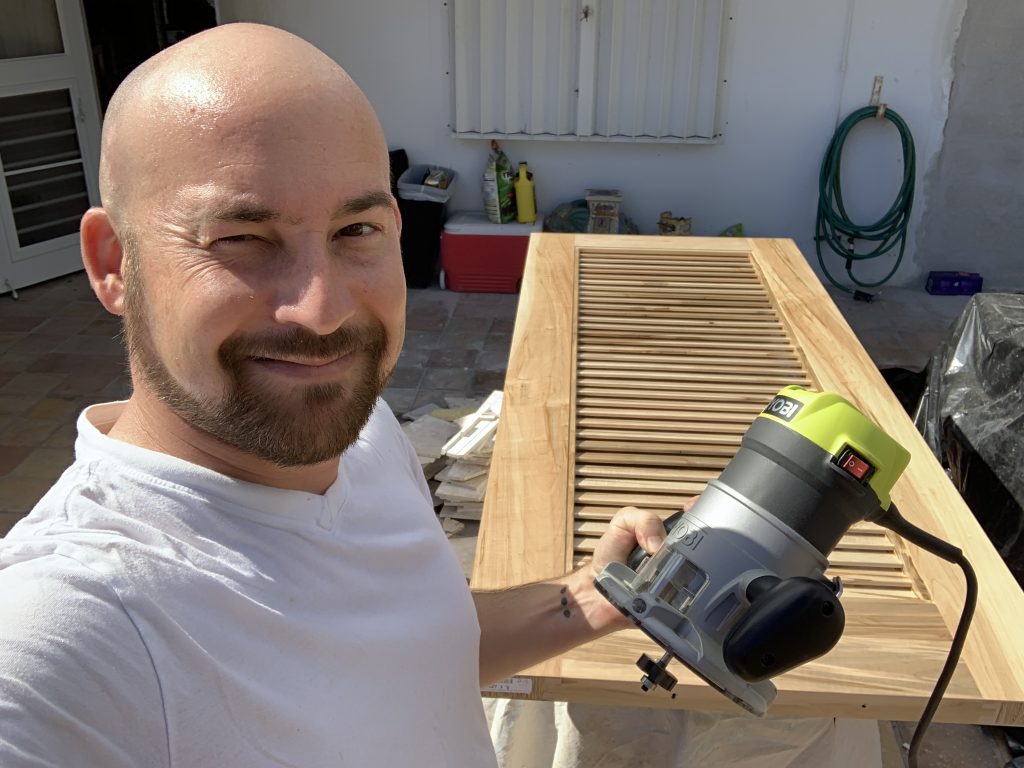
I started by designing a door that was going to look and feel like a quality door. That meant real wood, something a bit exotic, and thick/heavy/large construction. Additionally, I wanted to pay homage to our location and ensure there was a Caribbean feel to them. I settled on a slated door (like a Plantation Door) which not only shows well in the Caribbean, but also is functional for a home like ours which uses the natural Eastern Tradewinds as our form of air conditioning. The doors breath while providing privacy. Normally, a slatted door has a solid center piece that crosses it, around where a handle is usually installed – but since these are barn doors, I didn’t want the center panel as it wasn’t needed, and I thought the more simplified custom look would bode well on the wall. I’m trying to think of everything we do here as a statement or art piece when it comes to the larger pieces in the house.
Custom Barn Doors – Wormy Maple
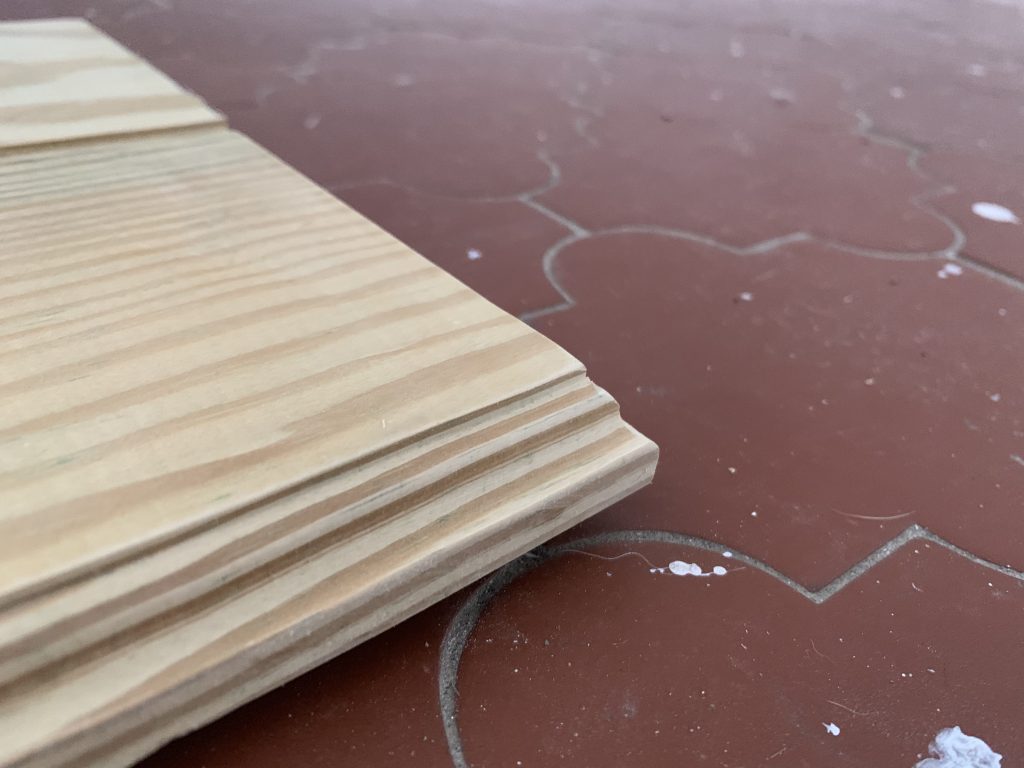
In the end, I chose wormy maple which shows not only some nice zebra striping in the wood, but also the little holes which the worms have eaten through. I had them oversized built, and 1 3/4″ thick so they look beefy and hang heavy. I couldn’t believe how beautiful they were when they arrived. The guys who built them custom for us are at Sun Mountain Doors, and they did a great job!
Wormy Maple Detail
A note on getting them here… along with other things I’ve shipped like Granite (in the next article) … pay the extra money ($400-$800 depending on the item) to have it crated well by a professional before it starts it’s long journey to the Caribbean.
Our Custom Doors Traveled the Distance of 3,723 Miles
Your product will be handled by multiple people on multiple trucks, sometimes on multiple boats, and a good crate is worth all the hassle to ensure the product arrives in perfect condition. The doors did just that, and I was impressed with the crating job. These were shipped from California, across the country to Miami, and then put on a boat to get to the island of St. Croix, and finally moved from the port to a truck that delivered it to my house. They have traveled many-a-miles to be here. 3,723 miles to be exact.
For the hardware, we went again, with something big, heavy, and statement like. We wanted a little bit of “stand the test of time” to the design, so we chose a hammered black powder-coated iron with stainless steel bearings. This will keep them from rusting and the sheer weight of these are looking mighty nice. Everything we do here, even indoors we try to get rated for outdoors, as it prevents against rust. (Because EVERYTHING RUSTS on an island.) – Here’s a link to the barn door hardware we purchased.
Barn Door Hardware
The next challenge was deciding how to hang the thousand pounds of wood and iron on the wall without it crashing down in a safe manner. I decided on what’s called a header board for the track installation, which created a multi-step process to hang them. Step 1 was creating the header board and installing it, and Step 2 was then installing the track rails to the header board. After that, we could hang the doors and make all the adjustments to the soft-close mechanisms we also purchased.
Step 1 – Creating the Header Board
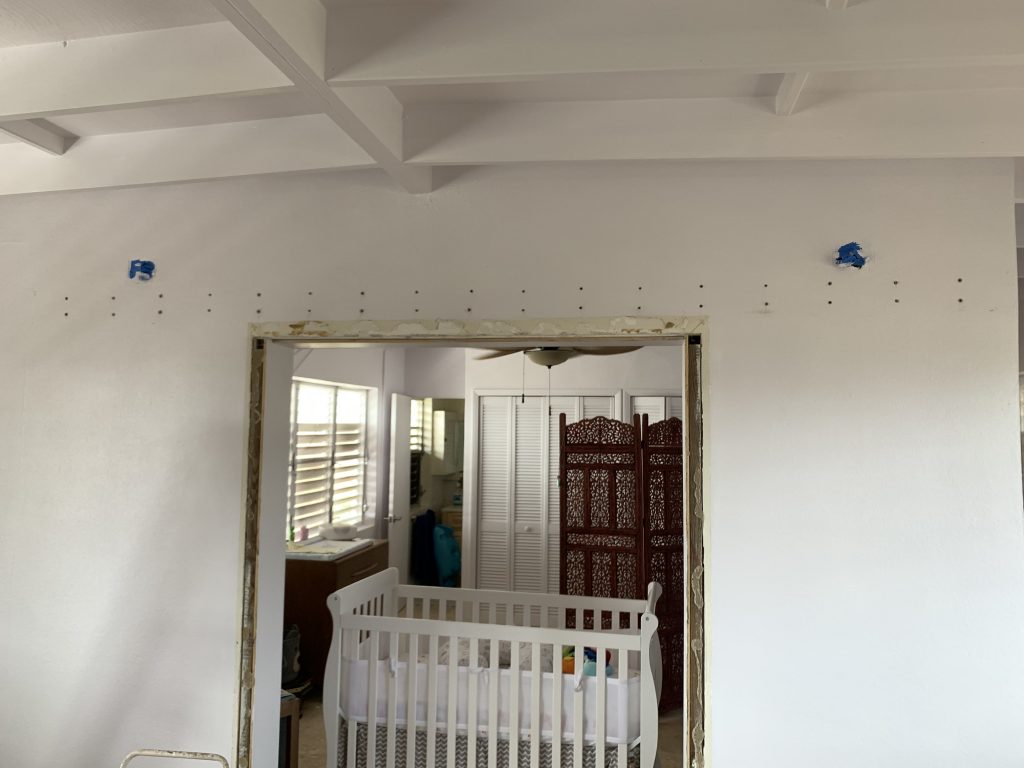
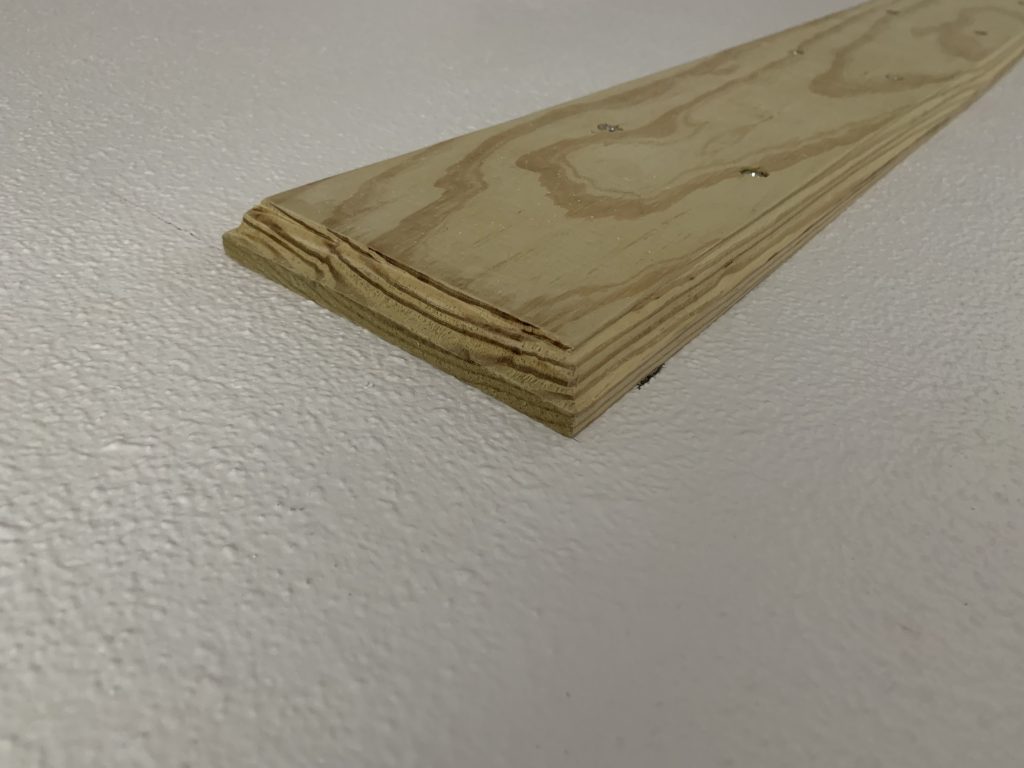
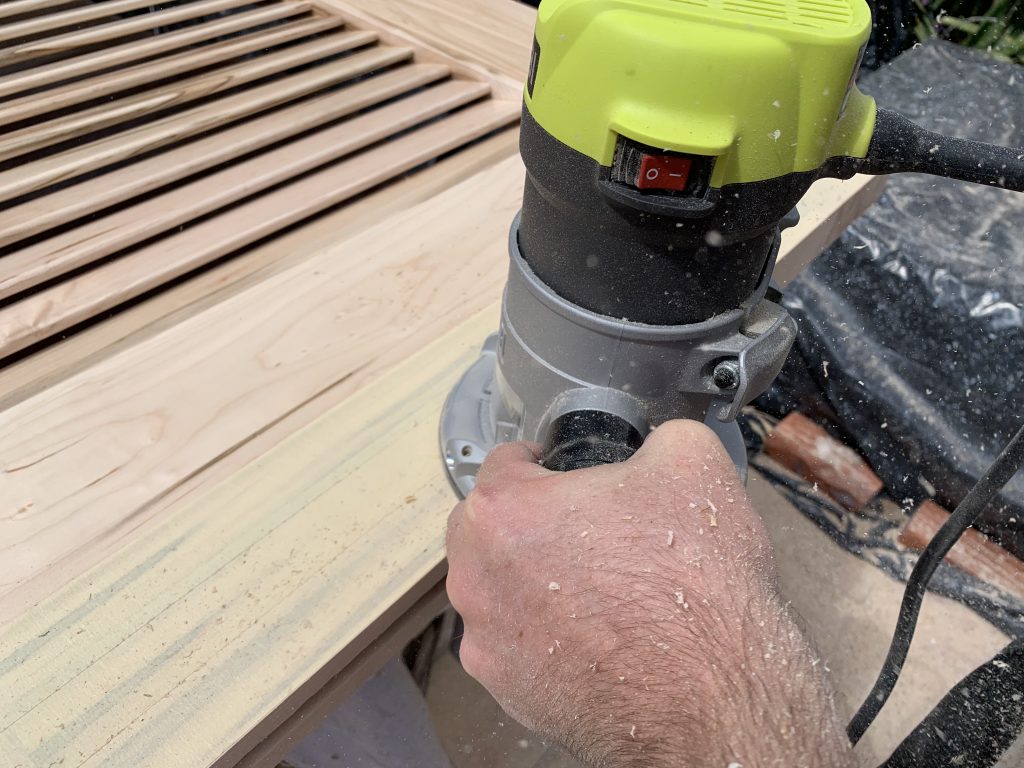
I needed two header boards for this since two separate walls were to house the barn doors. One was approximately 12′ in length, while the other was 26′ long. I started with three 16′ long 1″x6″ boards. After cutting the length to size, I routered the edges to give a more designed and polished look to the boards.
A Fine Routered Edge I Cut for a Classy Touch
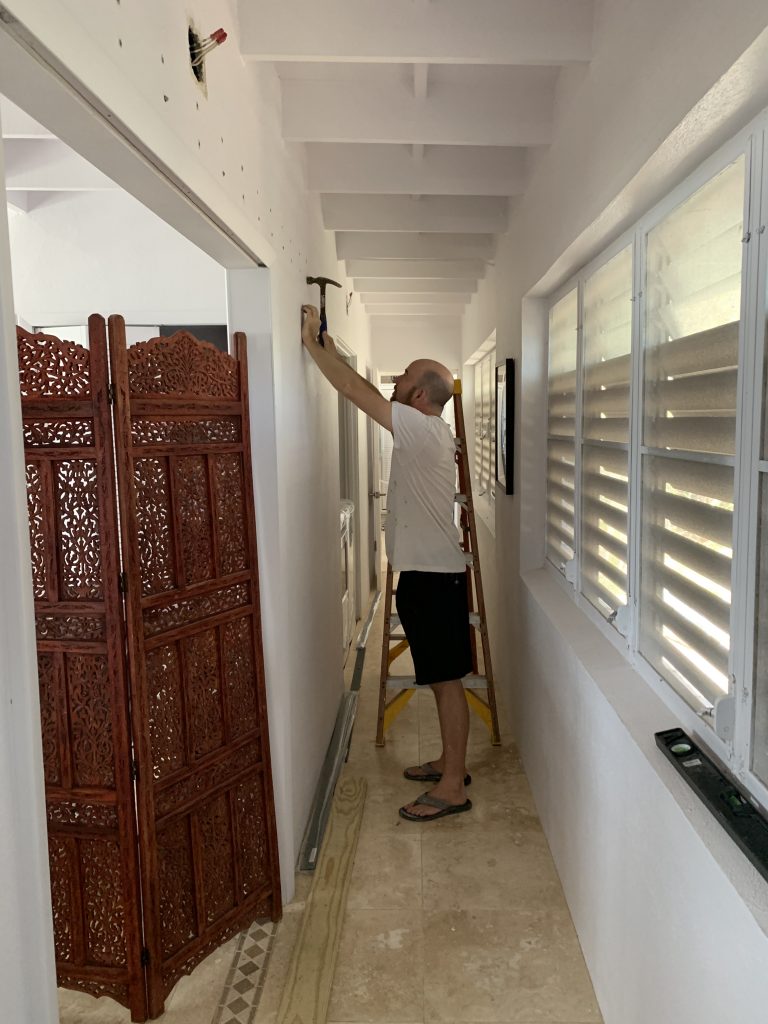
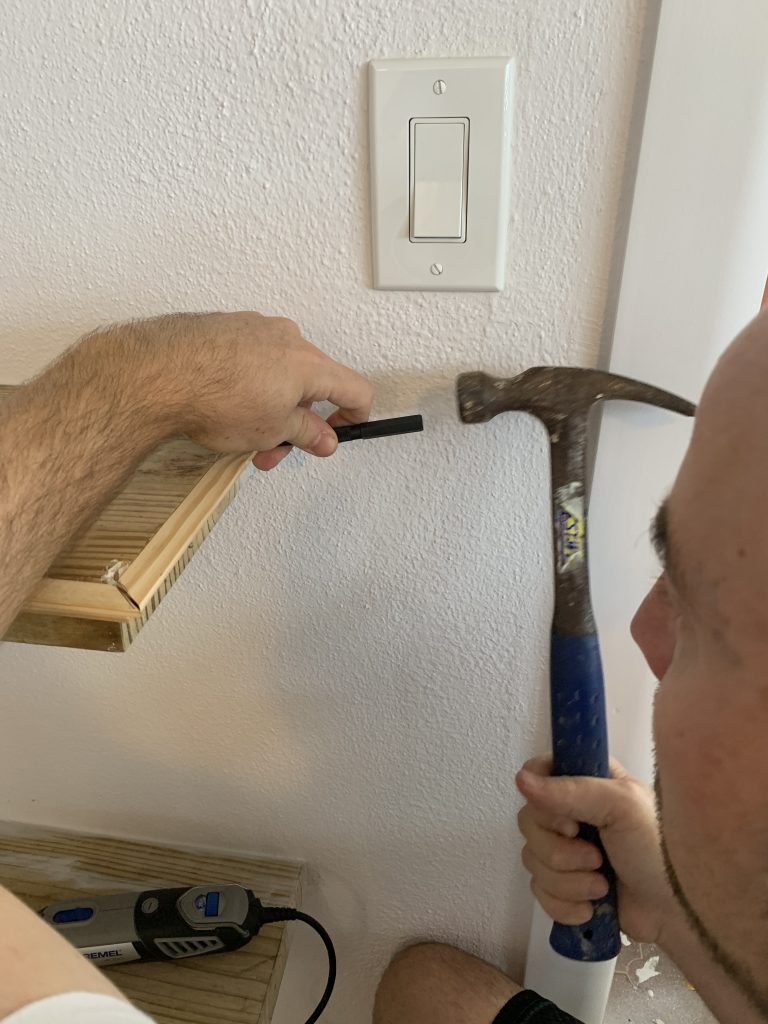
I then used a total of 96 concrete anchors and screws to install the boards on the wall. Each with a rated weight capacity of 45lbs. That’s right… 96 times (32 per set of doors) I had to use a hammer drill into the concrete wall, only after properly measuring and drilling pilot holes in the boards themselves so that all the anchors would line up with the screws in the boards. (That means putting up and taking the board down once or twice after installing just the end screws.)
Hammering in All 96 Concrete Anchors
Anchors Installed, Ready for the Header Board
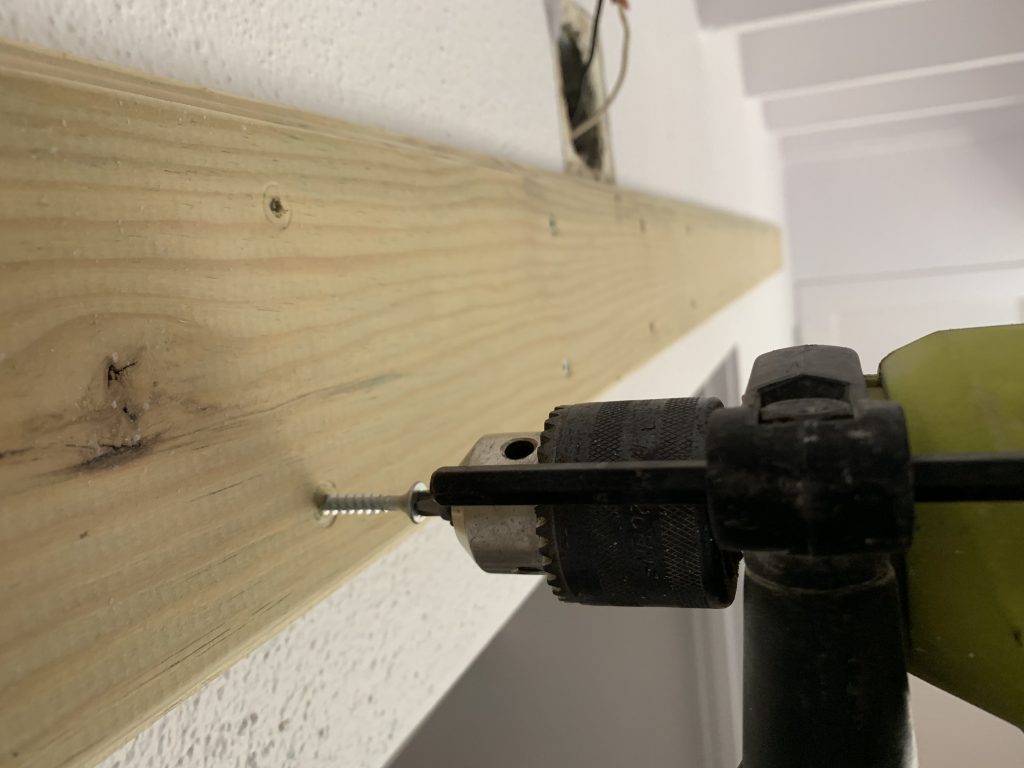
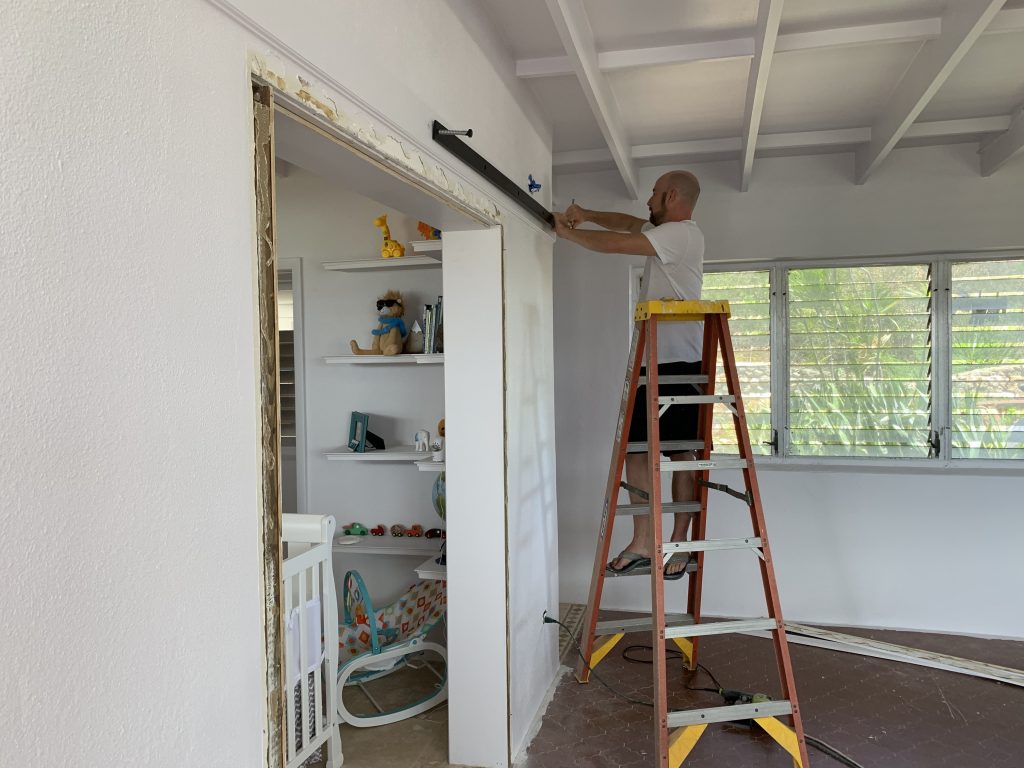
Screwing In the Header Board
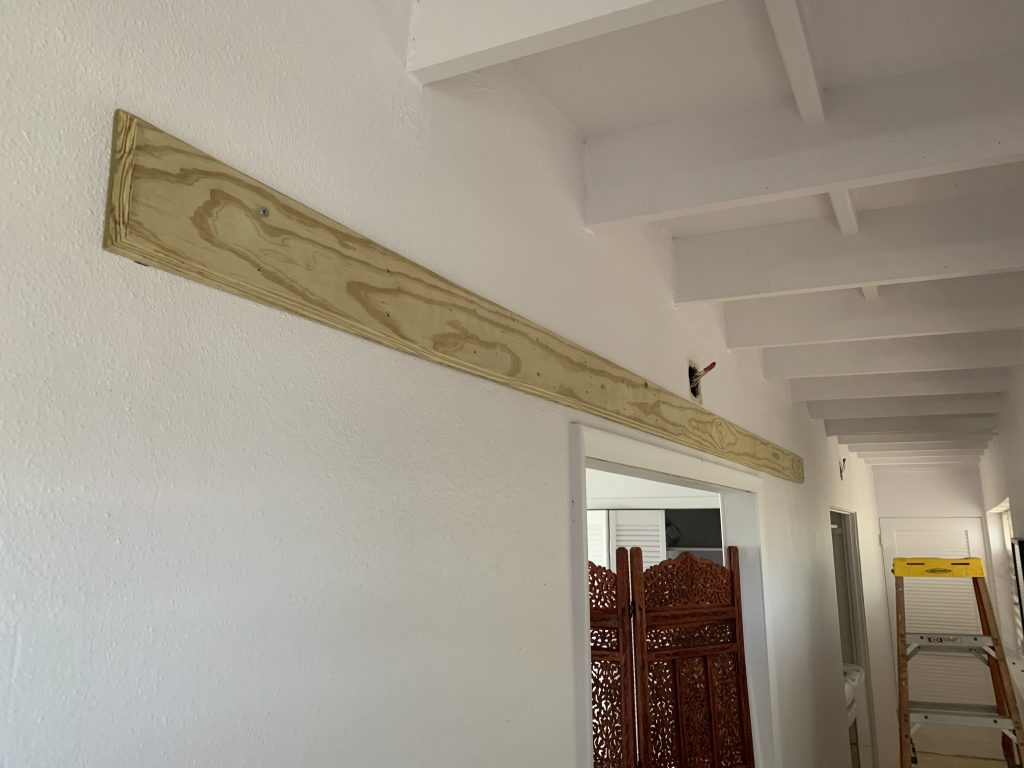
Dining Room Header Board Installed
One Up, One to Go in the Hall
After getting the boards on the wall, which took a few hours, and a painful right arm when finished, I caulked all the edges for a seamless look. I also took the time to sink the screws a bit when installing the board, so that I could cover over the screw heads with spackle to hide them before painting the header. (Good luck to the next guy who tries to take these off the wall!)
Routered Edges for a Polished LookHeader Board Installed, with Spackle to Hide ScrewsHeader Board Installed, with Spackle to Hide Screws
The finished header boards looked great.
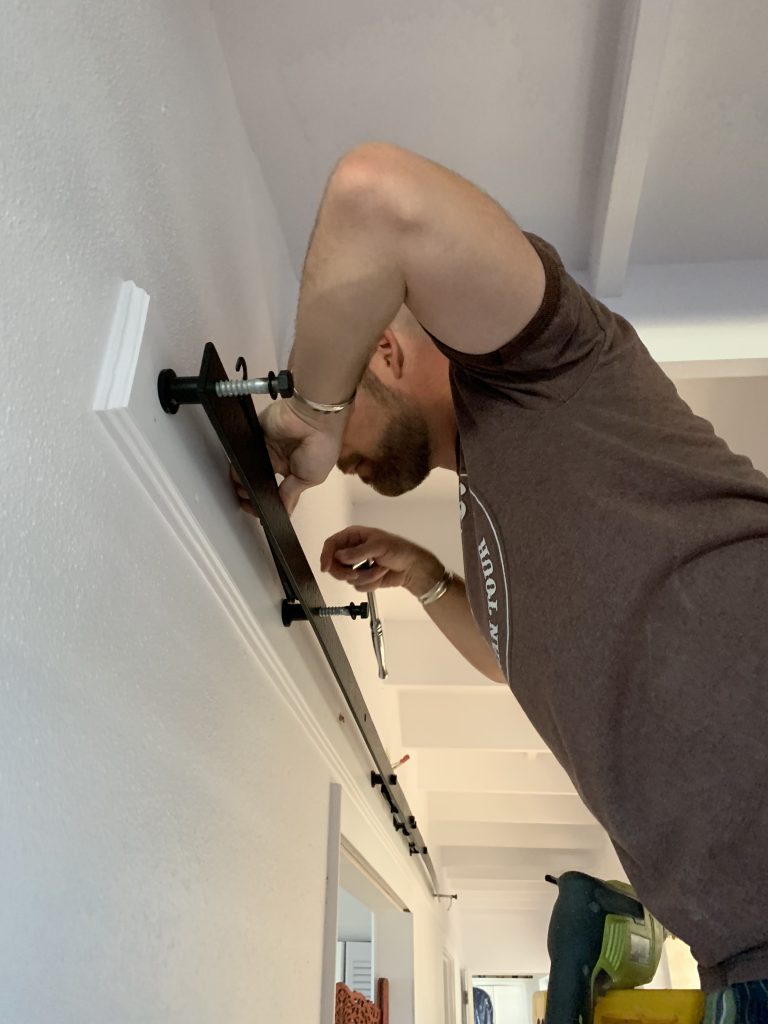
Step 2 – Installing the Track to the Header Board
Getting the track onto the header board was the next step, and to do so it meant installing 5 half-inch lag bolts into the wall and header board for each track/door – a total of 30. That’s right, more hammer drilling! But for a 1/2″ lag bolt, you’ve got to drill pilot holes first… so double the workload again for another 60 drills!
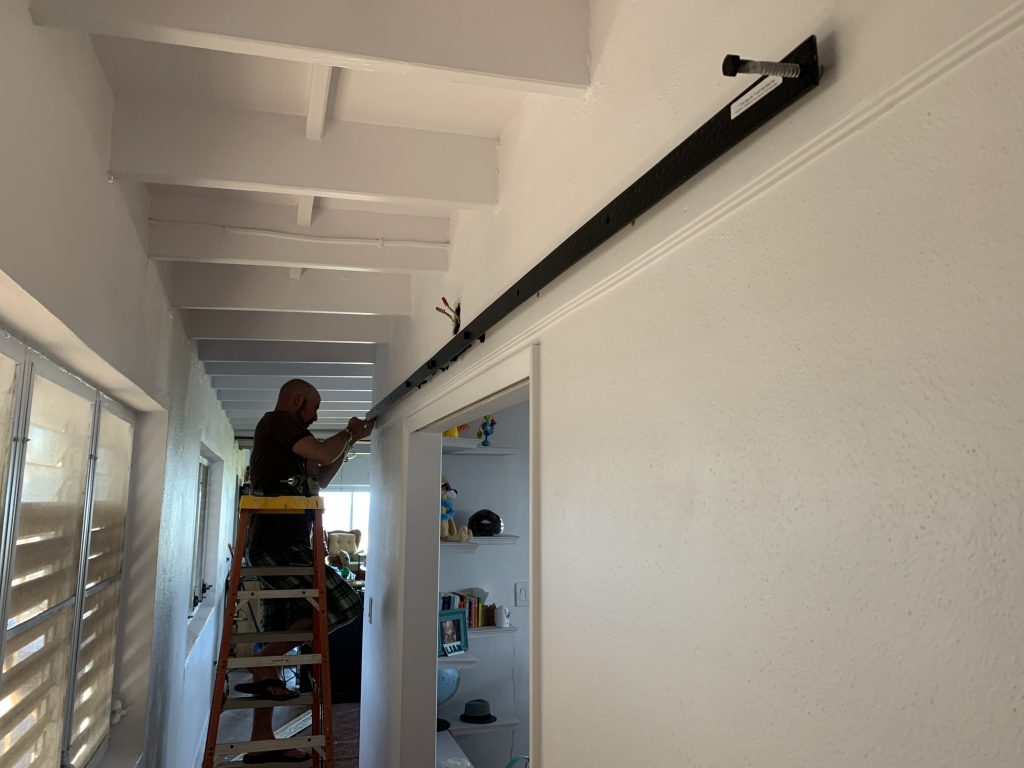
1/2″ Lag Bolts are No JokeInstalling the Track
The tricky part about this is that you must install the tracks as you go to ensure they are level. Since we are splicing tracks (meaning two doors will meet in the middle to create a set for a larger opening) both tracks that connect also have to be level with each other. You only get one shot at drilling these holes level… if it’s off ever-so-slightly you will get a gap where the doors meet that is uneven (the top of the doors touch while the bottom has a gap for example.) You can’t re-drill your holes because they would only be off by a fraction of an inch, yet the holes themselves are 1/2″ around. I think you get the importance here.
Splicing the Two Tracks Together
Step 3 – Preparing the Doors
Routering the Floor Track Channel
Taking the heavy doors outside for a bit of prep work, I drilled holes (very scary considering how much each door cost) for the wheel hardware in the tops of them and also routered a 1/2″ x 1″ deep channel through the bottom of them so that the floor track would be hidden. Some people choose to put this on the front and back of the door – but we wanted to continue with the clean look by hiding the track inside and under the door so it wasn’t seen. It’s extra work to cut the channel in the door, but worth it… Here’s an image showing the difference.
We went with T-Guide that Doesn’t Show on the Outside of the DoorRoutering the Channel in the Bottom of the Door
Step 4 – Hanging the Doors
Hanging the doors required simply lifting them onto the tracks. I realized though that I did this preemptively at times getting excited. I needed to have the T-Guides down on the floor first to slide them over top of into the channel, and the soft close catch holes and end-stops drilled installed on the top of the doors before hanging them.
The first time I hung them I didn’t have the top soft close catches installed or drilled, and the second time I didn’t have the track channel routered, So I’ve taken them on and off a couple of times now. I’m not sure I would have done it differently though because each time I hung them, I learned something new and also made sure I was moving in the right direction. With doors these expensive you want to measure not twice, but 5 times, and cut once.
Step 5 – Adjustments to Soft Closes and Floor Track Installations
The soft close mechanisms (12 in total, two for each door) allows the door to catch itself and slow down before coming to a stop on each end of the slide/track. This means no pinched fingers, and we can stop the doors exactly where we want them. Check out the video below. These again were an expensive upgrade, but well worth it for these extremely heavy doors that would probably just fly off the tracks without them.
Soft Close Example
Door Gaps… I spoke of them earlier and of course I had a bit of this going on with such a large installation and long run of track. As much as I tried I was still a little off at times on the leveling where the splicing of the tracks met. I was able to counter act it though by slightly adjusting the hardware wheels attached to the tops of the doors after installing them the first time however, having to redrill a couple holes larger, to raise or lower the wheel on the door – effectively leveling it by way of changing the door angle ever so slightly with one side up or down. This worked, and they ended up looking great. Of course, I had to take the doors off again to do this, so we’re talking like 4 times I’ve re-hung these things. (The third was a channel that wasn’t deep enough for the T track on the floor and needed to be re-routered.)
I installed the handles as well which matched the hardware above, on both sides of the doors with the exception of the laundry closet – which hopefully no one finds themselves in our washing machine trying to get out.
Laundry Doors – Our Bedroom Door Looks Cheap Now in Comparison
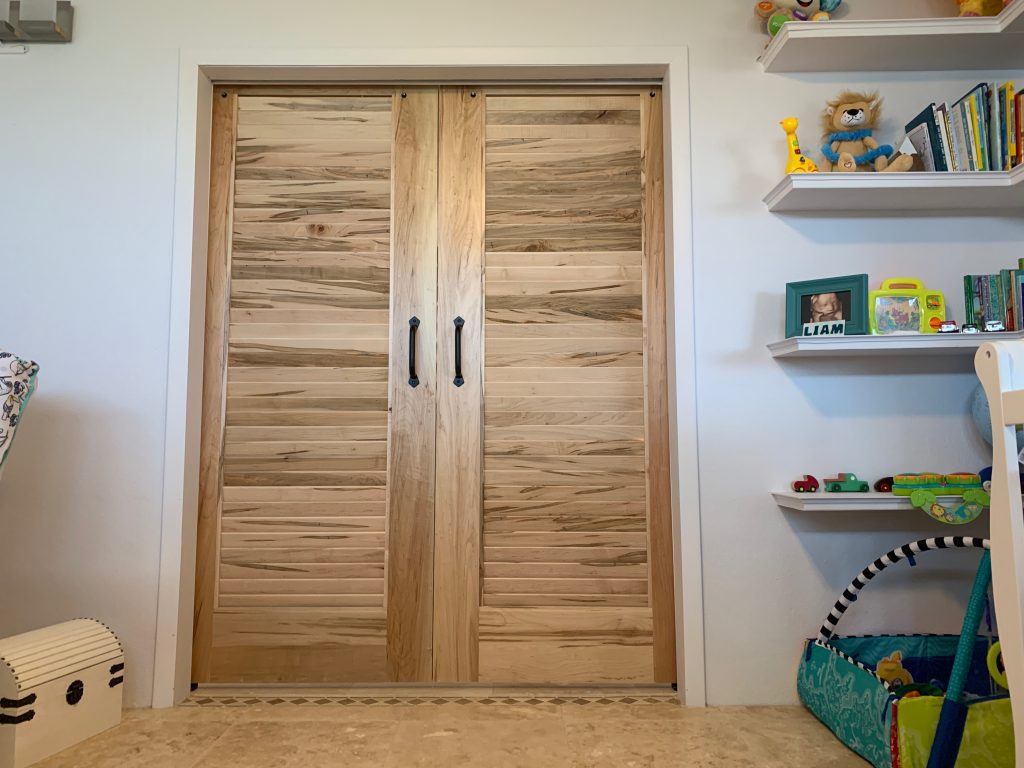
In the end, we absolutely love the doors and it was well worth the few weeks of work to get them built and hung. They are surely a statement piece in the house. Unfortunately for my budget and I, they make our bedroom and bathroom doors look weak and cheap… We will definitely be upgrading these in the future to finished custom wormy maple doors as well from Sun Mountain after our kitchen is done.
The Finished Product In Liam’s Room
Now, enjoy this video of a baby deer running through our driveway!
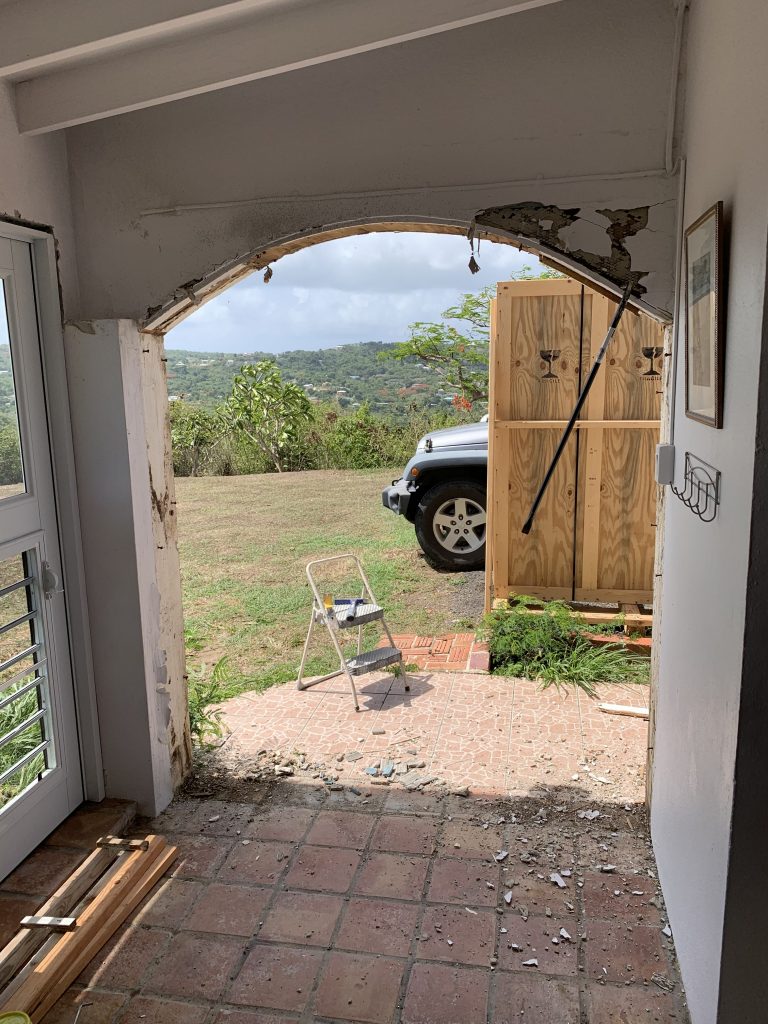
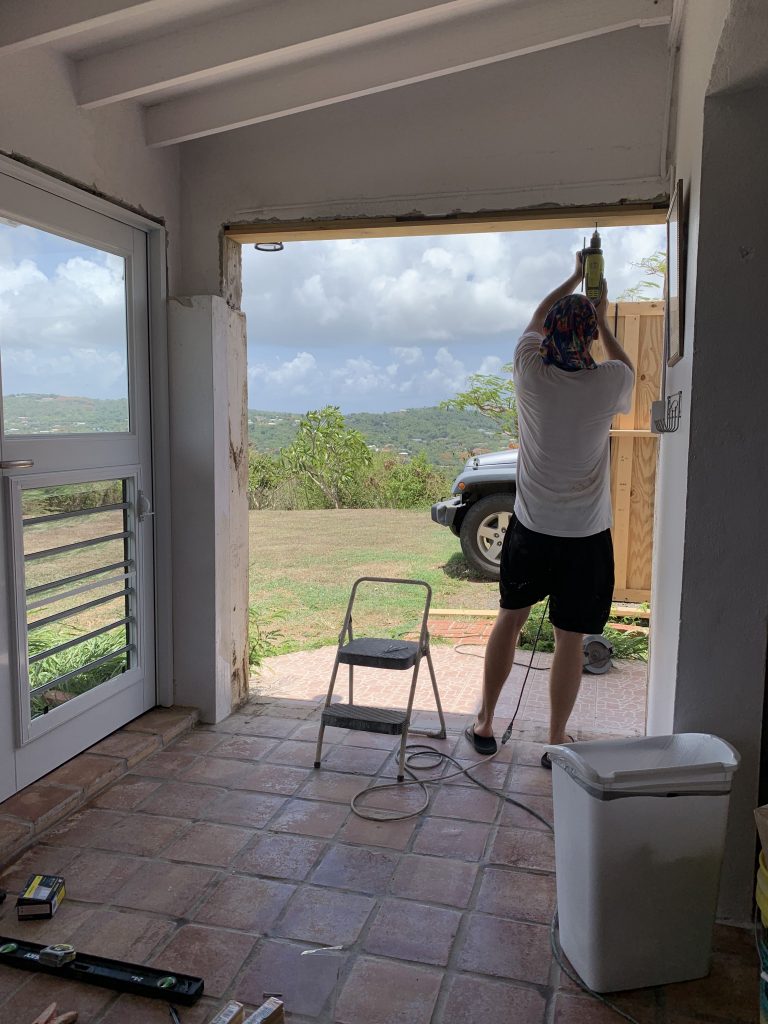
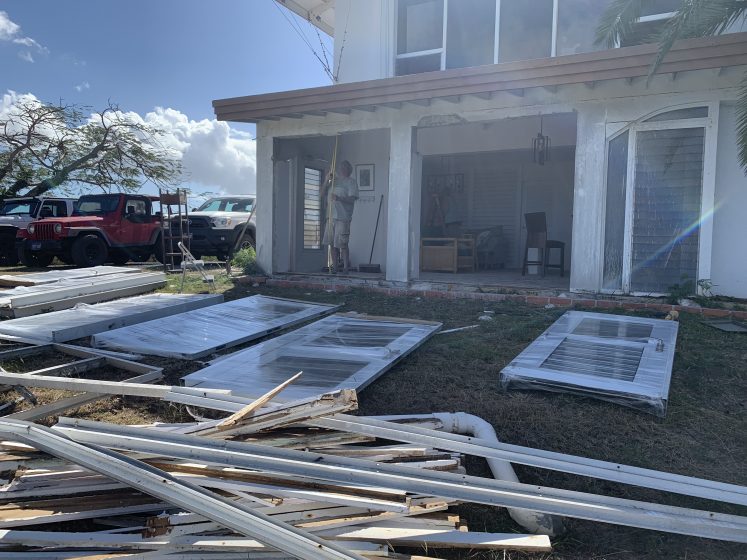
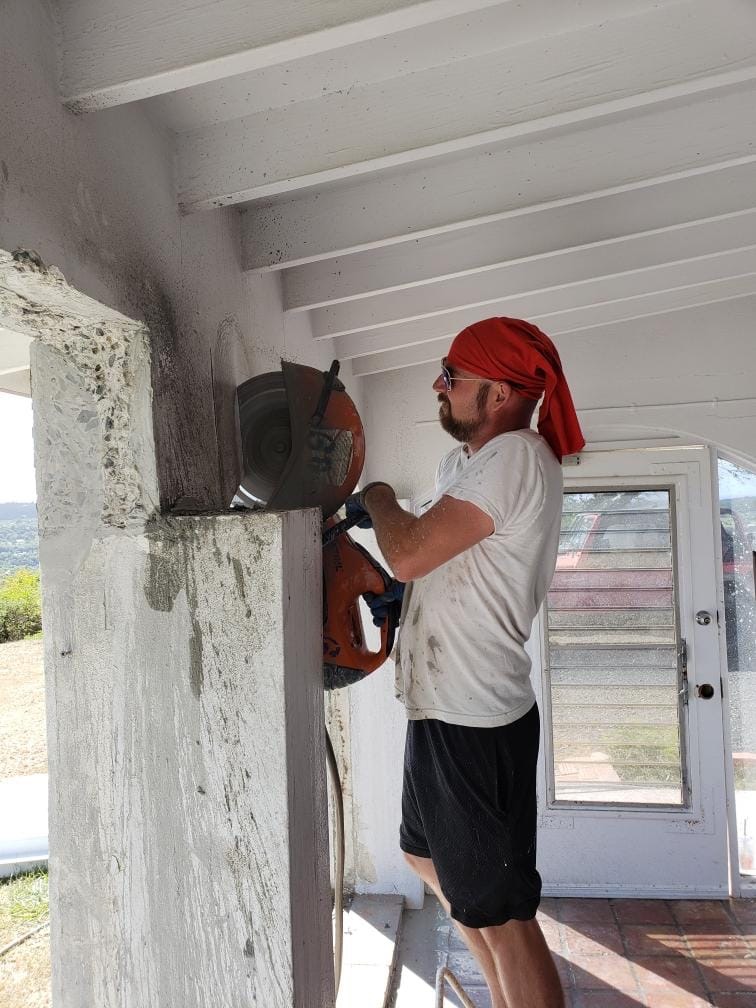
Dave’s last trip down a few months ago was a tough one on us. We literally were cutting through 10” of poured concrete with a 17” concrete saw. It was not easy work. Dave is a machine. It’s no wonder why he is probably reconsidering another trip down. I may have over-extended my ask of him last time. None the less we plowed through and got a few french doors installed in The View. I owe Dave a huge favor.
Dave with the Concrete SawHere I am Wielding the Beast
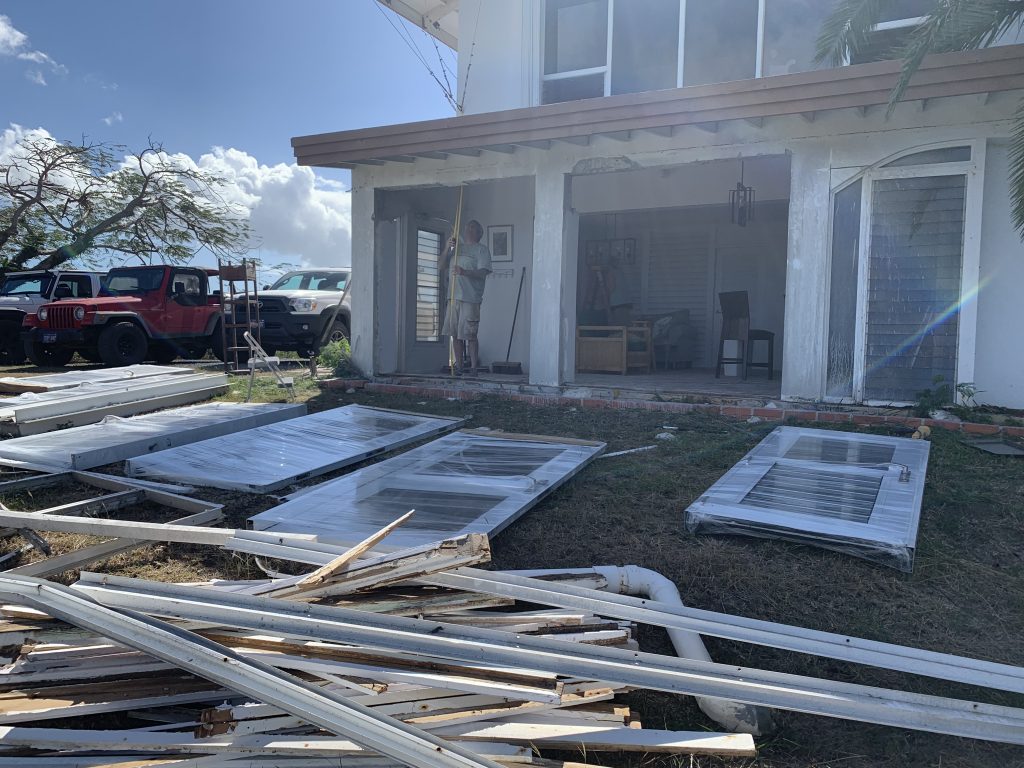
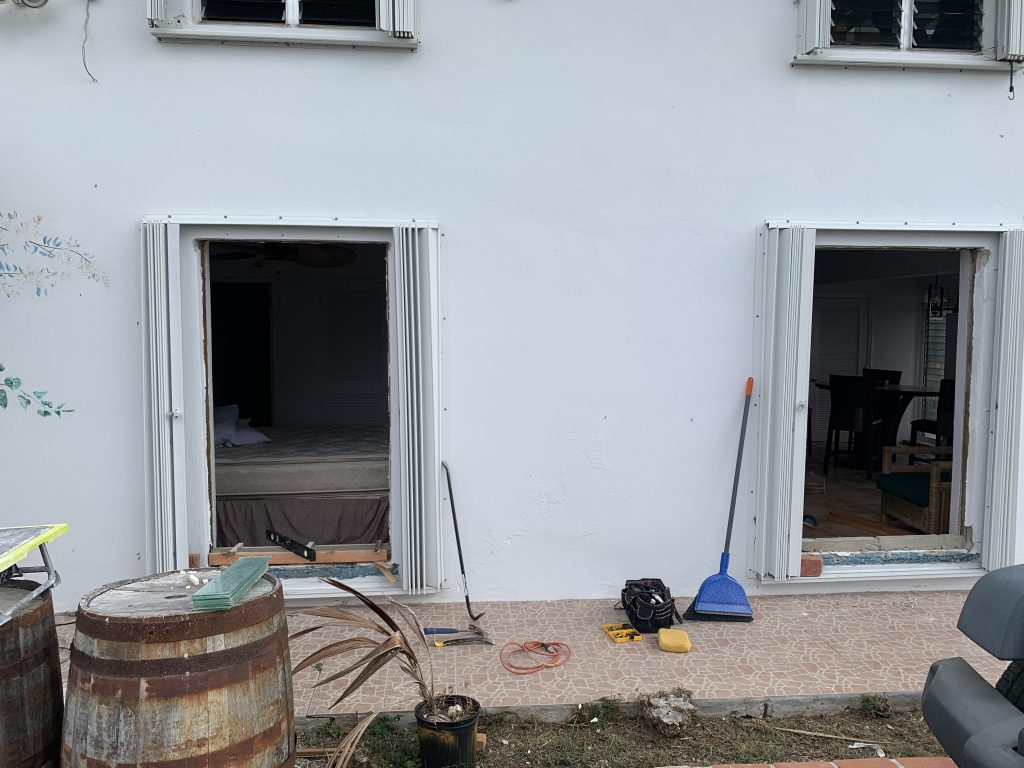
One Opening Done
Both Openings Done
Dave Has Had Enough
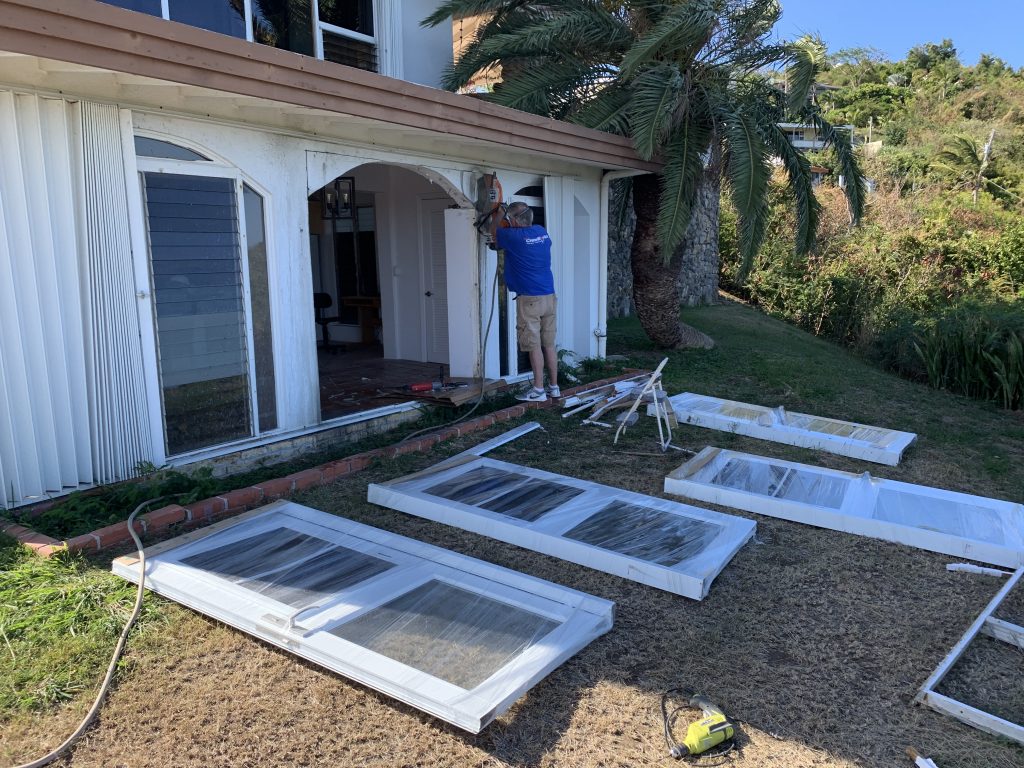
I’ve got another set to do, but we had some glass break on one and it took them 4 months to repair it, so it’s still waiting to be installed. I plan to get to it next week. There is one more window to be replaced in there as well, which I will also tackle. Then some plastering and finishing. It all has to be done quickly, as we have our first AirBnB guests since KC moved out arriving mid August in the View.
Installed, Just Needs Finish Work
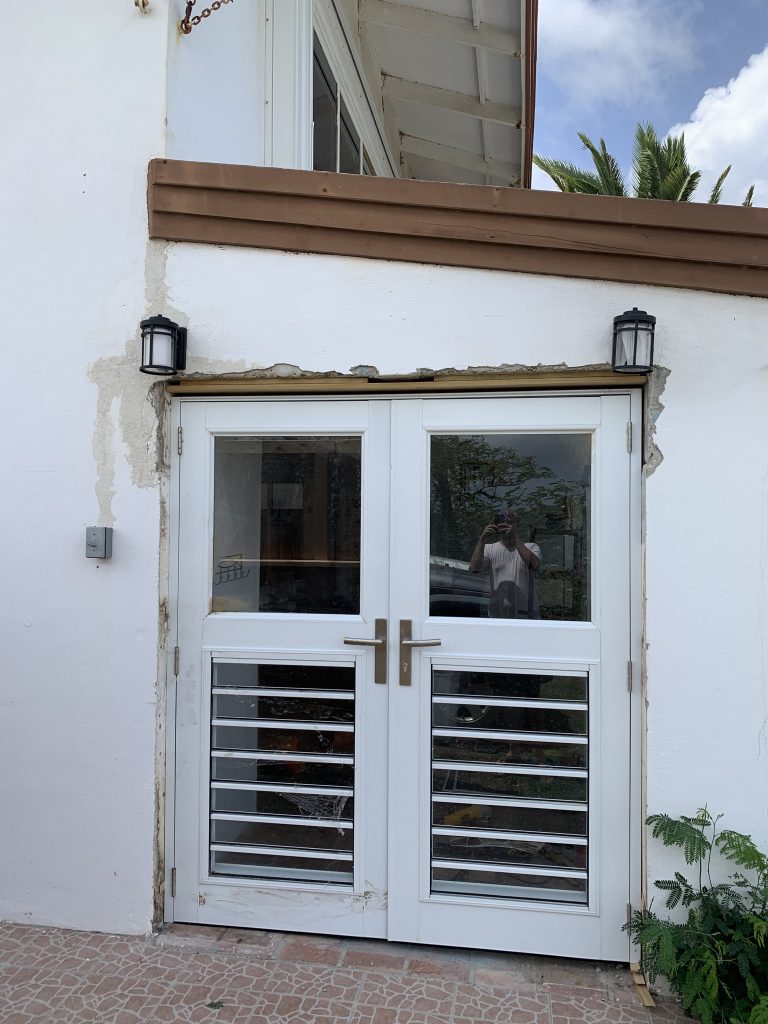
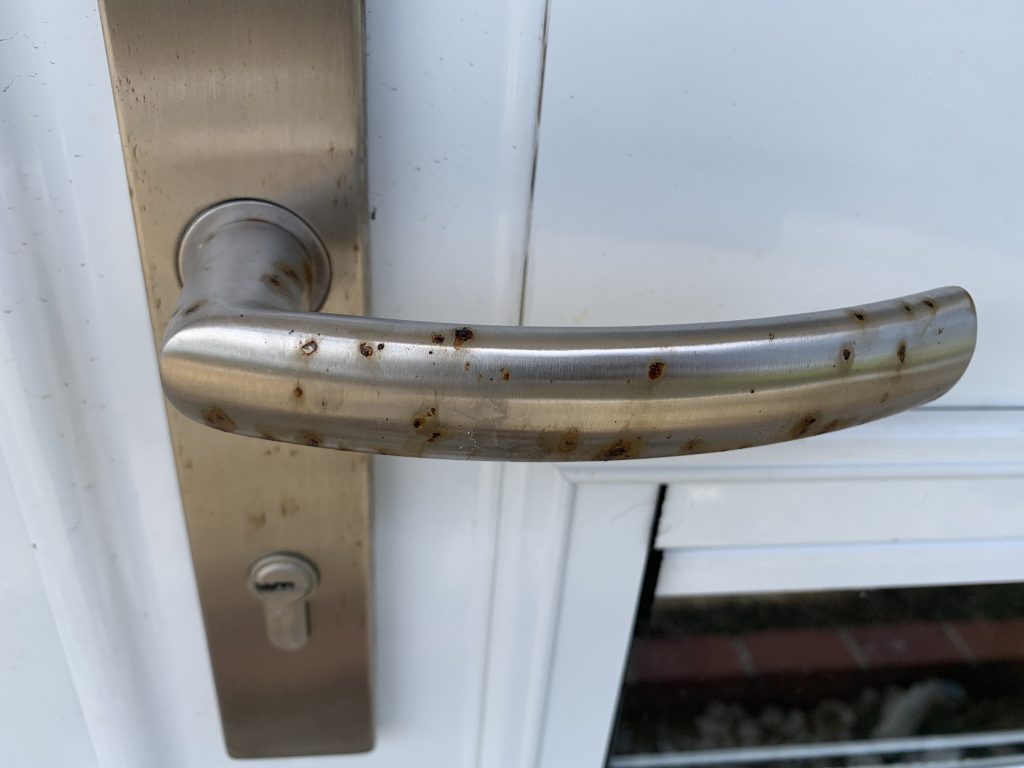
The doors we put in were also made by Airmaster. I referenced in my windows post the issues we’ve been having with the handles on the East side of the house. They are showing rust already. This is the ocean view side where the wind whips in from and rain constantly batters agains the house. The other handles on other doors are not showing the light rusting yet, but they don’t get beat nearly as much by the rains from the Eastern Tradewinds. I will let you know how the Brasso works out when we get to polishing them.
A Little Plaster and Paint Needed Inside
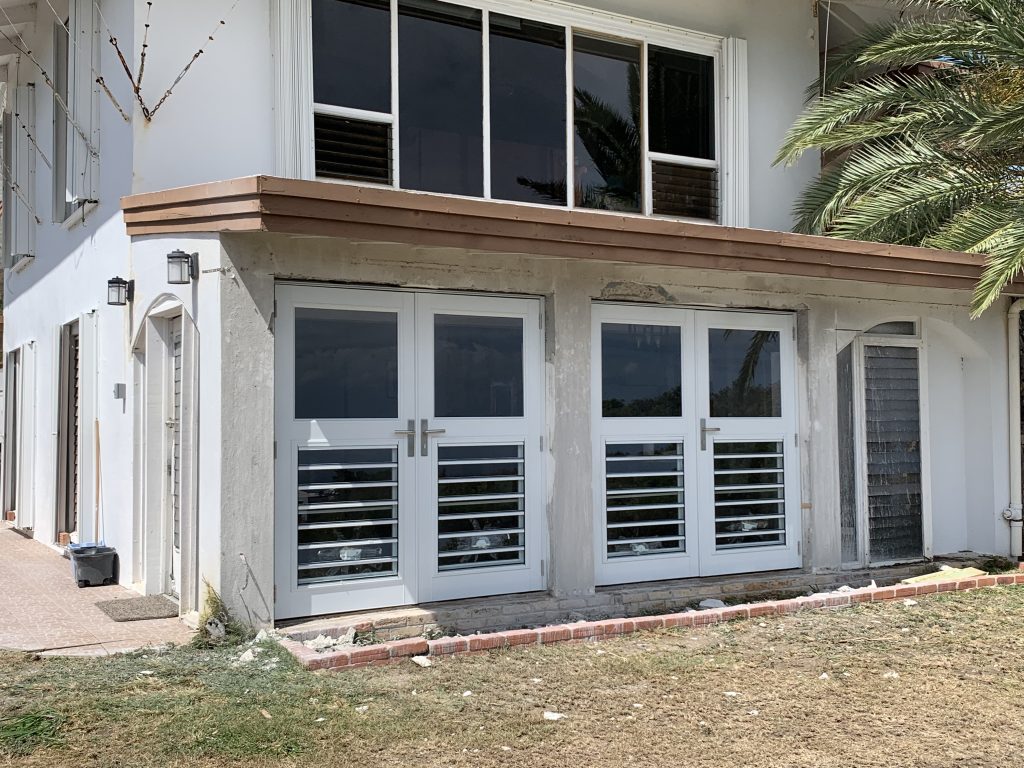
The doors turned out nice. Large viewing windows at the top really set off The View, and the jalousie bottom halves allow the breeze to blow through the house. They are the perfect mix I think and exactly what was needed. These doors have been put in rather than windows on the East side of the house because the plan is to have them open to the pool patio once it is complete. At that point The View will be the best spot in the house for a guest. A one bedroom apartment poolside with a view. It doesn’t get any better.
My brother also came and visited, and we replaced the back door upstairs to our back patio. He got a taste of a bit of the concrete home construction Dave and I were doing. 🙂 I’m not sure he enjoyed it. But it turned out great!
The below took place from January 2019 to July of 2019
The below activities took place over the last 7 months, but I’ve coupled it into one article from “receiving” to “replacing” a couple of our windows, the majority of which we have not done yet. I’ve got a long way to go in regards to replacing the windows in the house. The biggest pain in the rear will be doing those on the second floor. My neighbor said he has some scaffolding, so I will most likely borrow that when I get upstairs. This will not be the last article on windows I’m sure…
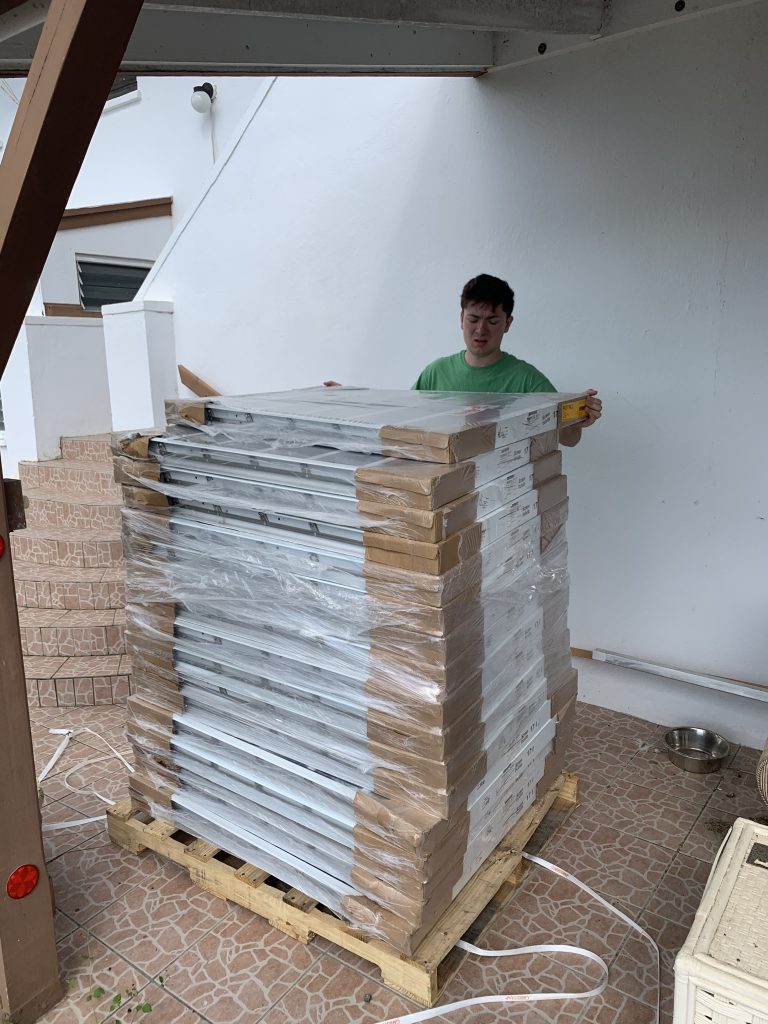
Window Delivery!
When they arrived, Sebastian helped me pull them off the truck. I forgot just how many there were. 47 windows and doors all together. 47! That’s a crap ton of work to be done. So far it’s been 7 months since they first arrived and we haven’t replaced them all. They have been just sitting on the back porch, covered from the elements. We have installed some doors – which I’ll mention in the next update.
Sebastian and I Moved all the Windows and Doors to the Back of the House One by OneSo Many Heavy Windows… the Doors Not Showing Here Either
The last few months I’ve been so busy, and before that my friend Dave ran into a medical issue (and I was sort of waiting on his help again to start on the windows.) I’ve decided to move forward though as I need to get this done now. I’ve done two so far downstairs in The View.
The windows we purchased are from Airmaster out of Puerto Rico. We didn’t have many options when it came to jalousie type windows for homes without AC. Since Florida changed their energy codes, not many companies are making them anymore. (They used to be popular in Florida.)
Rust on Stainless Steel Hardware
I have to admit I’m a little disappointed with Airmaster’s quality control. While the windows themselves seem to be made out of quality materials (heavy, durable aluminum with thick glass and hurricane glass on the door panes) I have had a few issues already… A couple pieces of the glass have not been properly inserted into their window rail/holder which I’ve had to re-glue with clear caulking, the “stainless” handles on the doors are already showing rust to which they told me I need to regularly polish with rubbing compound to keep looking nice, one of the handles was missing and not even cutout into the door itself, none of the adjoining screws for the windows were included so Home Depot gave me $120 in free hardware when I complained, and they’ve shorted me a window crank already and I’m only on window #4. I know Airmaster is busy as hell from the hurricanes still, but they really need to get it together and make sure they’re sending out a quality product. I spent 10’s of thousands of dollars on these and to have this many issues, well – you understand, I’m sure, how I feel at times. Luckily though in the end, all of these things are fixable, and they don’t affect the end quality of the product after its installed properly, so life goes on.
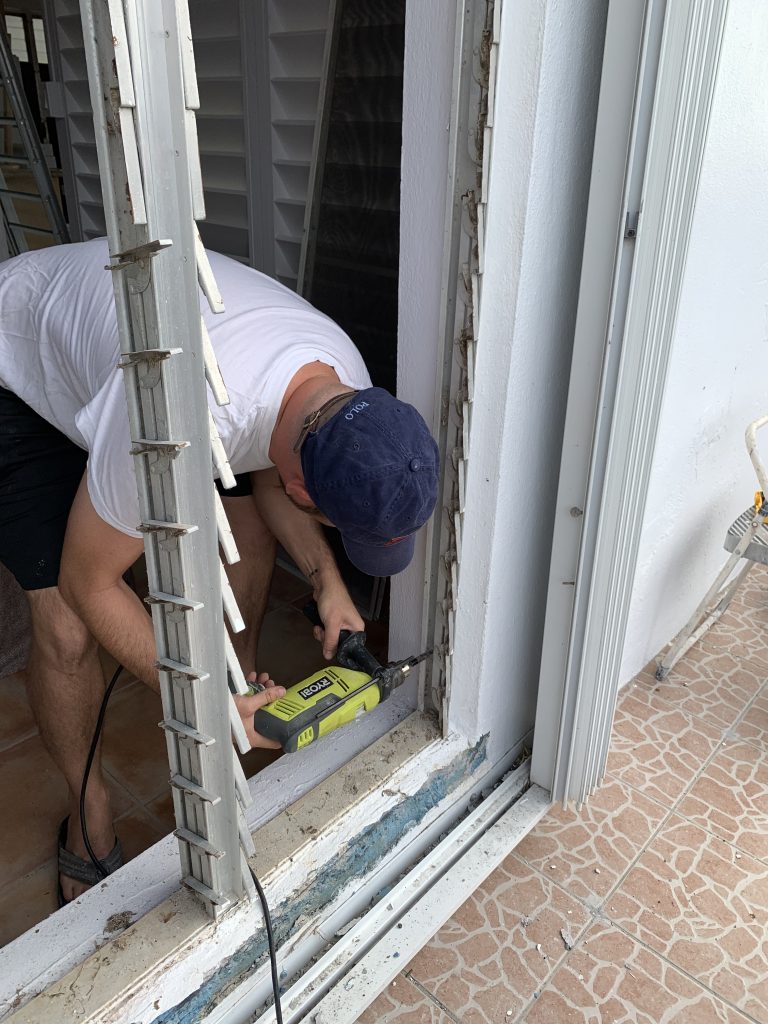
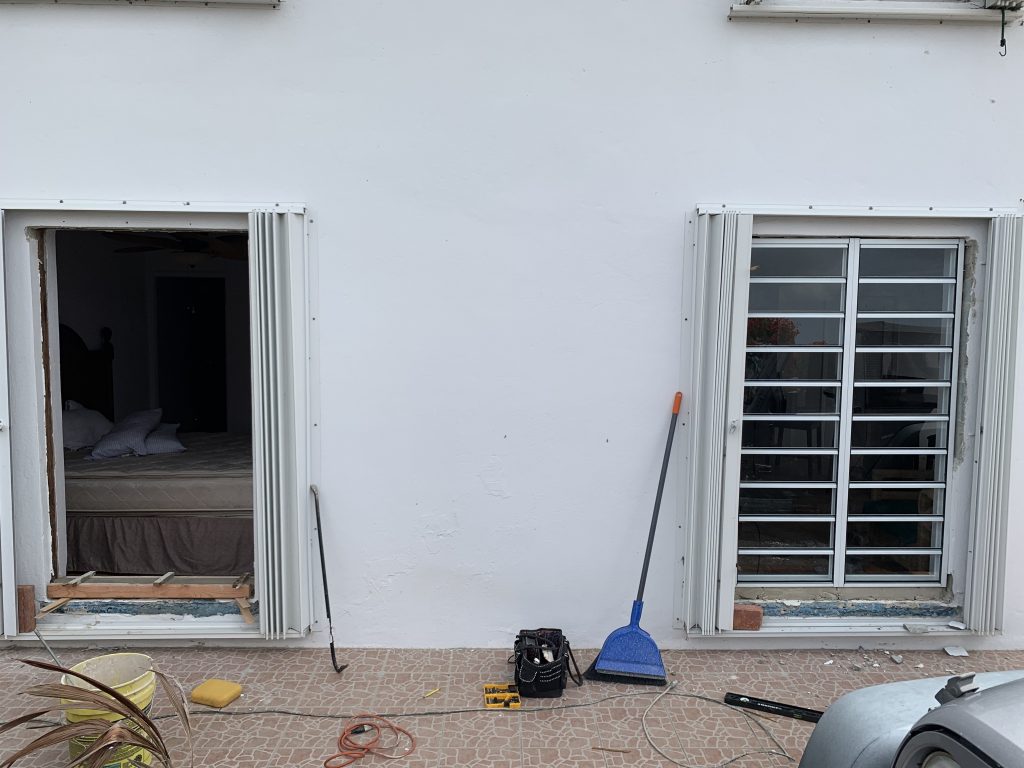
Removing Old Window Frame
Tearing out the old windows I noticed they were only in with four 1″ screws… and some plaster of course. I could not believe they’ve held in this house so long with the storms that have come through. My plan is to use 4.5″ concrete Tapcons. On the first two sets of windows I installed, I used 8 of them in each. Six on the sides, one top and one bottom. These aren’t going anywhere in a storm, even if the glass breaks.
Both Windows Knocked Out
One Down One to Go
Both Bottom Windows Installed
We do need to work on getting hurricane shutters for the house. I want the roll down electric kind, which of course are the most expensive. It’s going to be a while before we get them. Half the house already has the accordion shutters and we have some metal shutter panels for other windows on the house. There will be some that are completely exposed that I have to worry about first (and those will be the ones who get the first sets of roll downs.) I did a quote on a couple sections of the house and it seems that its going to cost another $35-40k or so by the time we’re done with the entire thing (materials only if I install), which is almost double the cost of the windows themselves, mind you.
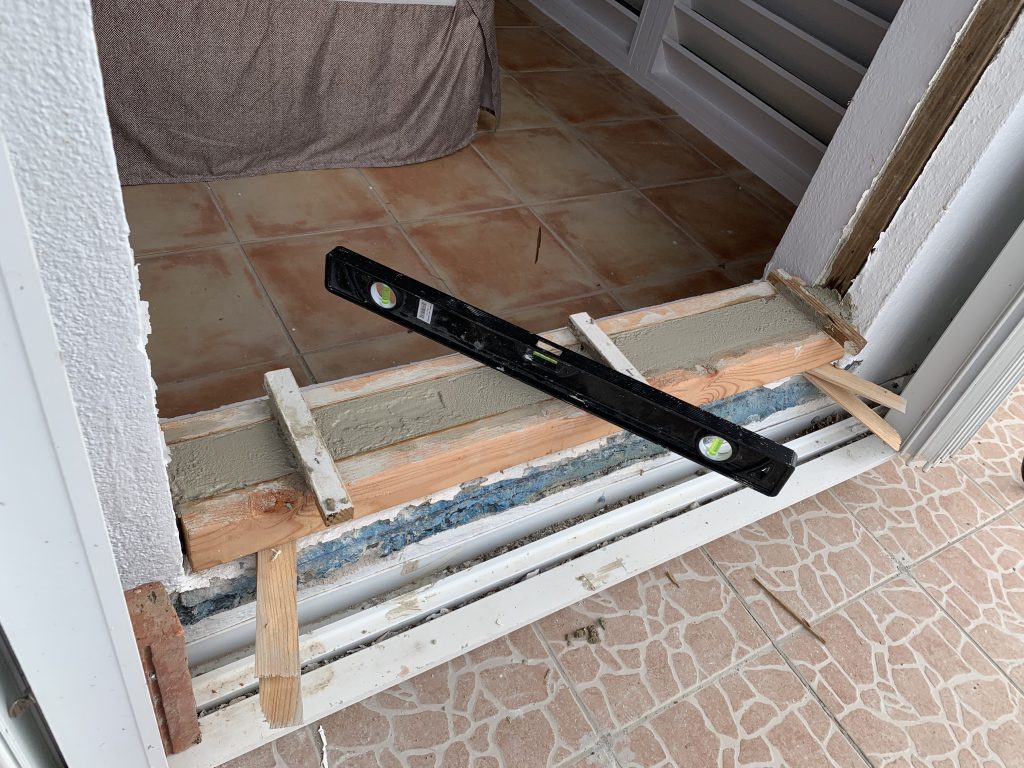
One thing I learned is that jalousie windows, only come in certain heights depending upon the size of the jalousie window you buy. For example, 3″ heigh panes come in heights divisible by 3″, 4″ heights by 4, and so on. We had selected 6″ heights for the most viewable window space to show off the view, so of course my height had to be increased or decreased by a factor of 6. This means I will have to do a lot of “filling” and building up of the window sills before installing each window. Some are 1″ shorter than the space, some windows 4″ shorter than the space. This is a huge pain in the rear as it must be level and exact, although I think the end product will be worth it with more viewable window and less bars across. It’s also better than having to cut concrete everywhere. At least they can make them any width, exact, and there isn’t much to do on the sides of the rough opening. Let’s just hope my measurements were right.
Building Up the Window Opening to Fit with a Form I Made and ConcreteJust Needs Plastering!Plaster and Paint Needed, Cranks Not Yet Installed, View from Inside
I’ll for sure have another article on installing windows in the future as we do more. The next article will show you what it took to get the doors in. (Thank God for my friend Dave.) I only have one set of doors left to do, which I plan on tackling in about a week from this writing.
You may have noticed I’ve also not put the total spend above recently… Since I’m playing “catch up” on these articles right now, I’m not sure exactly where we were in the spending, or the number of days at the time of the projects I’m writing about. I figured if I catch up completely in about a week and a half – I’ll then post exactly where we are today again with the budget. It’s not pretty… but our granite selection for the kitchen sure is. 🙂
The Sunrises have been beautiful lately. Here’s another I captured at our place.
I know, it’s been a while. I’m still playing catchup on this blog writing stuff. Liam has taken up so much of what used to be “free time” I find less time to write anymore. Just getting further behind! Not to mention the last couple of months we were away to run Backwoods at Mulberry Mountain for the year – but I digress. Have patience with me, I will eventually report back on it all…
The Below Took Place in February and March, 2019
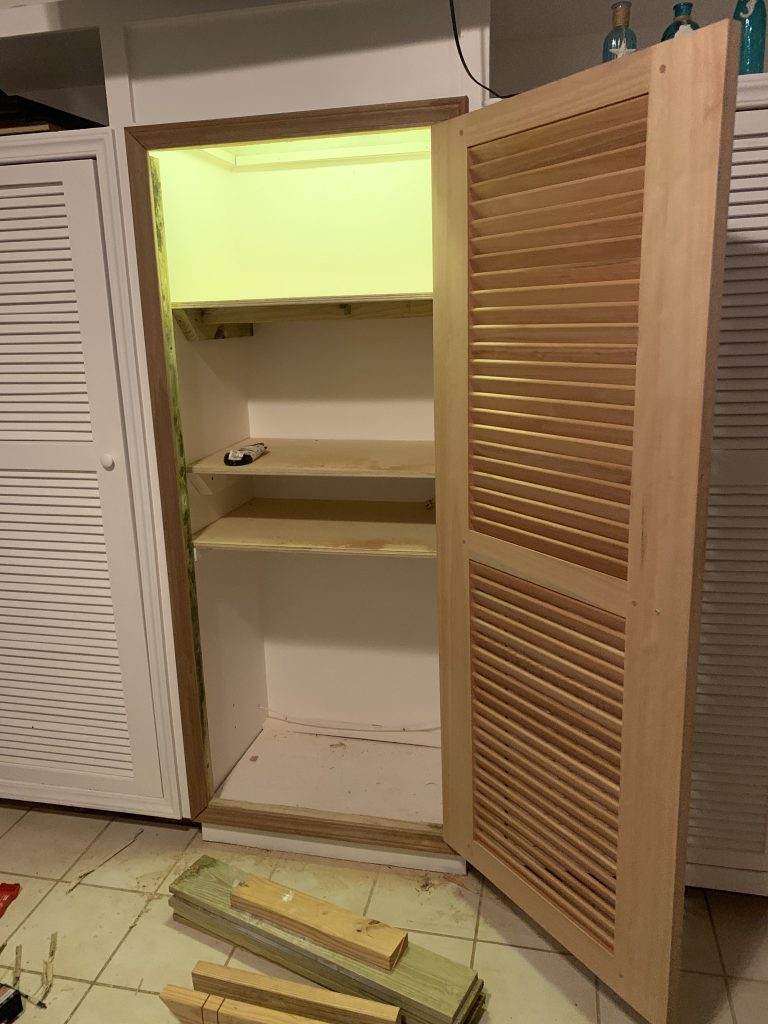
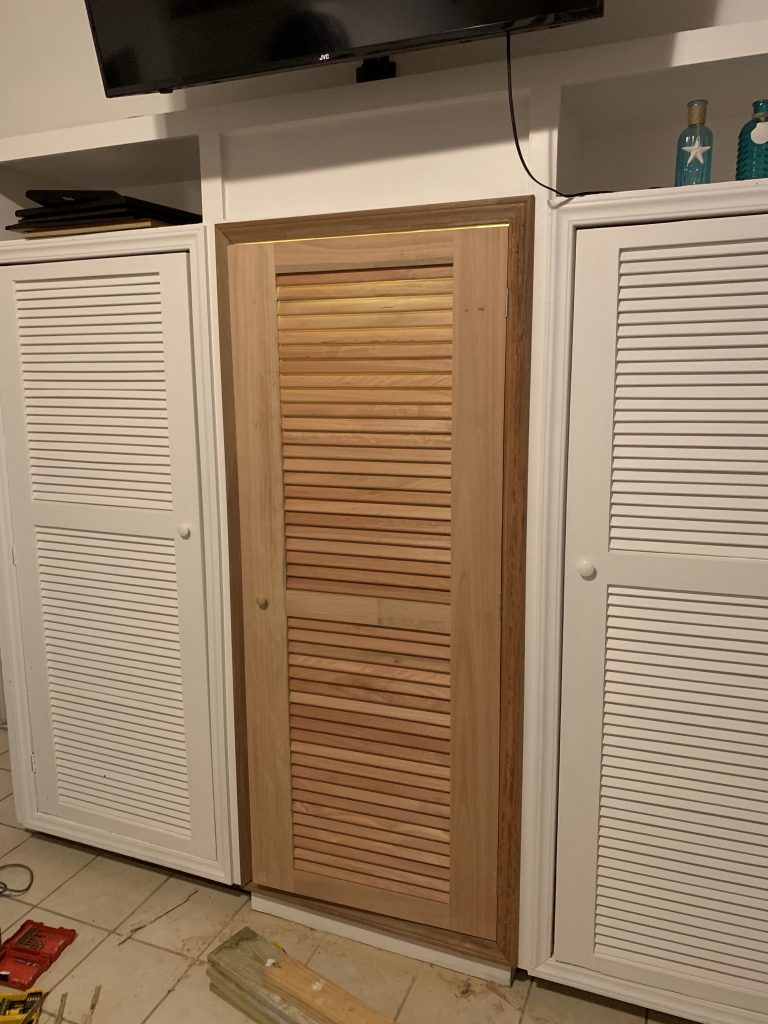
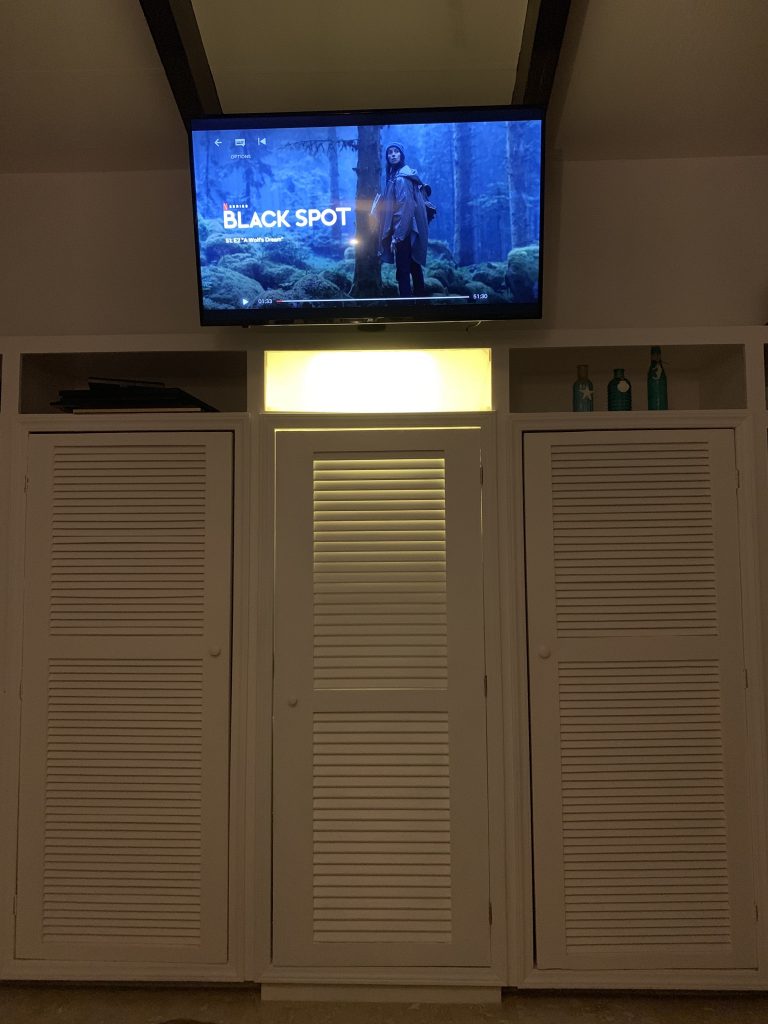
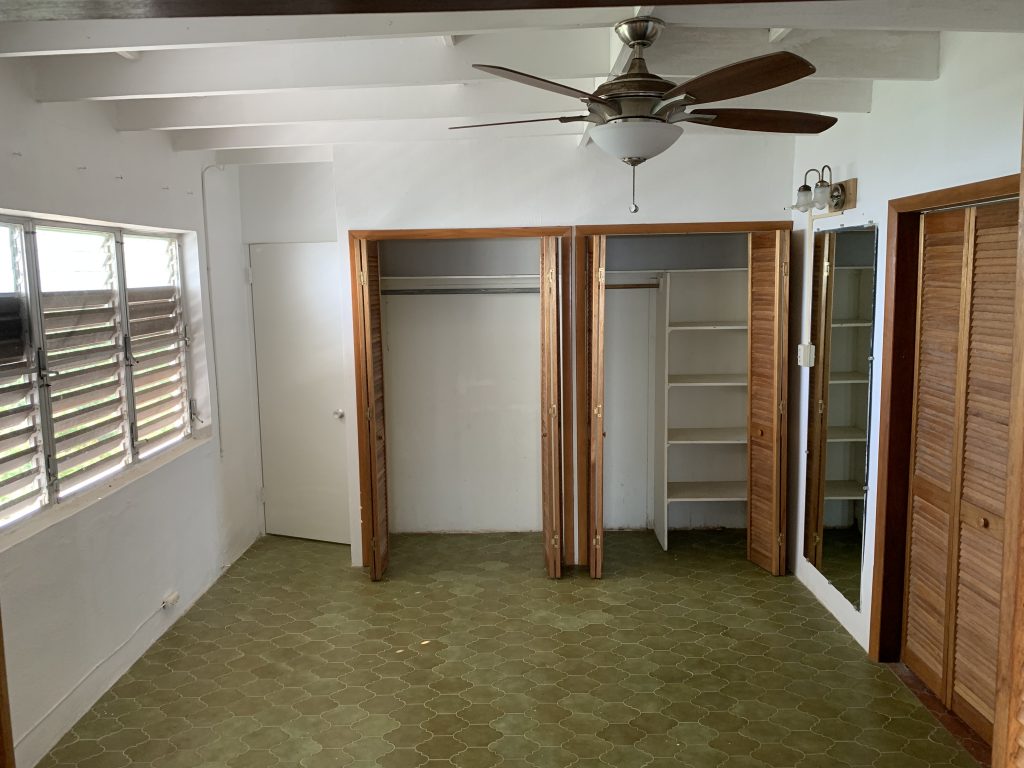
In our master bedroom there was a space between two closets, which looked like it was used for an old TV set placement. The issue was that it was only about 36 inches across, and well most TVs now-a-days are much larger than that. The awkward space seemed to collect junk, so I went ahead and built a third closet in our bedroom and tried to match the doors as best as possible. In the end, it turned out great, now hiding all of my scuba gear instead of having it out in the open.
Closet Shelves Built, Frame Added, and Door InstalledCenter Closet Before Painting to Match
We mounted the TV above the closets more towards our ceiling as well, which is great when you’re laying in bed. No neck strain! I also cut out the top panel that was above this area to create an indirect light that served a dual purpose of lighting the closet so I can see my scuba gear, and lighting the room when you first walk into the bedroom. I used a piece of plexiglass on the front, and as the closet ceiling, and used a high grit sand paper (and sander) to give it a frosted look. It turned out great and provides a soft light!
Finished Closet After Wiring TV Through Wall and Adding Frosted Light in Top Shelf
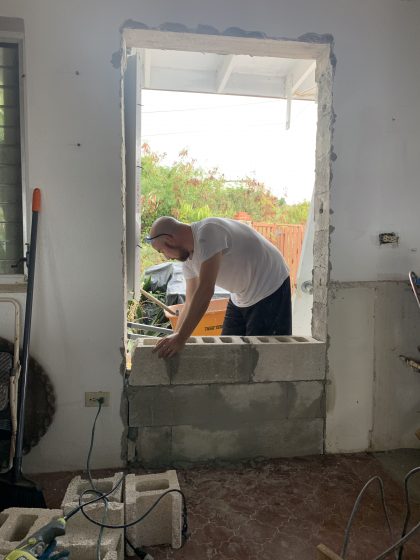
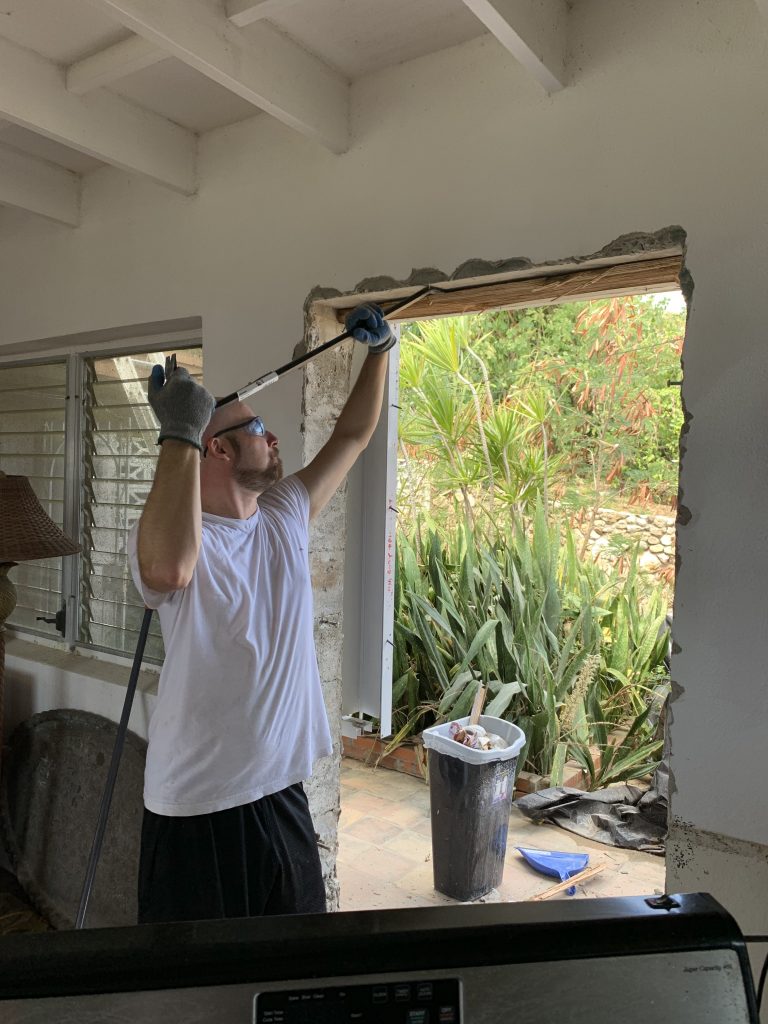
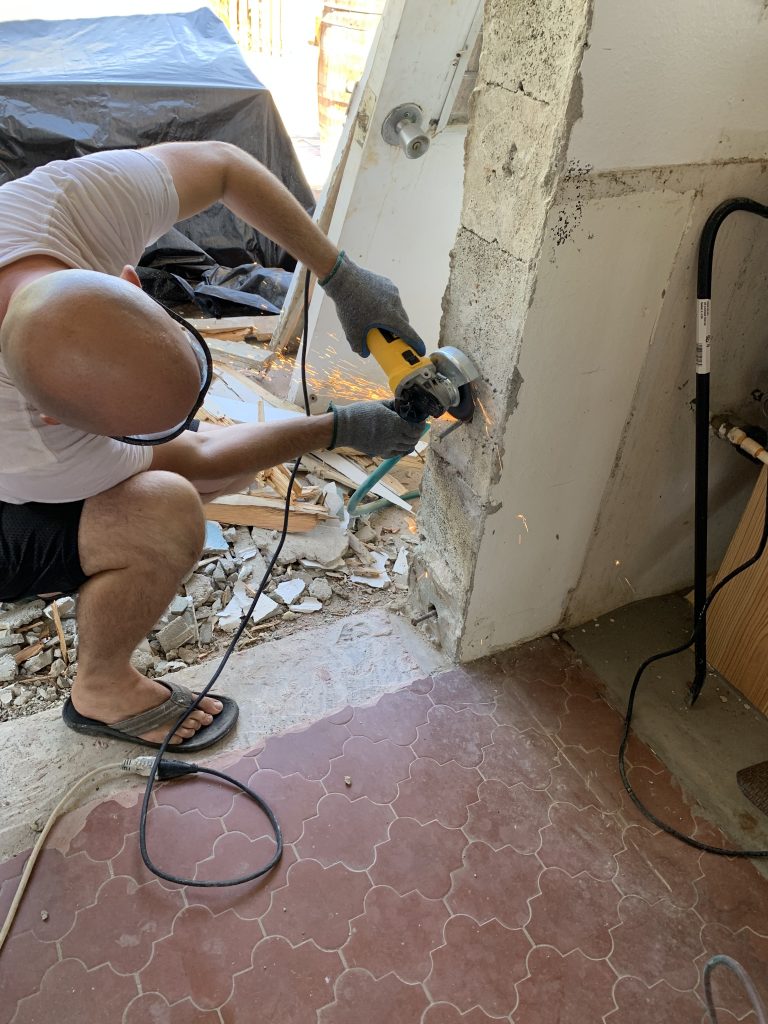
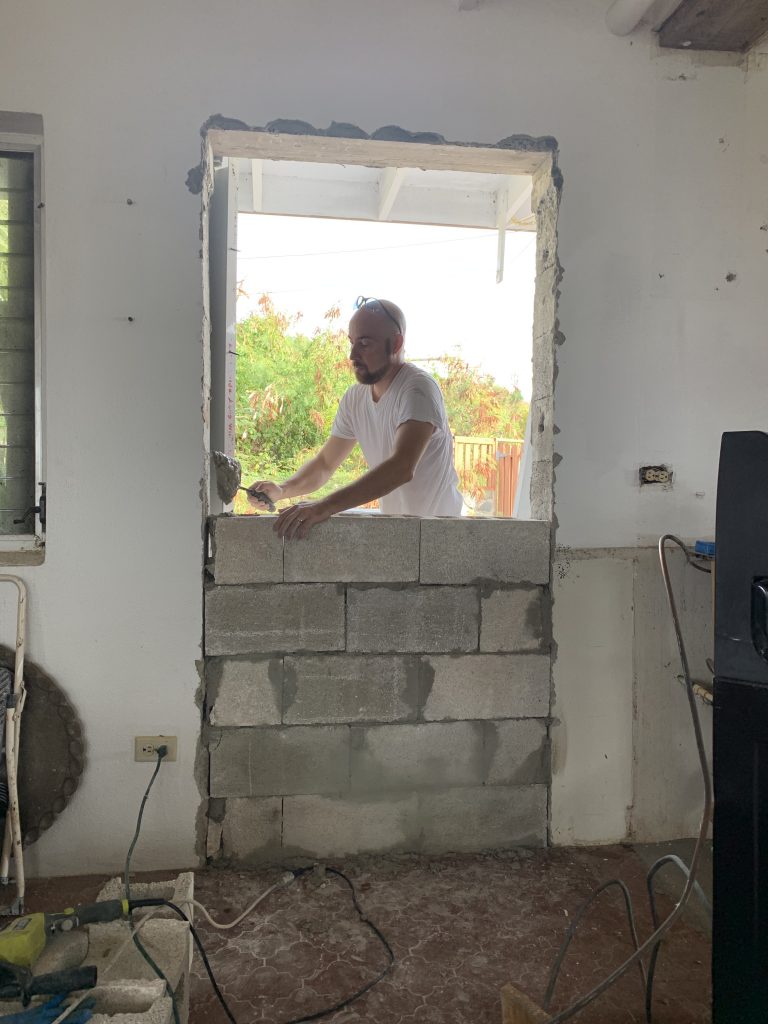
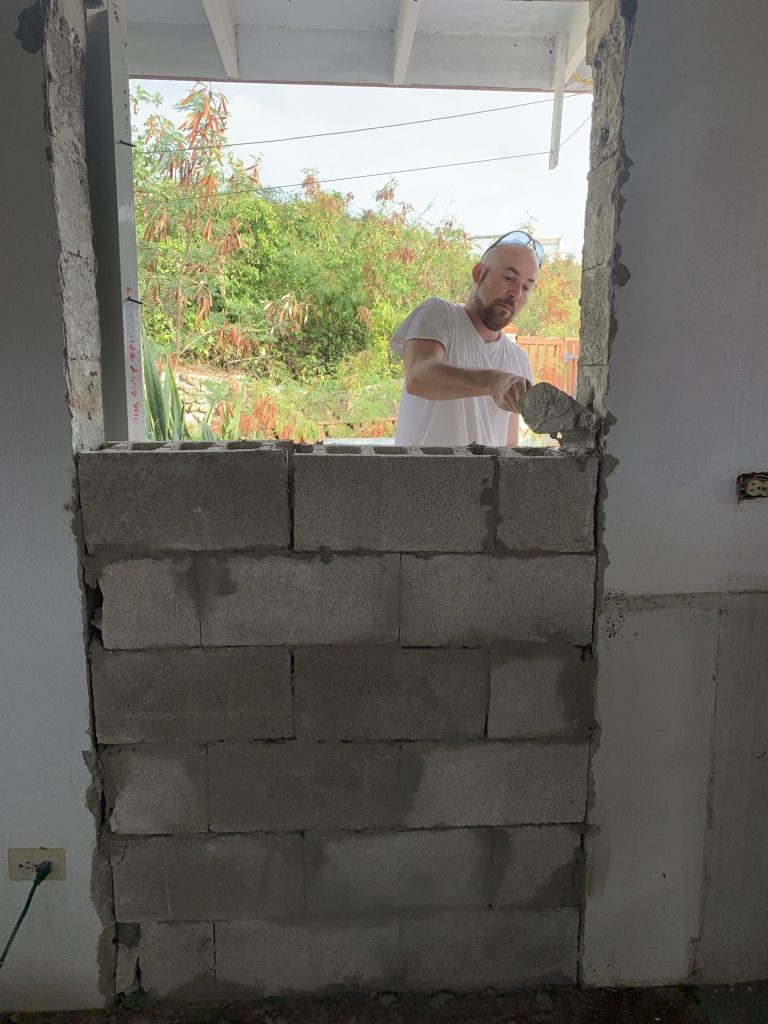
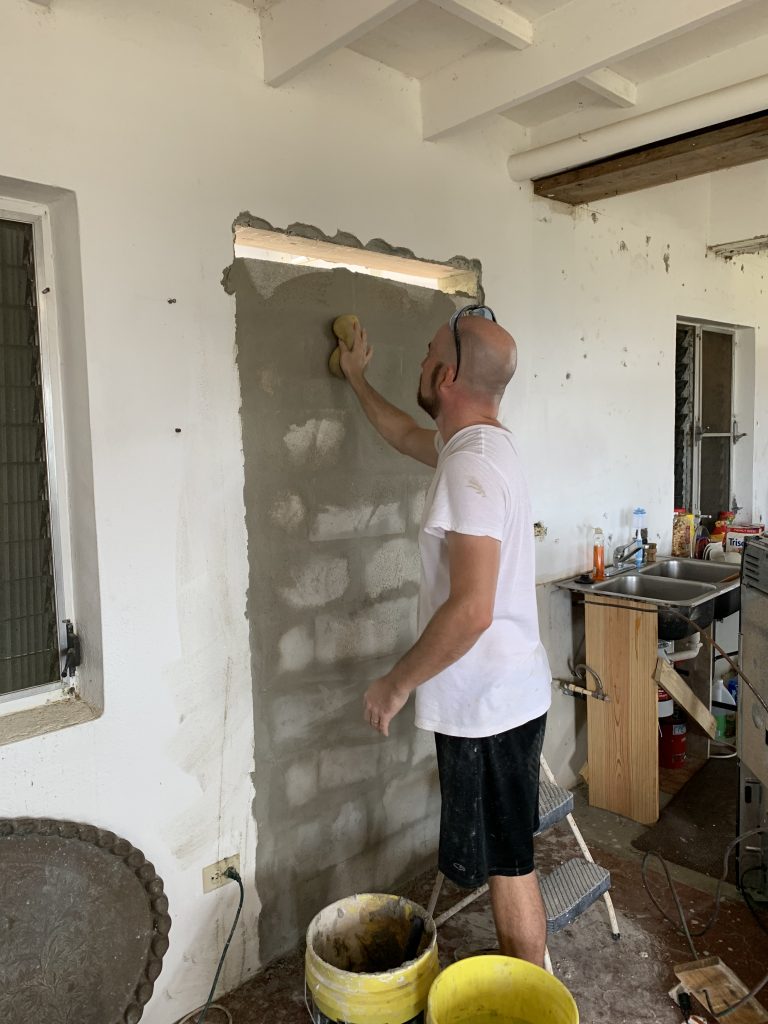
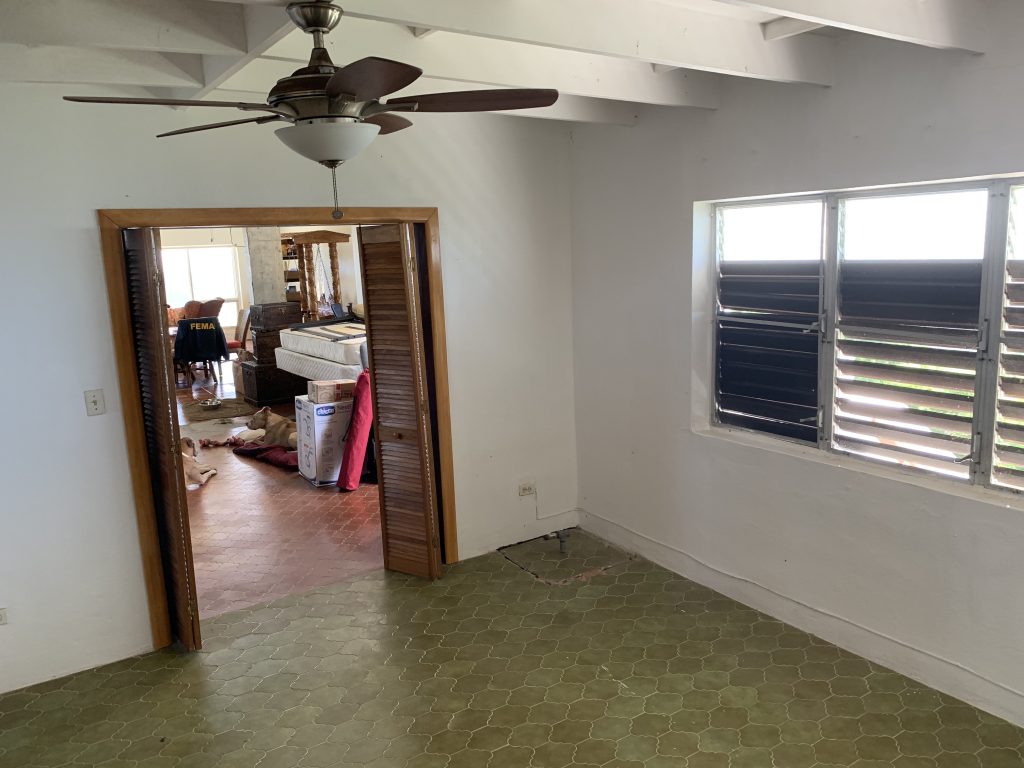
I’ve also gone ahead and blocked up an exterior door way that lead to our back patio which is no longer needed now that we’ve torn down kitchen walls and created an open floor plan. The doorway was redundant as we have another just 155″ away on the same wall. We’ll be using this space for kitchen cabinets now in the new kitchen layout.
Demolition First, Before Blocking Up Doorway
Grinding Off Bolts In The Rough Opening
Doing Some Demo
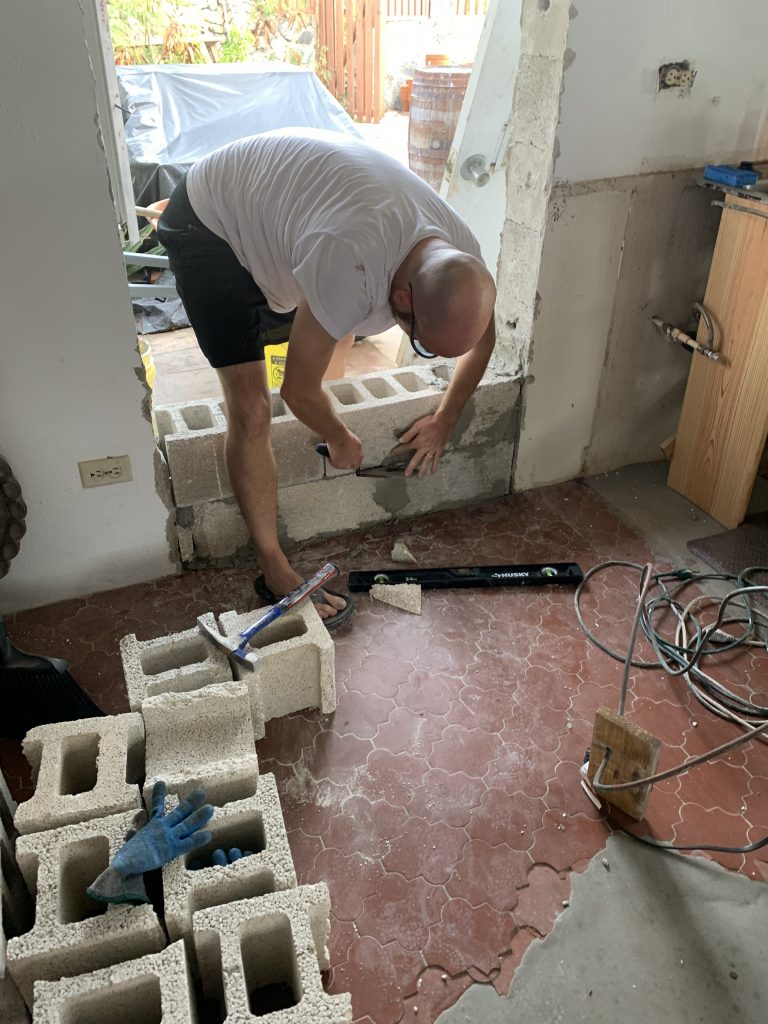
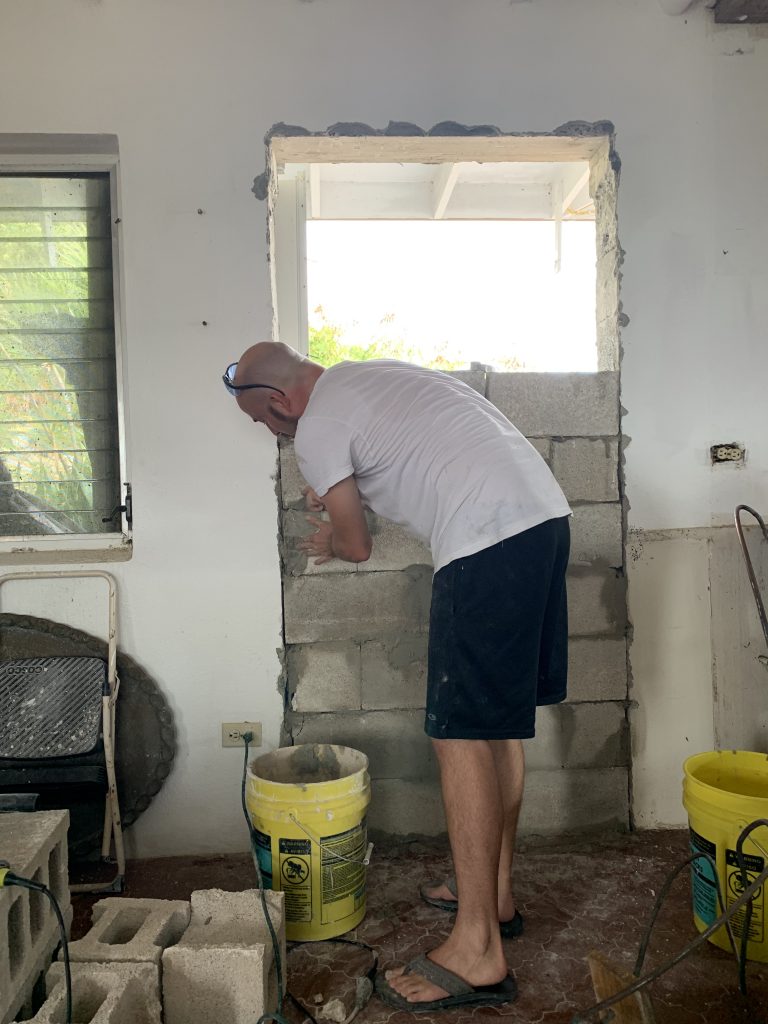
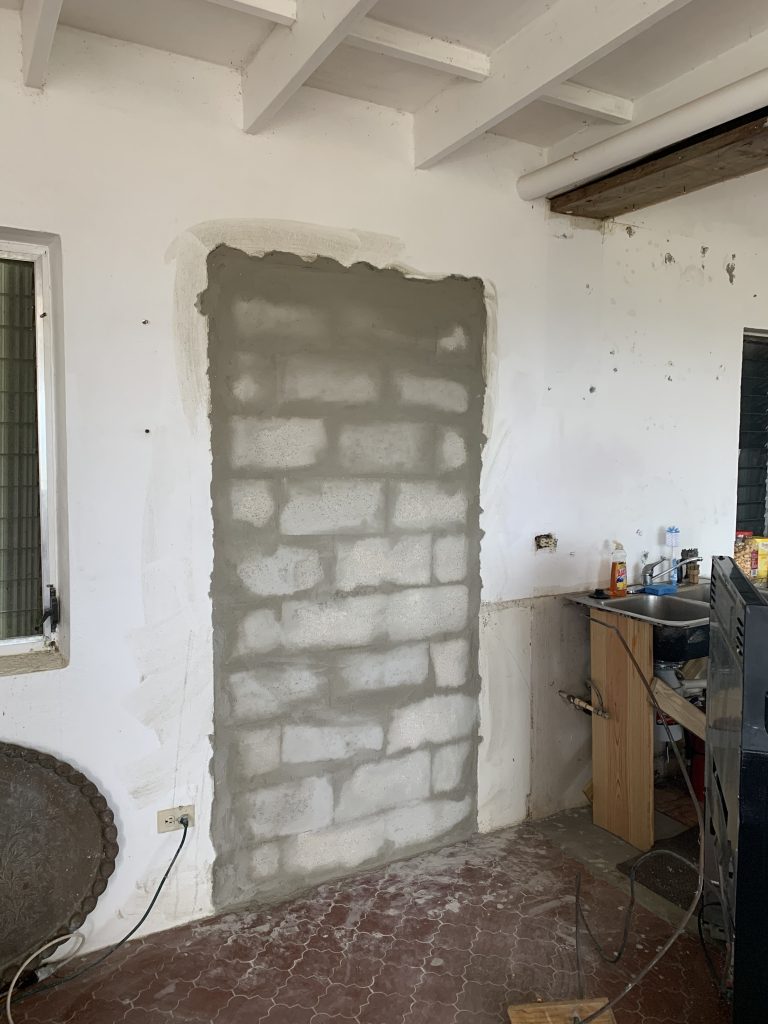
I’ve never bricked up a wall before, so this was not only a learning process but my first attempt on an important aspect of the house. I had to get it level so you wouldn’t notice it, which I think I did a great job at in the end.
Ready for the Final Coat of Plaster!
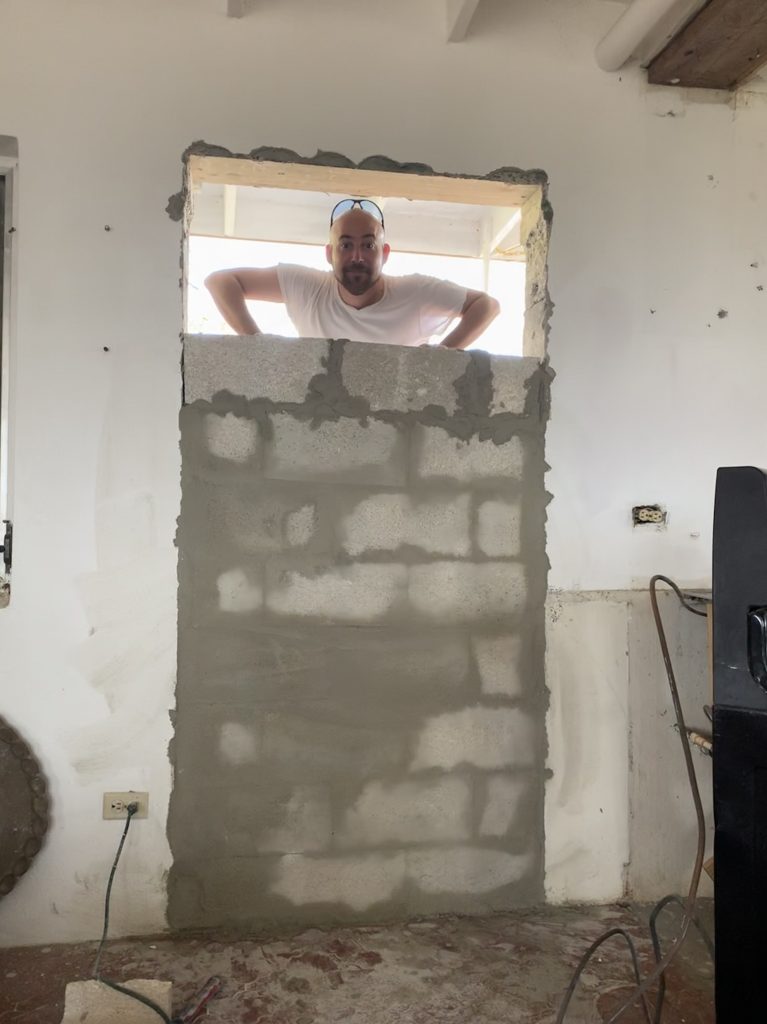
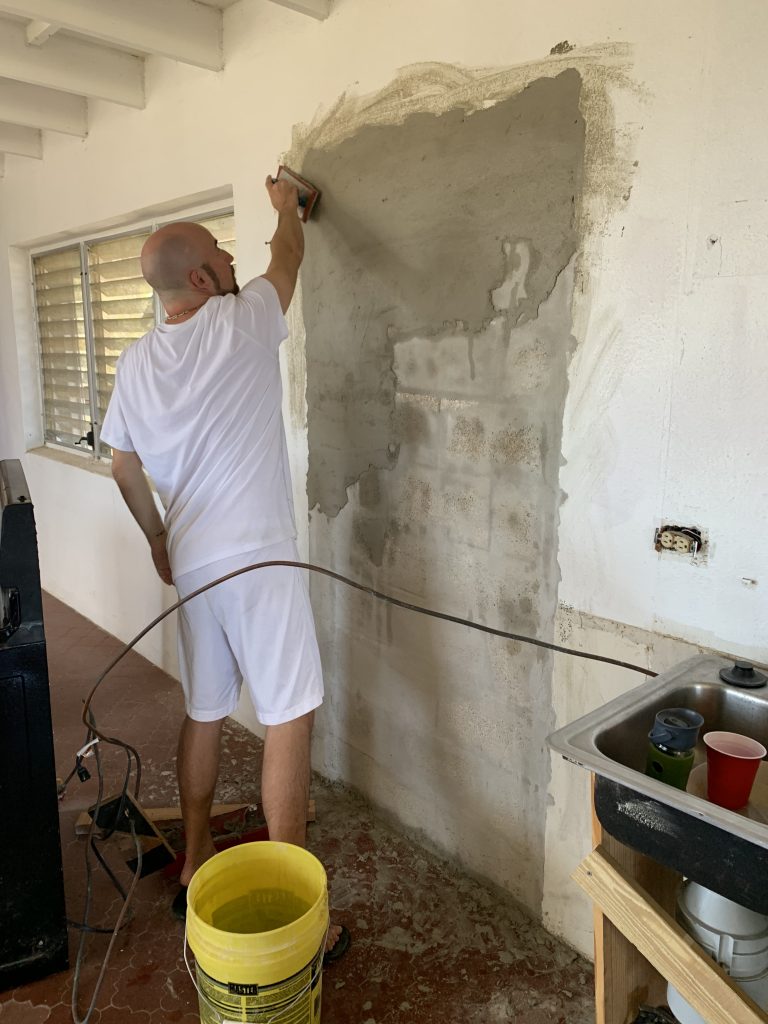
It turned out lovely. I’ve learned a lot about plastering lately which will be needed for all the window replacements. I’m not horrible at it, but I will tell you I’m not a fan of the work itself.
Laying on the Final Plaster Layer
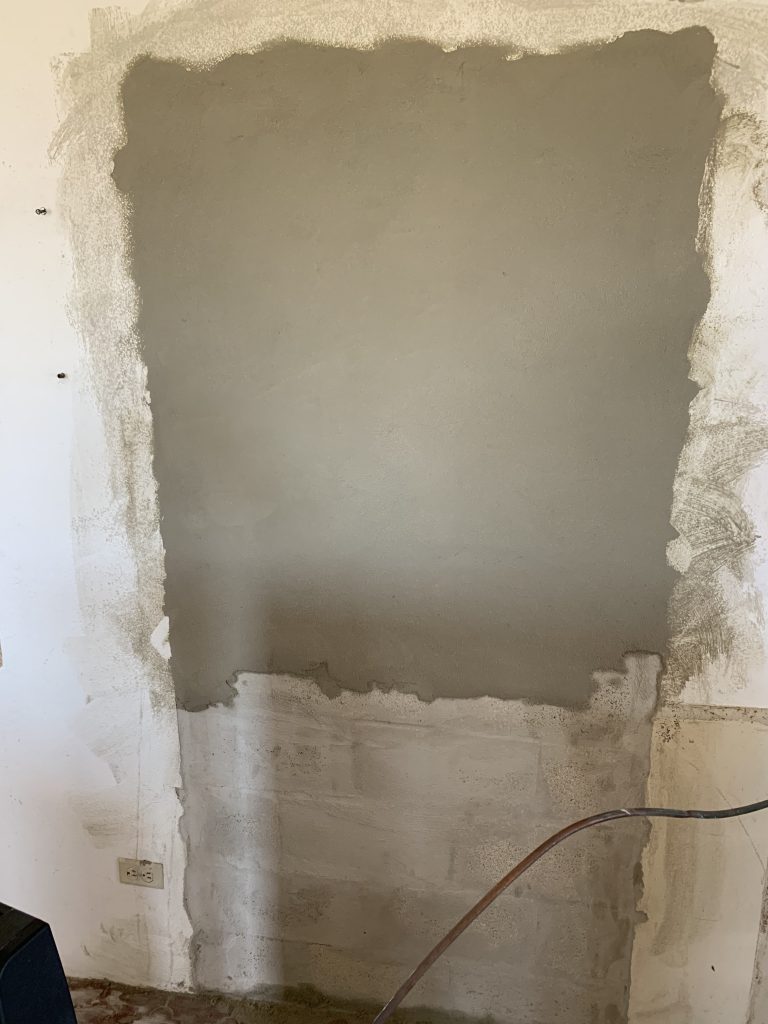
It Sponges Surprisingly Smooth!
The Finished Product, Plastered and Painted. I Can’t Believe There Was a Door There!Check out this Sunrise Photo Taken at Our House. I Still Can’t Get Over Our View!
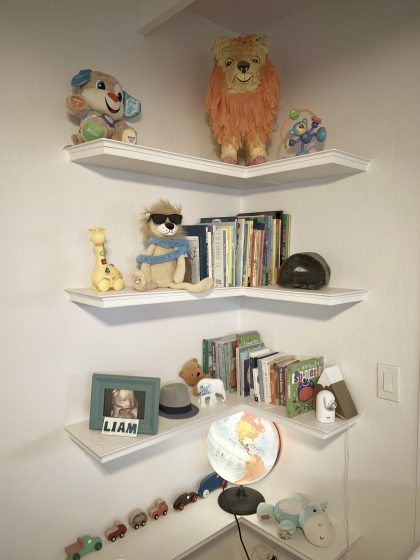
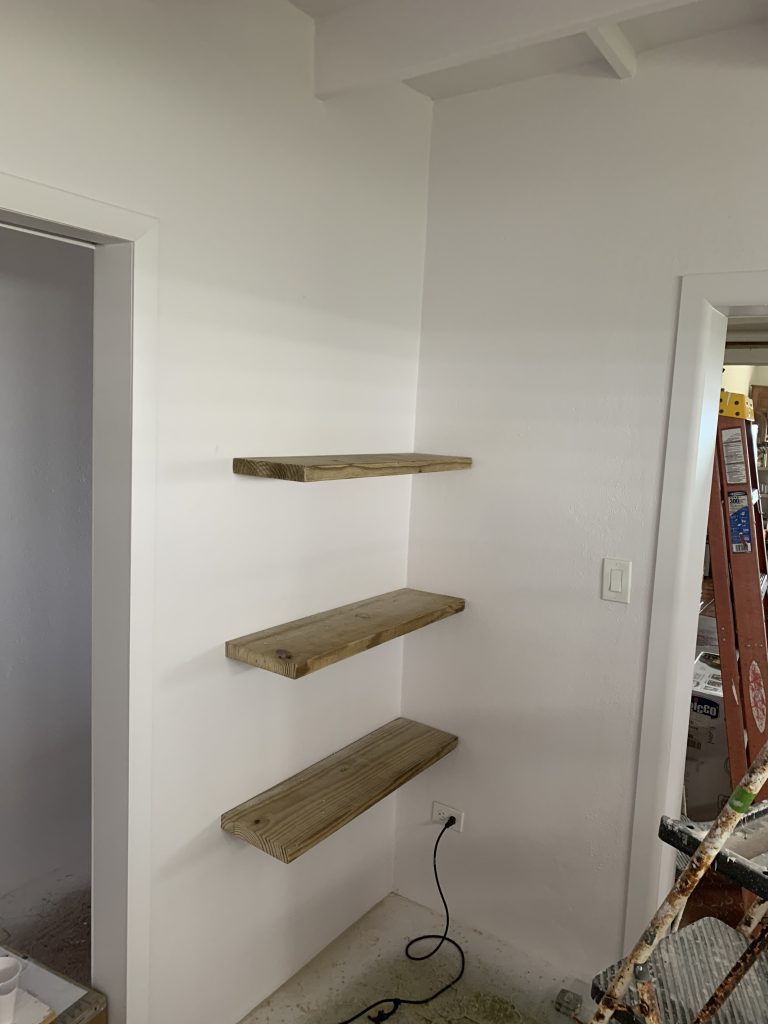
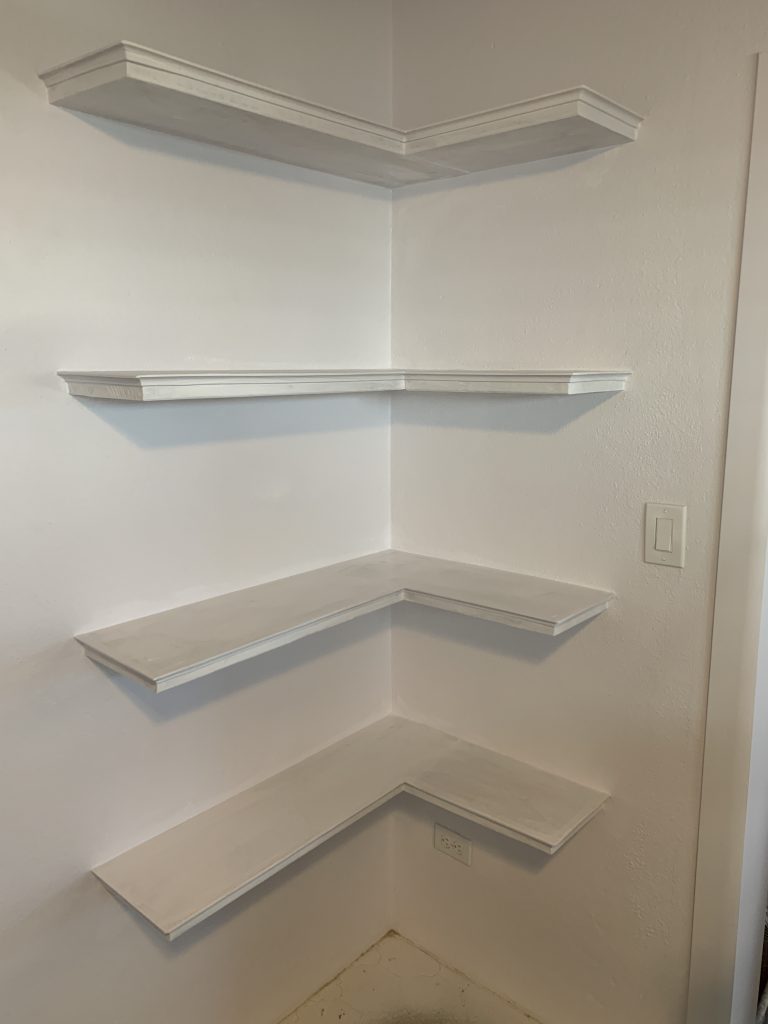
Liam’s nursery was pretty bare, so we wanted to create some built in book shelves for his giant library we got from friends and family at our baby shower. (A great idea by the way: have your friends and family sign the inside cover and bring a book, rather than a card to your shower.)
Here’s how I built his floating shelves to appear to have no support underneath, and still hold the weight of all his books.
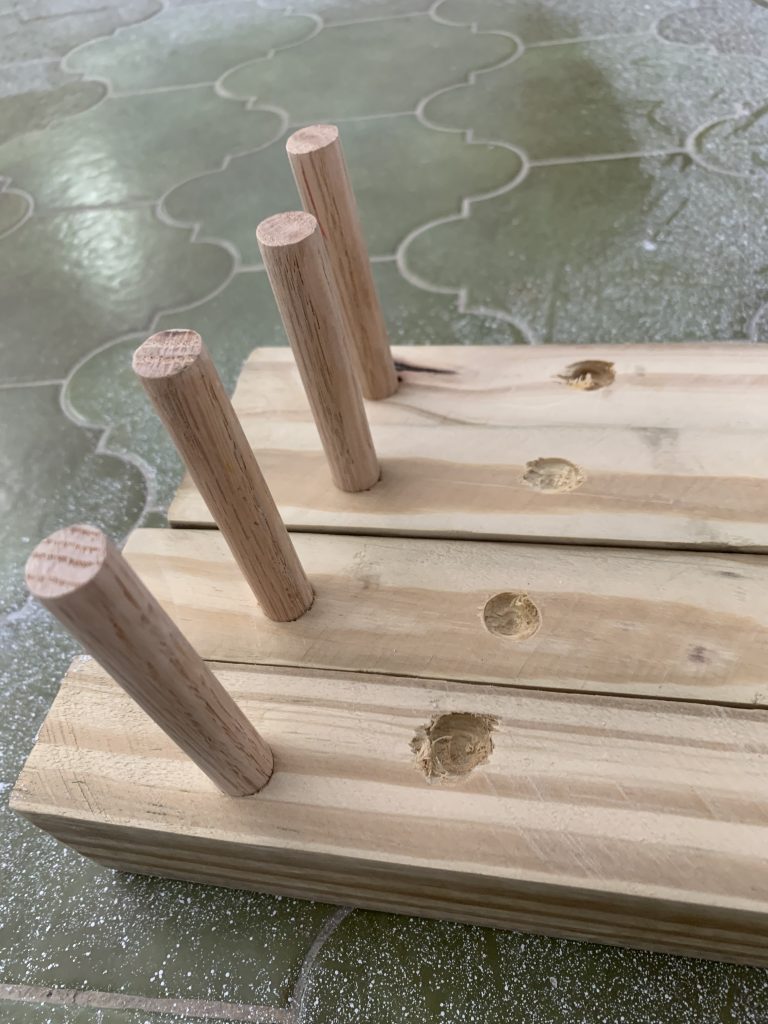
Step 1 – Cutting and Drilling the Shelf Supports
After measuring out the length of the shelves you want (I did mine in an L shape for the corner of the room) measure out the 2×12’s to length and cut to size.
Once cut to size, you’ll want to drill a 1/2″ round hole at least 6″ deep on each end of the shelf board, and if the shelf is longer than 2 feet, every 2 feet or so. This hole will eventually have a 1/2″ dowel inserted that will support the shelf to the support you attach to the wall. It’s critical that these holes are square to the flat surface of the board… if they are not, the dowels could end up opposite angles of each other, and when you try to insert the shelf onto the support, it will bind up… You may not understand what I’m talking about here yet, but just know you need to make sure that hole is completely squared to the board and perfectly straight!
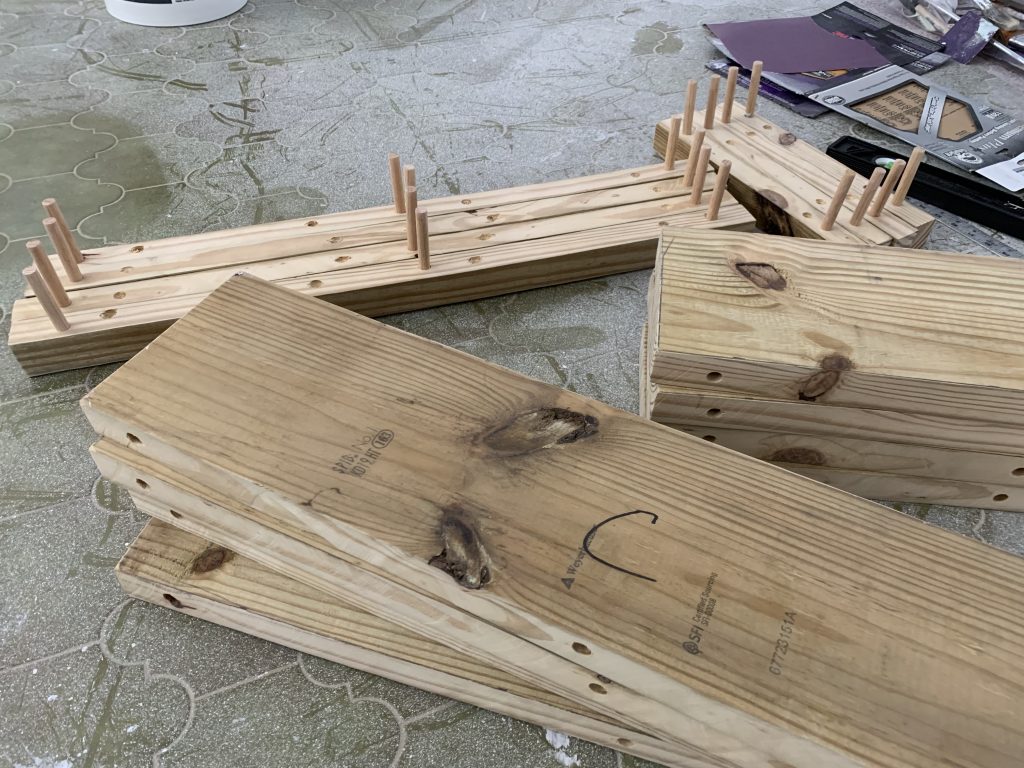
After drilling your dowel holes, cut a strip off the side of the 2×12′ that you drilled into at about 2″. This will be your wall support and is the magic behind floating shelves. Your end result should be about a 2″ square piece that is as long as your shelf with a 1/2″ hole all the way through it at it’s ends (and maybe in the middle depending upon length), and the remaining 2×12 (now 2×10) which should still have 1/2″ holes about 4″ into it. Cutting after you drilled the dowel holes ensures they will line up perfectly later when you put the two cut pieces back together. Label the supports with the shelf you cut them from, so you know which ones go together.
Next, on the inside (where the saw blade was cutting) of the small 2×2 support piece, you’ll want to drill some recessed holes (only 1/4″ deep) where you will later screw these to the wall, and that will recess your screw head so it doesn’t get in the way when you attach the shelf.
Finally, cut your 1/2″ dowel into 5 7/8″ pieces so they will fit into your 6″ holes and not stick out. Sand everything including the dowels EXCEPT the cut side of the shelves and cut side of the wall supports where they separated originally. If you sand these, when you put them back together, they will not line up flat, you will have a small dip in your shelf, and the connection points will be obvious defeating the magic of floating shelves.
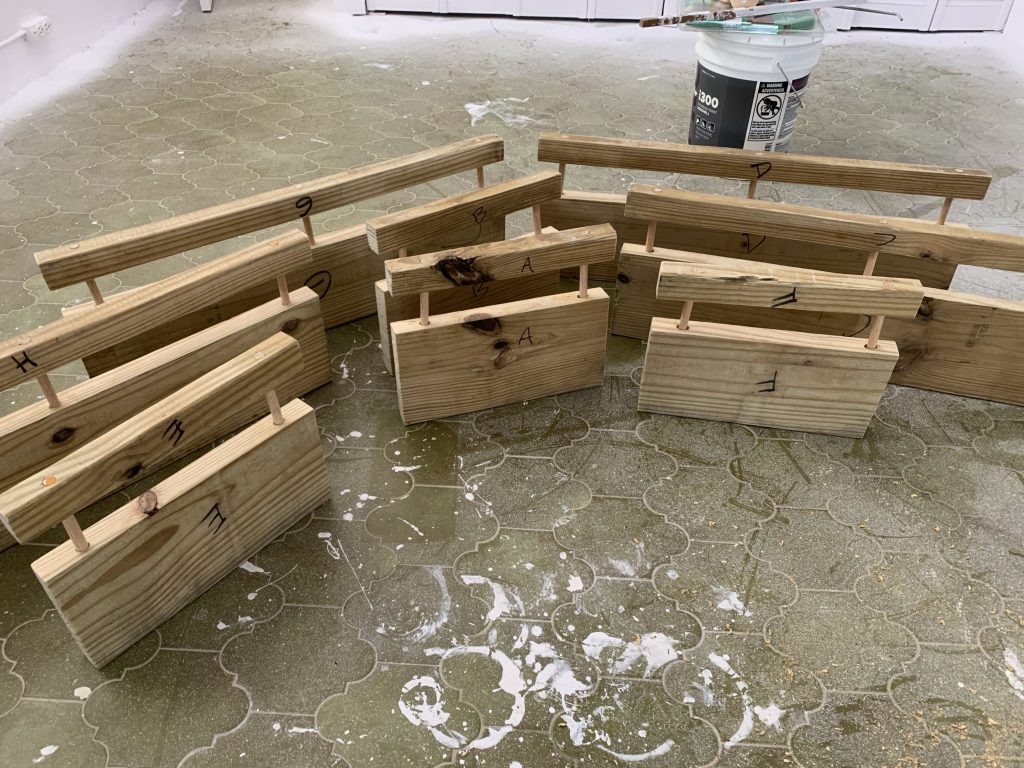
Insert the dowels into the small support 2×2″ so that they are sticking out of the end that has your recessed 1/4″ screw holes. The picture below of what your finished product should look like for the shelve wall supports.
Wall Supports with Dowels and Recessed Screw Areas.Labeled Shelves, with Supports in the Background.How the Supports will Go Together with the Shelves… Don’t push them together yet, we actually have to attach the wall support to the wall first!
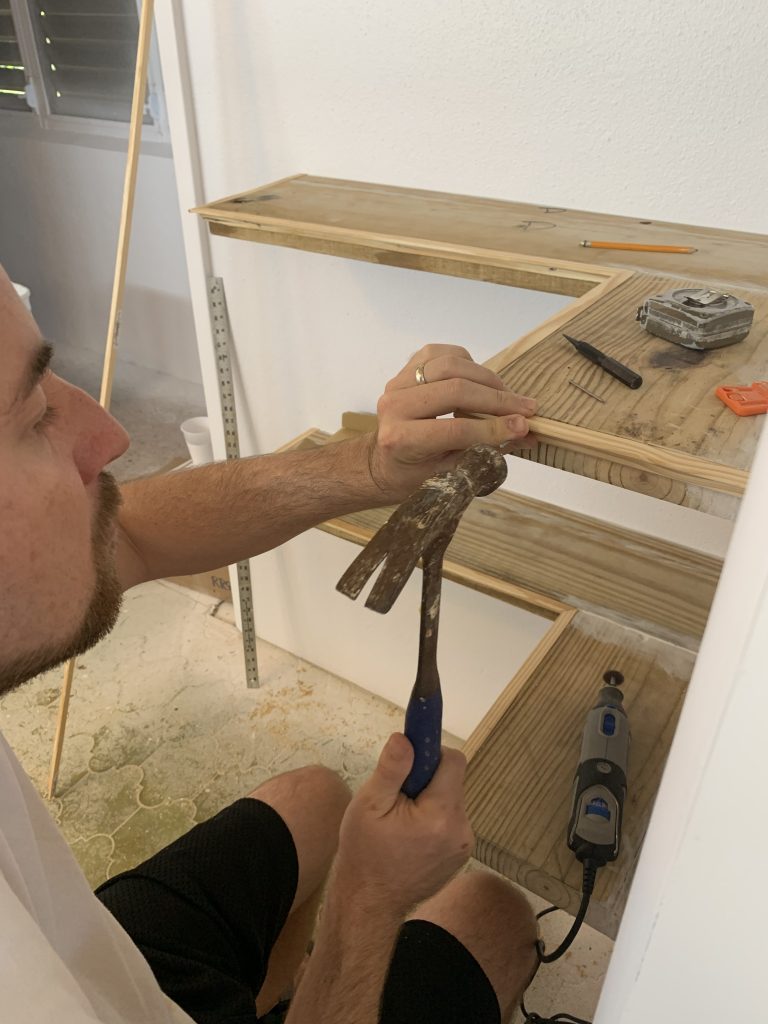
Step 2 – Attach the Wall Supports to the Wall, and Slide On Shelves
The short of this step is to attach the wall supports to the wall by inserting screws into the recessed screw hole areas you created, so that the dowels are sticking out from the wall.
To do so with anchors into drywall, you’ll most likely want to drill a pilot hole all the way through your recessed screw area on one side of the wall support first. Then remove the support, and place your anchor into the drywall or plastered wall. Next replace the support once again and insert your screw into the anchor holding one side of the support onto the wall – just not too tight, so that it can swing down and out of the way as needed.
Get your level out and make sure the shelf is completely level on the opposite end that hasn’t been screwed into the wall yet. Once level, drill your pilot hole to the wall to make your mark for your next anchor. Let the wall support hang down from the one attached end so it’s out of your way to insert your anchor. Once done, swing back up the wall support and insert the screw. Your shelf support should now be attached to your wall! (Note if you have more than one area to screw the support into the wall, which I suggest at least in between each dowel, you may need to drill more pilot holes and add more anchors before securing each end.)
Finally, you can slide your shelf onto the wall support by inserting the dowels sticking out from the wall into the shelf. Below is an image of the shelves attached to the wall supports and on the wall!
First Few Shelves Inserted onto Wall SupportsHere I’m screwing in one of the wall supports for the next shelf. If you want to fill the connection points to make them appear smoother, caulking is great if you intend to paint rather than stain your shelves.
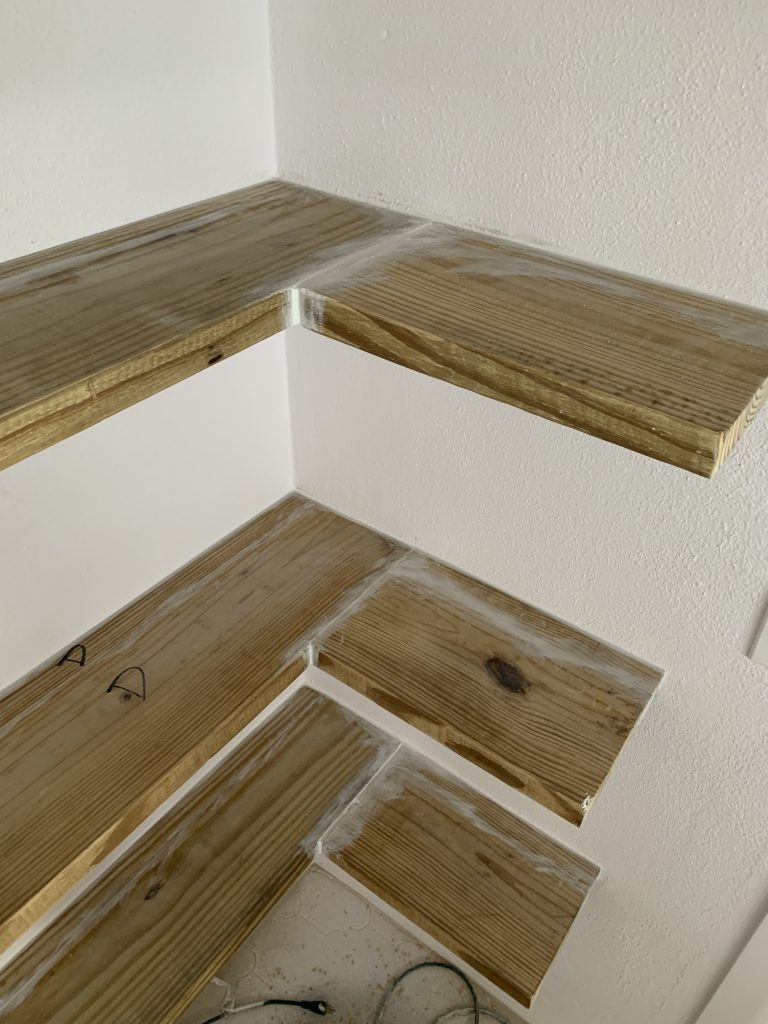
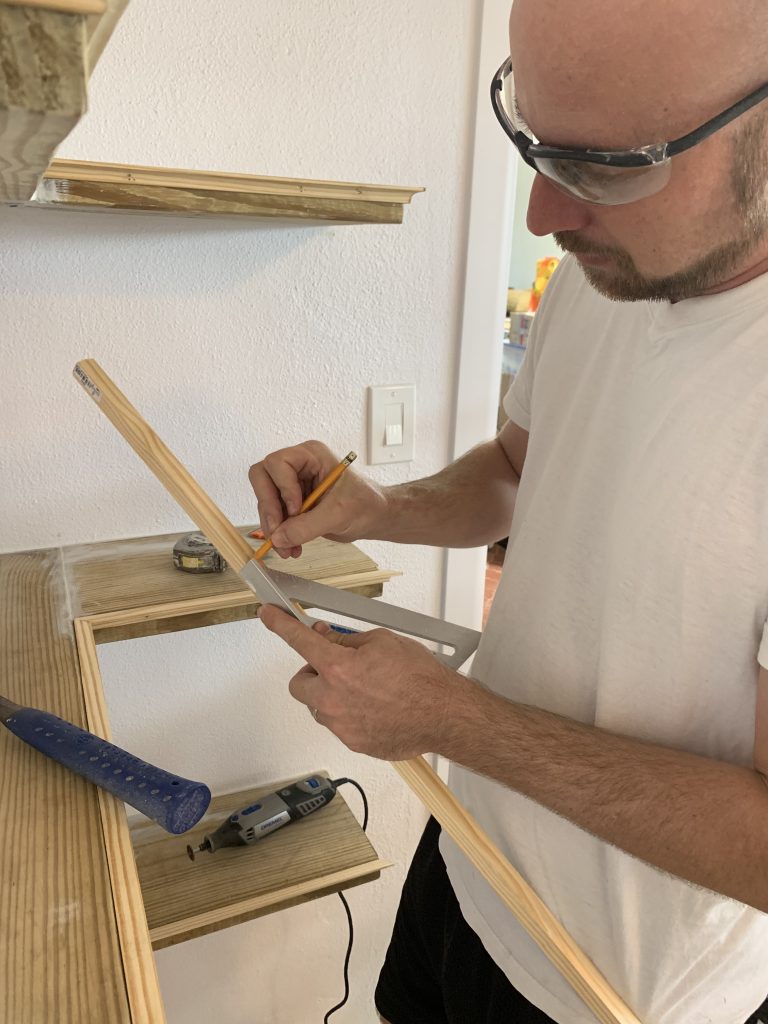
Step 3 – Add Trim for a Professional Finished Look
Trim is so simple to do, and adds so much to the final product. You can buy it super cheap as well. I got some small trim to add to the top edges of the shelves. Simply measure the length of each, and cut the ends of the trim on a proper 45 so that it matches up with the next piece for that corner.
Use finishing nails to attach the trim to the edge of the shelves.
Measure and mark your 45 degree angles for the trim, and then cut with a circular or table saw.Nail up your trim!Pro Tip – use a “Nail Punch” so that you can recess your finishing nails just a tad below the trim surface, without having the hammer hit or dent the trim!
Step 4 – Sand More, Then Paint Your Shelves!
Do a bit of final sanding now that they are on the wall and you can see what needs to be sanded. Do a little final fill with caulking as well if you plan on painting to hide other imperfections, or fill the finishing nail holes for example on the trim.
Paint Paint Paint – multiple coats looks best. Use a primer to start with on the raw wood.
Almost finished Product, still a coat or two of paint to go!The Finished Product!
Day 353 Total Spent So Far: $85,814.47 30 Yard Dumpsters Filled: 3.5
It’s been a while since I last posted. But a lot has happened. The next 4-5 blog posts will be “catch-up” for everything I haven’t written about over the last three months. We’ve been incredibly busy, not only with the remodel, but also with our precious new born son (don’t skip ahead readers!) To top it off, our annual music festival, Backwoods, is quickly coming upon us. All of this combined with our software company PromoJuice growing as fast as it is has stripped me of any free time to write really. So, catch up it is. I owe it to myself, and to our readers following along.
Nursery Before the RemodelNursery Pre-Remodel
As with the rest of the house, Liam’s future room hadn’t been updated since the 70’s or 80’s. The room needed to be done from floor to ceiling, electrical and all. As with every room, we started with the demolition, removing the fan, the old closet doors (that were being used as doors to the room), pulled the mirror off the wall, the bathroom light fixture, and prepped the walls for painting.
Removal of Fan
Removal of Folding Doors
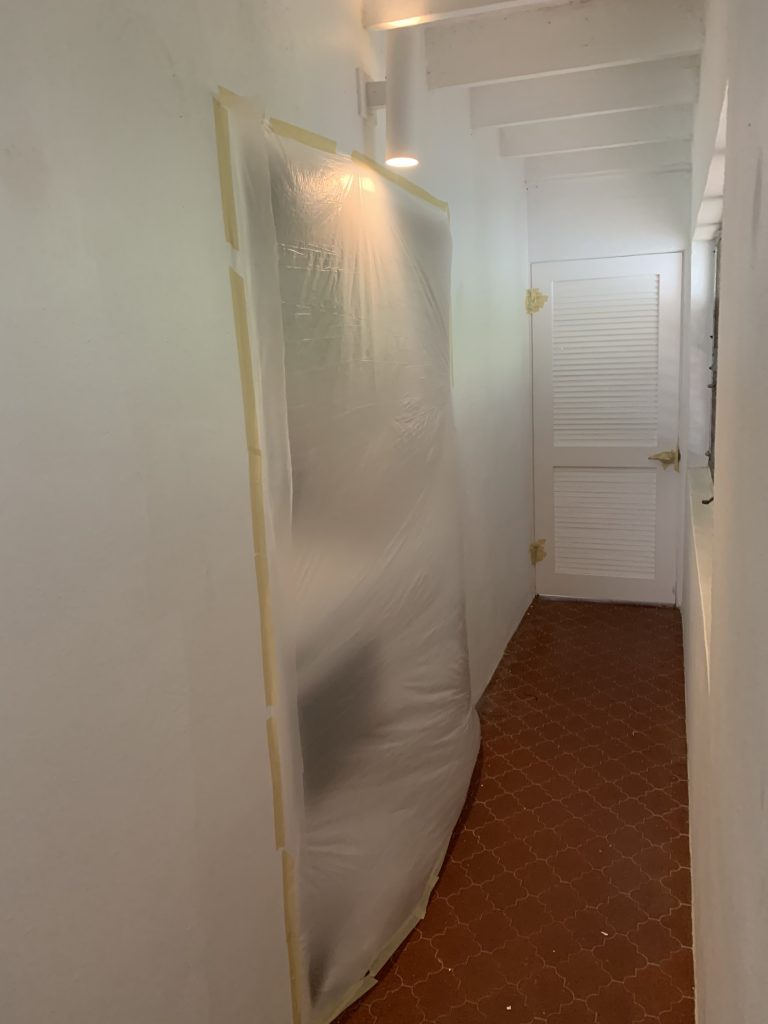
We decided to move forward with remodeling the hallway at the same time as Liam’s room since it connected our bedroom, which we had already painted, completed electrical, and ceiling work in. So the very first step was painting both the nursery and the hallway.
Covered from the Sprayer
Painting Hallway
To speed up the process I used a paint sprayer, which is messy as hell, but gets the job done incredibly fast. You really have to make sure EVERYTHING is out of the room which you don’t want paint on, or at minimum covered. Don’t be surprised if it gets under the cover still. We plastic sheeted off every opening to the other rooms we didn’t want paint on.
Building Floating Shelves
I decided I would build some floating shelves in Liam’s room, after Shaleece presented me with the idea, and as with everything told me, “Come on, you can do it. It will be easy for you!” They actually turned out really awesome, and I documented the entire process; so, I’m going to put up a post dedicated to “How to Build Floating Shelves” in case any of you want to try your hand at some carpentry for the next article as a side bar to our remodel progress.
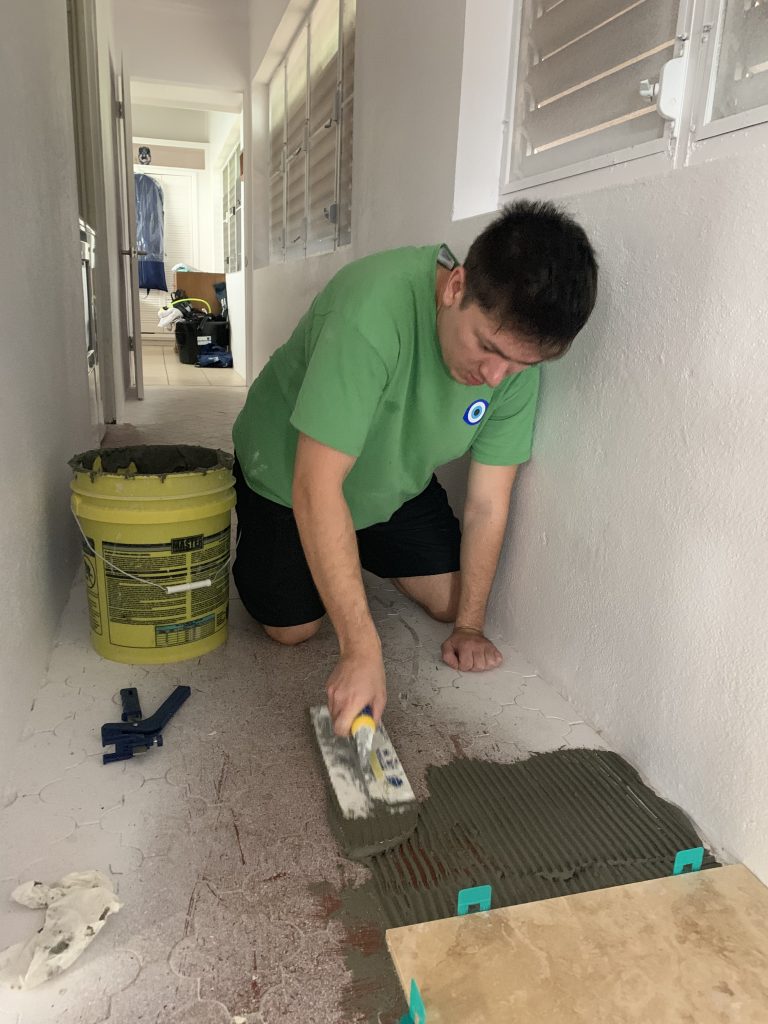
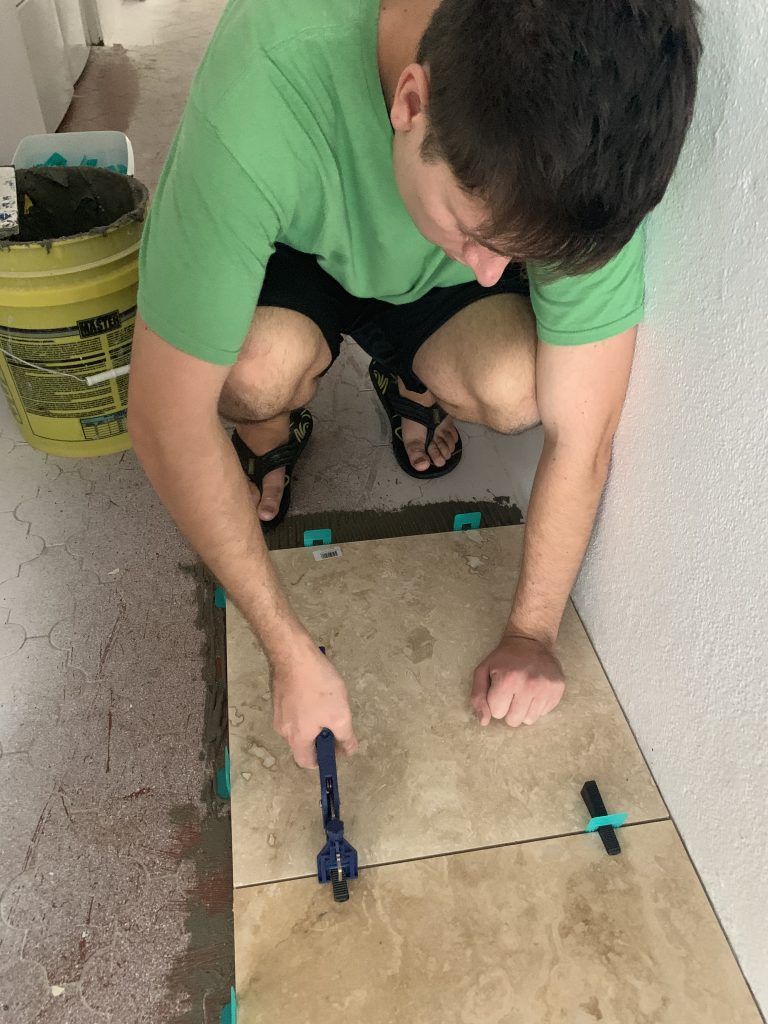
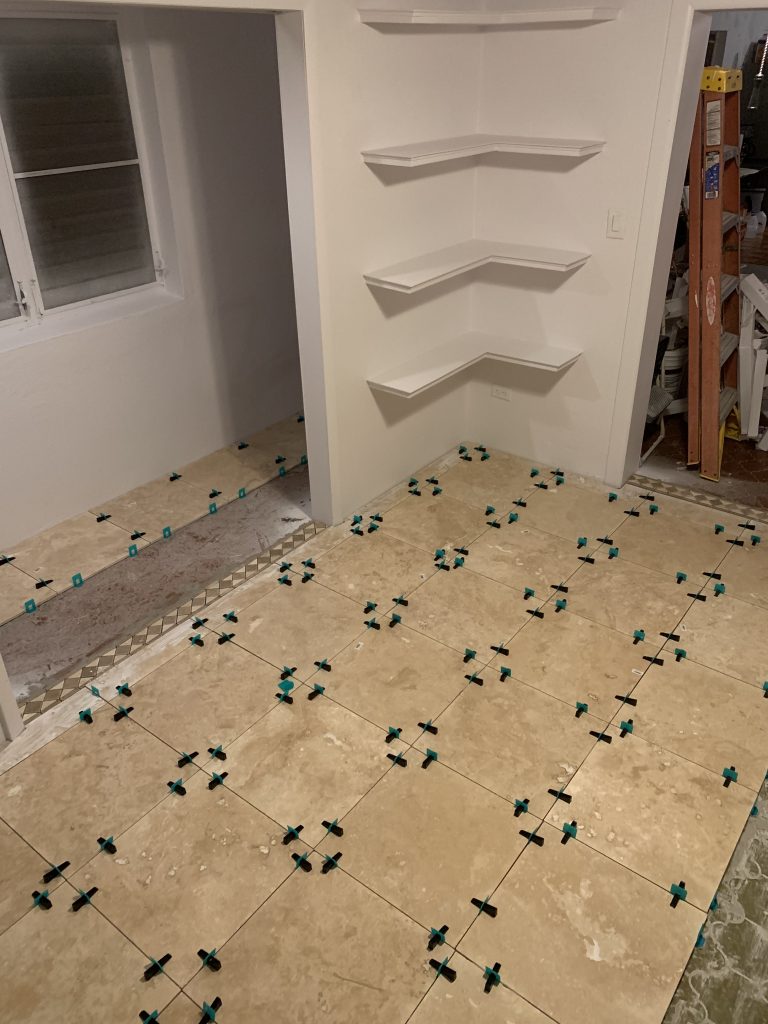
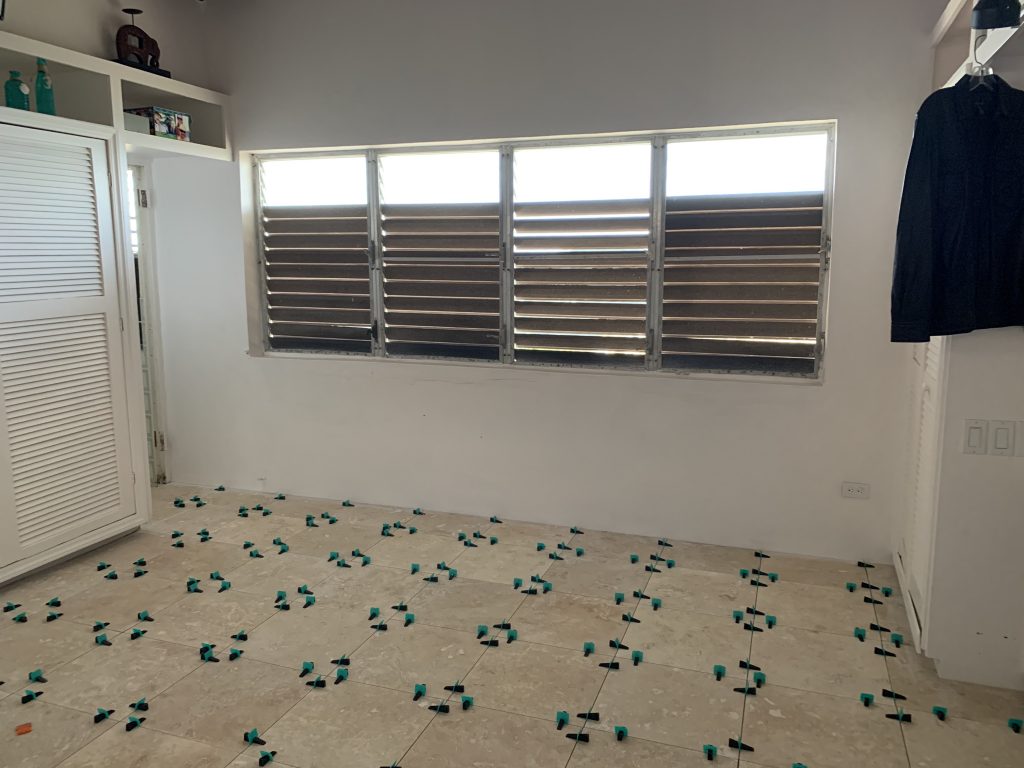
After the shelves were done, and room painted, besides some minor electrical and fixtures work, the flooring was the next major job to tackle. I learned a thing or two in my day about laying tile (this isn’t the first house I’ve laid tile in) and the best advice I can give is to spend the extra money on a Floor Leveling System. It keeps any “lippage” from occurring by simultaneously lifting the tile from the bottom, and squeezing down on it from the top, at the corners where multiple tiles meet. Basically, if you’ve ever seen a room where the tile edges are at different heights (causing edges) it’s because they didn’t use one of these systems and probably used the good ol’ regular spacers. It’s almost critical in a house like ours where you have multiple types of flooring meeting up in different areas at slightly different heights.
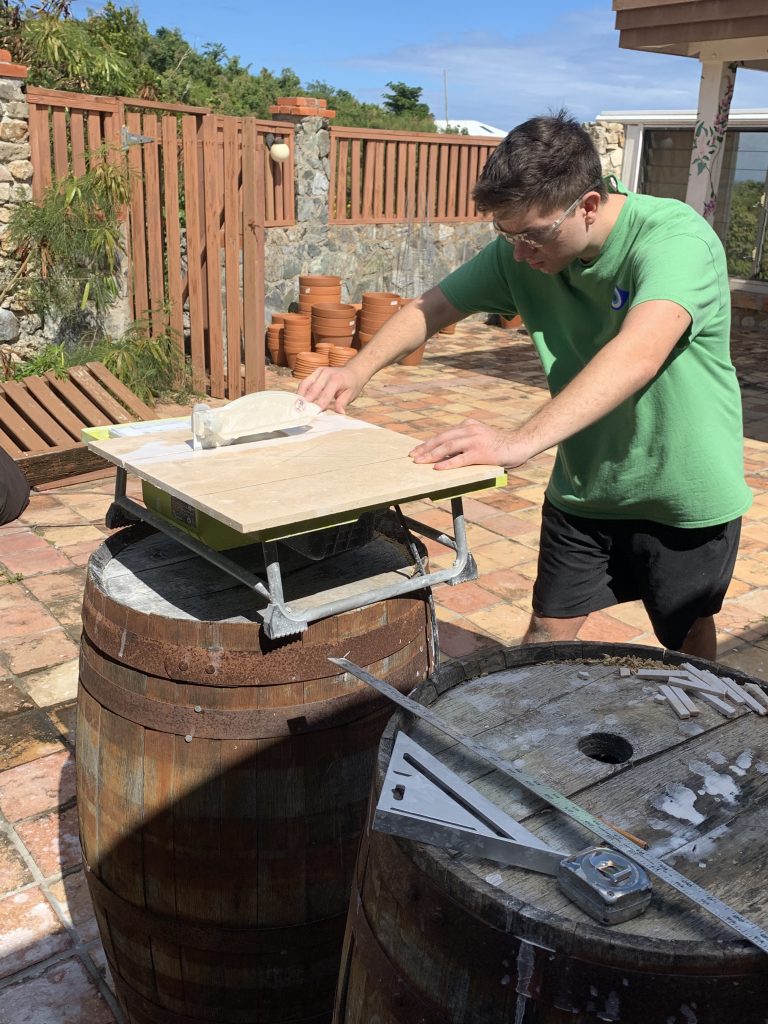
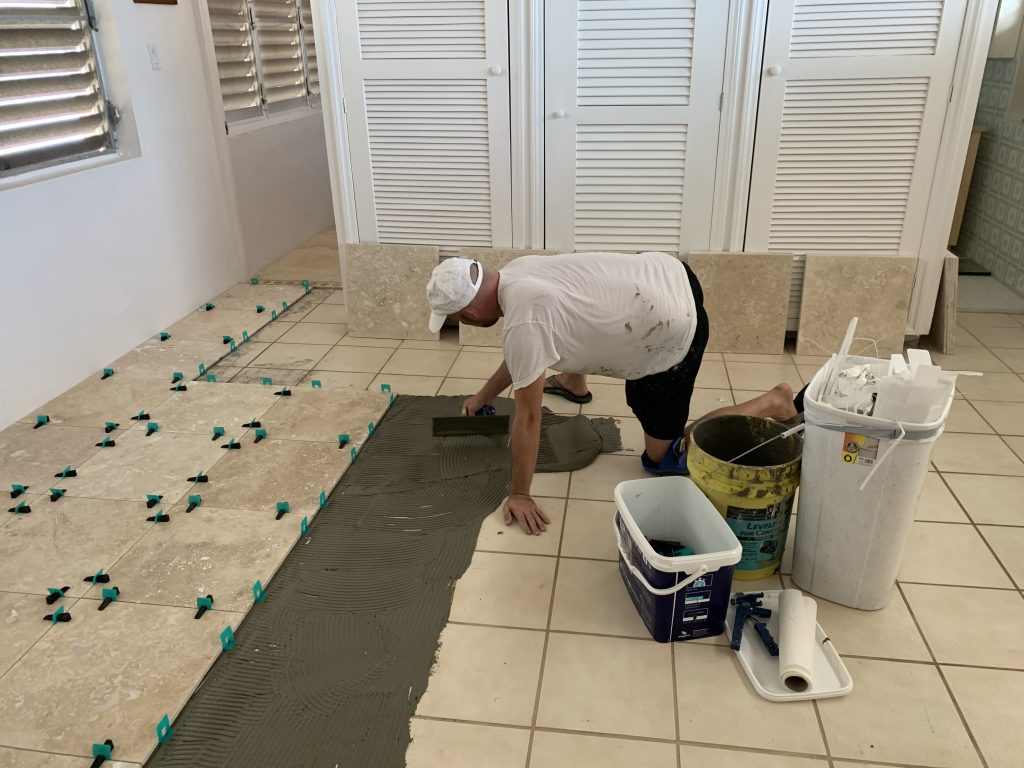
Sebastian learned a thing or two about tiling and helped as well. He got an opportunity to use the tile saw, lay some mortar, and throw a few tiles into place. He did great for his first go-around.
Sebastian Laying Tile
Using the Self Leveling System
Sebastian on the Tile Saw
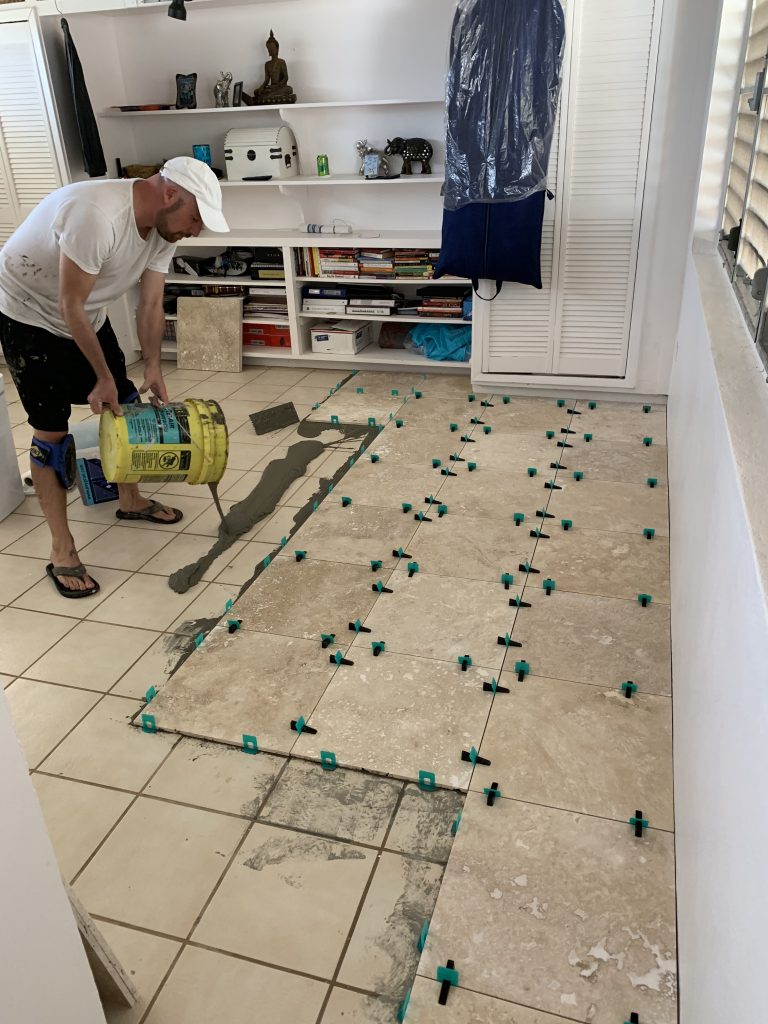
Half Way Done in Liam’s Room
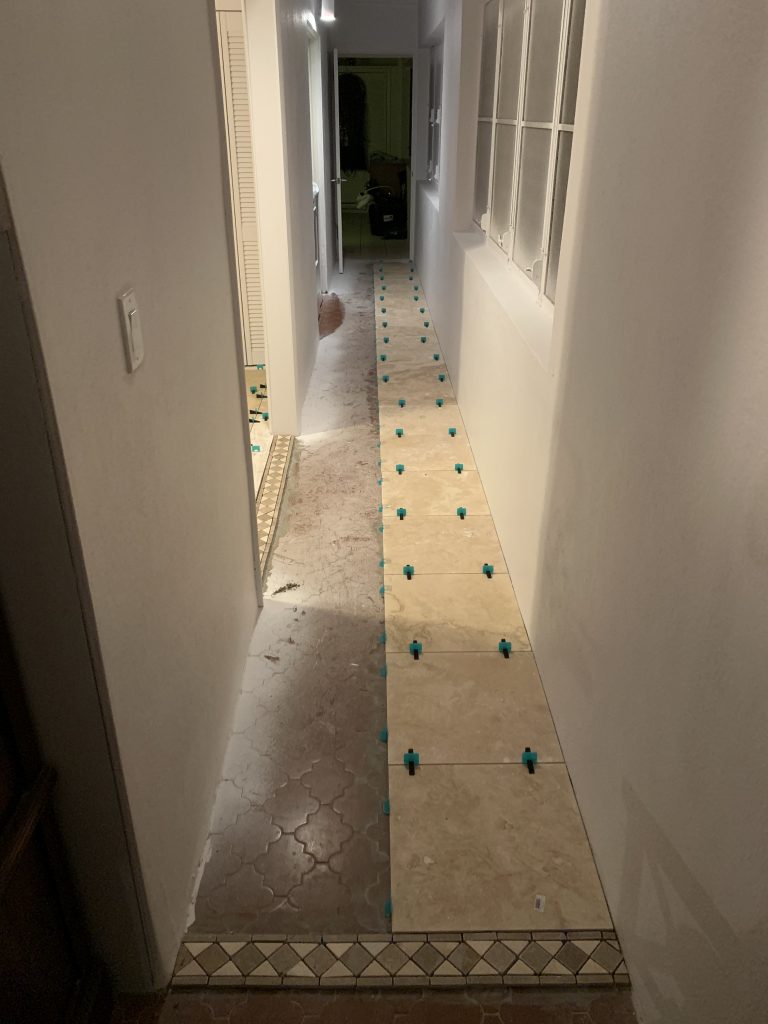
Tiling Down the Hall
Tiling into the Master Bedroom
Still Going…
Half the House is Tiled!
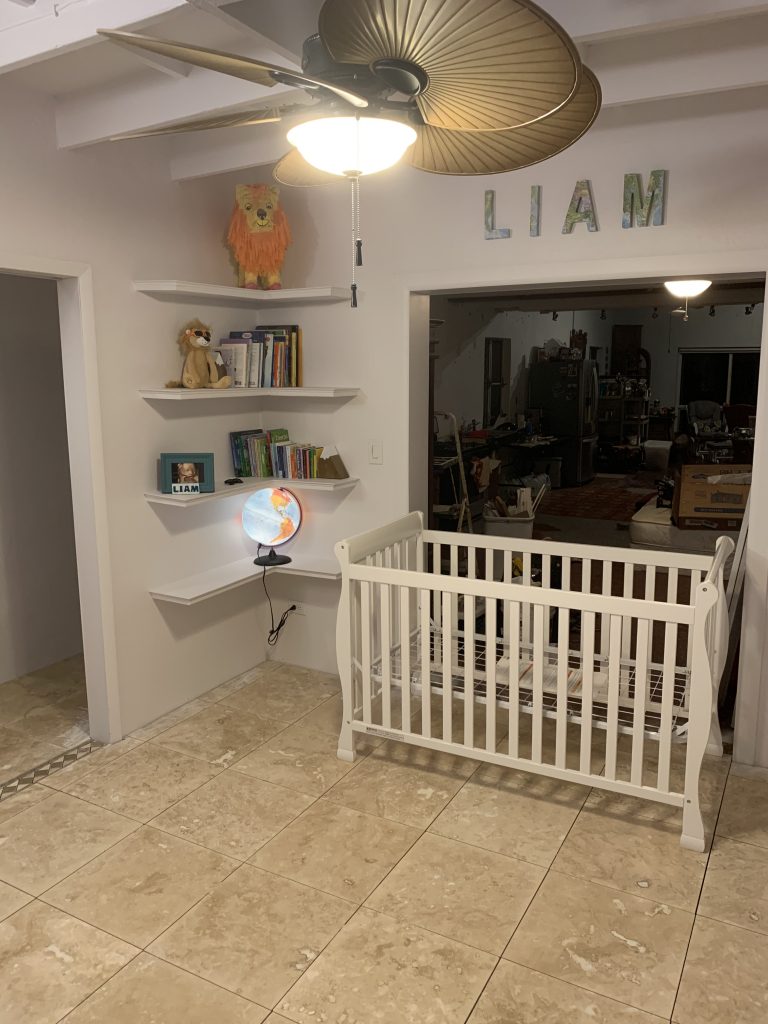
We more or less finished up in Liam’s room with the exception of the windows and the barn doors which have been on order. The photo doesn’t show the grout, but that’s been complete as well. I’ll be sure to post some final photos of the room once the barn doors are up and the new windows are installed… “Soon Come” as they say on the island. Liam will be here soon, and we can’t wait…. well actually I’m playing catchup and most of you guys know he’s already here… but that’s what I was thinking at the time I actually took this photo… 🙂
Liam’s Room (Minus the Barn Doors and Grout.)Liam’s almost here!