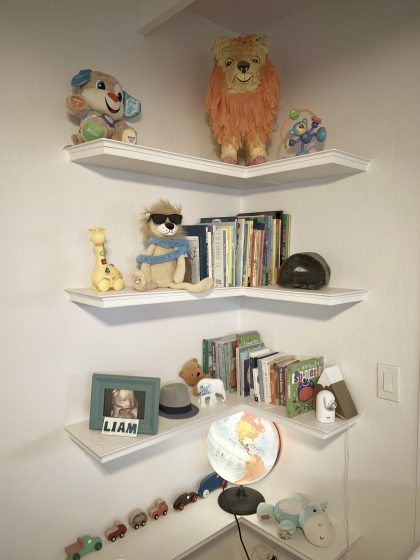
Liam’s nursery was pretty bare, so we wanted to create some built in book shelves for his giant library we got from friends and family at our baby shower. (A great idea by the way: have your friends and family sign the inside cover and bring a book, rather than a card to your shower.)
Here’s how I built his floating shelves to appear to have no support underneath, and still hold the weight of all his books.
Step 1 – Cutting and Drilling the Shelf Supports
After measuring out the length of the shelves you want (I did mine in an L shape for the corner of the room) measure out the 2×12’s to length and cut to size.
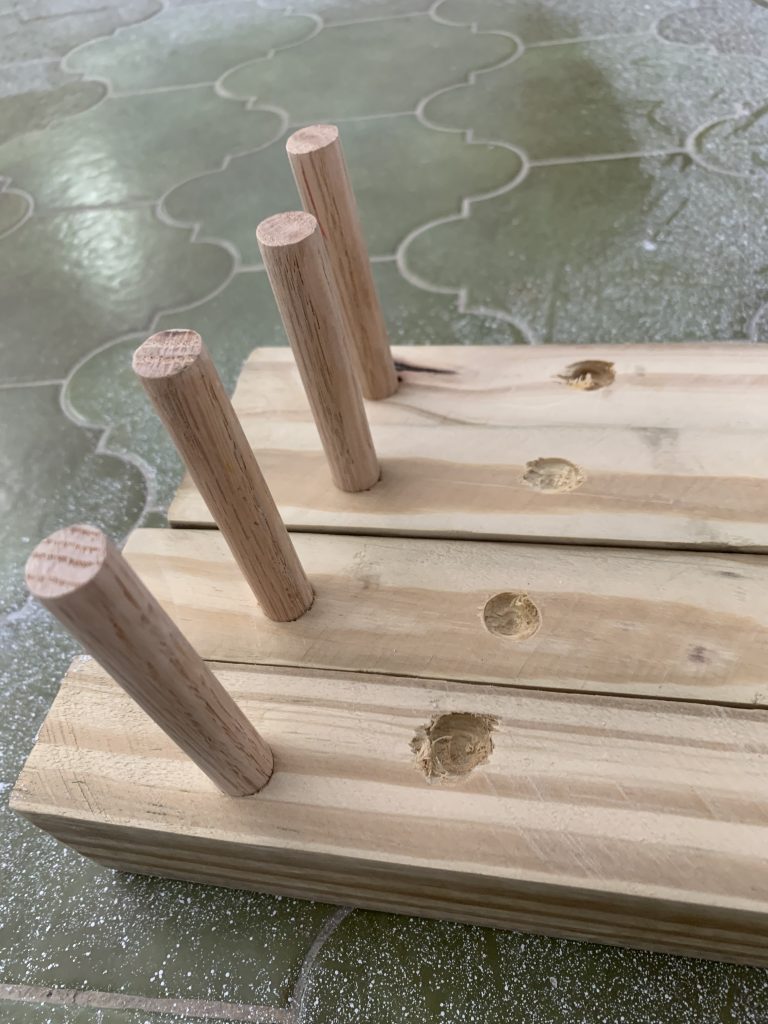
Once cut to size, you’ll want to drill a 1/2″ round hole at least 6″ deep on each end of the shelf board, and if the shelf is longer than 2 feet, every 2 feet or so. This hole will eventually have a 1/2″ dowel inserted that will support the shelf to the support you attach to the wall. It’s critical that these holes are square to the flat surface of the board… if they are not, the dowels could end up opposite angles of each other, and when you try to insert the shelf onto the support, it will bind up… You may not understand what I’m talking about here yet, but just know you need to make sure that hole is completely squared to the board and perfectly straight!
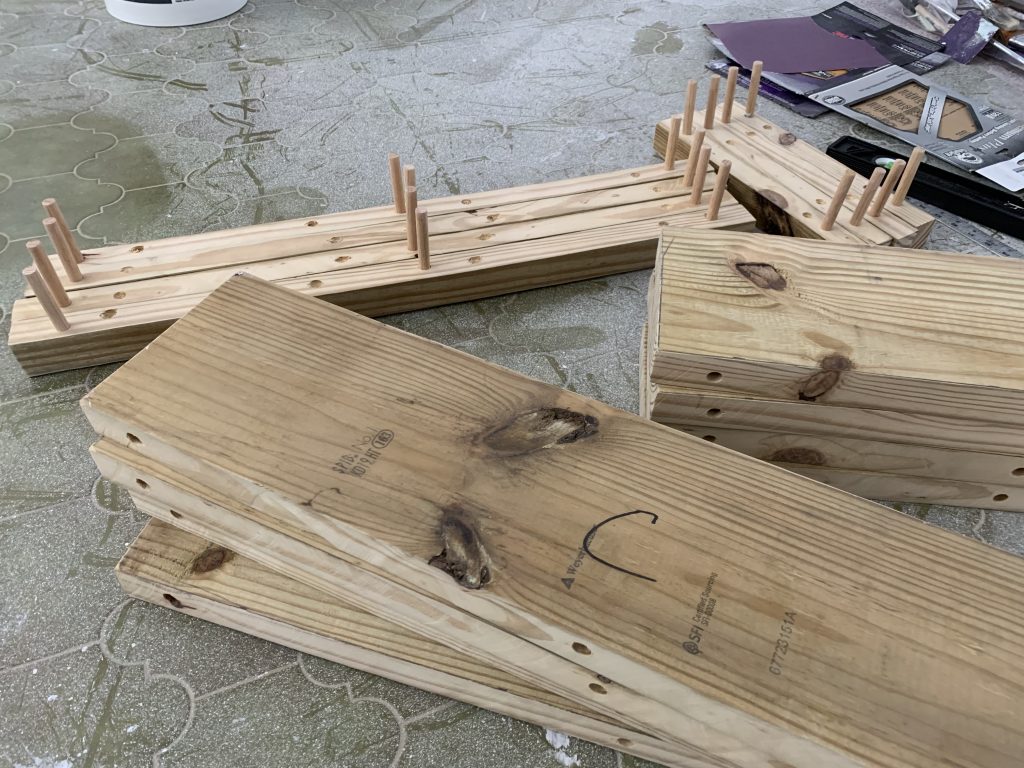
After drilling your dowel holes, cut a strip off the side of the 2×12′ that you drilled into at about 2″. This will be your wall support and is the magic behind floating shelves. Your end result should be about a 2″ square piece that is as long as your shelf with a 1/2″ hole all the way through it at it’s ends (and maybe in the middle depending upon length), and the remaining 2×12 (now 2×10) which should still have 1/2″ holes about 4″ into it. Cutting after you drilled the dowel holes ensures they will line up perfectly later when you put the two cut pieces back together. Label the supports with the shelf you cut them from, so you know which ones go together.
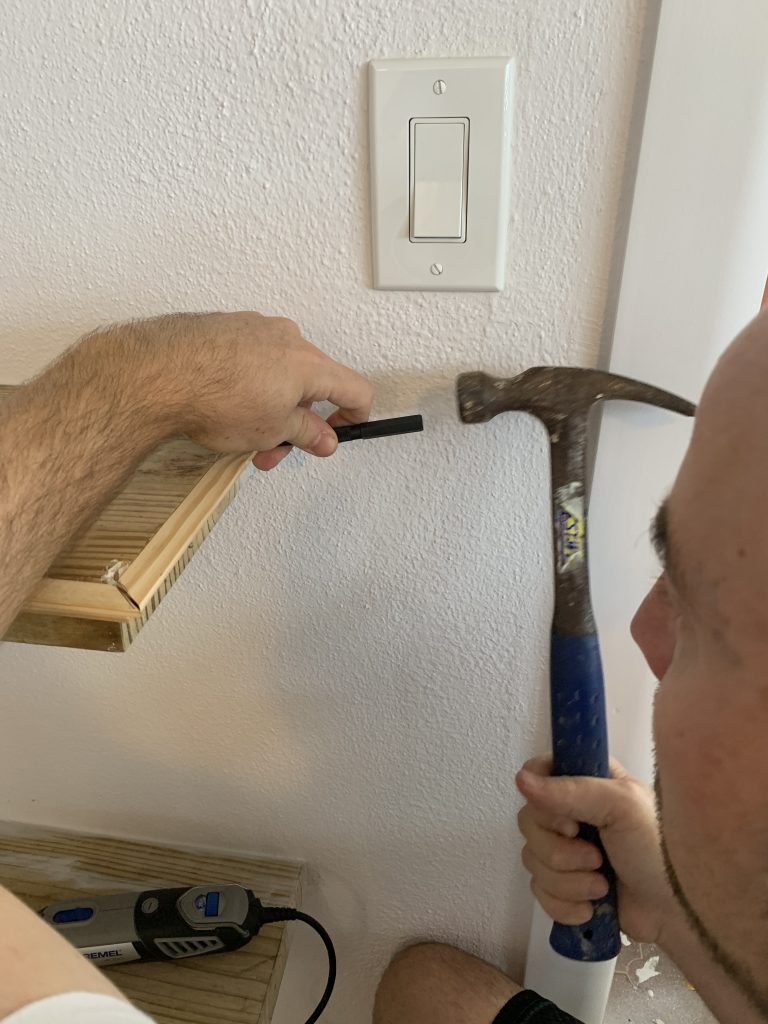
Next, on the inside (where the saw blade was cutting) of the small 2×2 support piece, you’ll want to drill some recessed holes (only 1/4″ deep) where you will later screw these to the wall, and that will recess your screw head so it doesn’t get in the way when you attach the shelf.
Finally, cut your 1/2″ dowel into 5 7/8″ pieces so they will fit into your 6″ holes and not stick out. Sand everything including the dowels EXCEPT the cut side of the shelves and cut side of the wall supports where they separated originally. If you sand these, when you put them back together, they will not line up flat, you will have a small dip in your shelf, and the connection points will be obvious defeating the magic of floating shelves.
Insert the dowels into the small support 2×2″ so that they are sticking out of the end that has your recessed 1/4″ screw holes. The picture below of what your finished product should look like for the shelve wall supports.
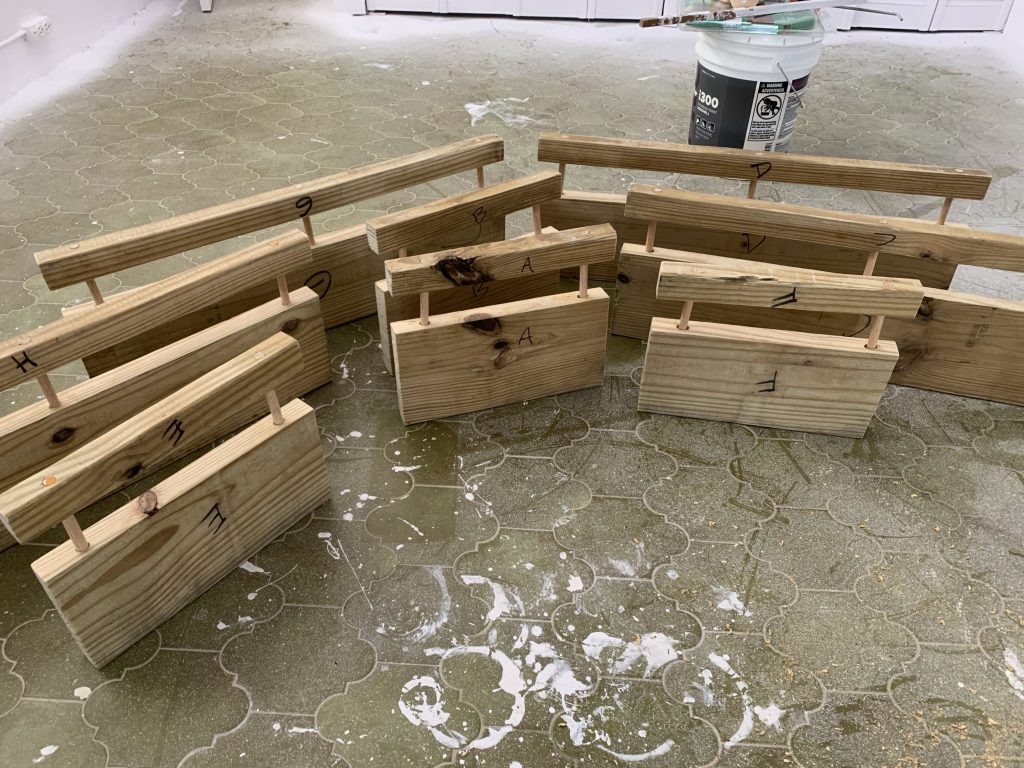
Step 2 – Attach the Wall Supports to the Wall, and Slide On Shelves
The short of this step is to attach the wall supports to the wall by inserting screws into the recessed screw hole areas you created, so that the dowels are sticking out from the wall.
To do so with anchors into drywall, you’ll most likely want to drill a pilot hole all the way through your recessed screw area on one side of the wall support first. Then remove the support, and place your anchor into the drywall or plastered wall. Next replace the support once again and insert your screw into the anchor holding one side of the support onto the wall – just not too tight, so that it can swing down and out of the way as needed.
Get your level out and make sure the shelf is completely level on the opposite end that hasn’t been screwed into the wall yet. Once level, drill your pilot hole to the wall to make your mark for your next anchor. Let the wall support hang down from the one attached end so it’s out of your way to insert your anchor. Once done, swing back up the wall support and insert the screw. Your shelf support should now be attached to your wall! (Note if you have more than one area to screw the support into the wall, which I suggest at least in between each dowel, you may need to drill more pilot holes and add more anchors before securing each end.)
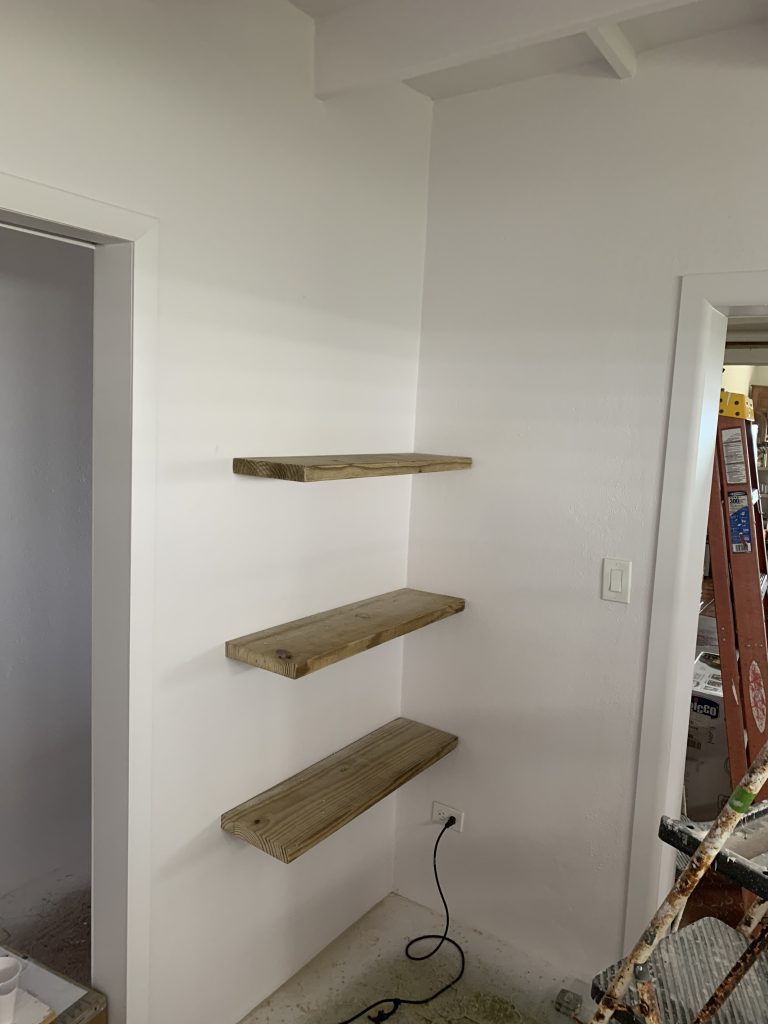
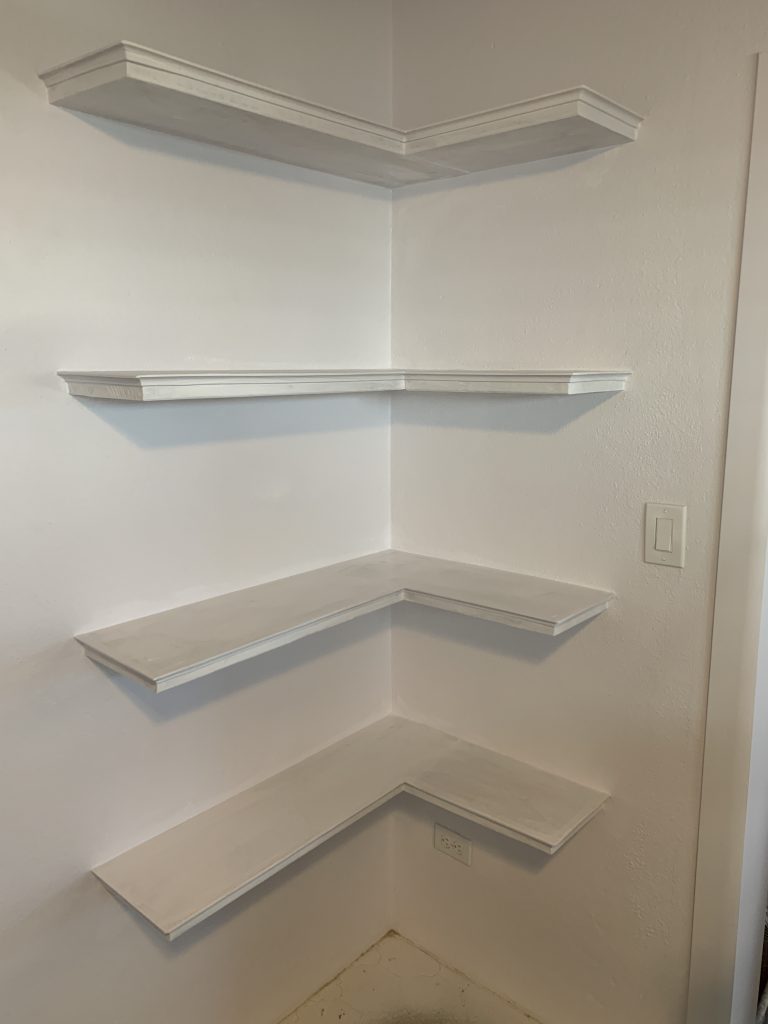
Finally, you can slide your shelf onto the wall support by inserting the dowels sticking out from the wall into the shelf. Below is an image of the shelves attached to the wall supports and on the wall!

Step 3 – Add Trim for a Professional Finished Look
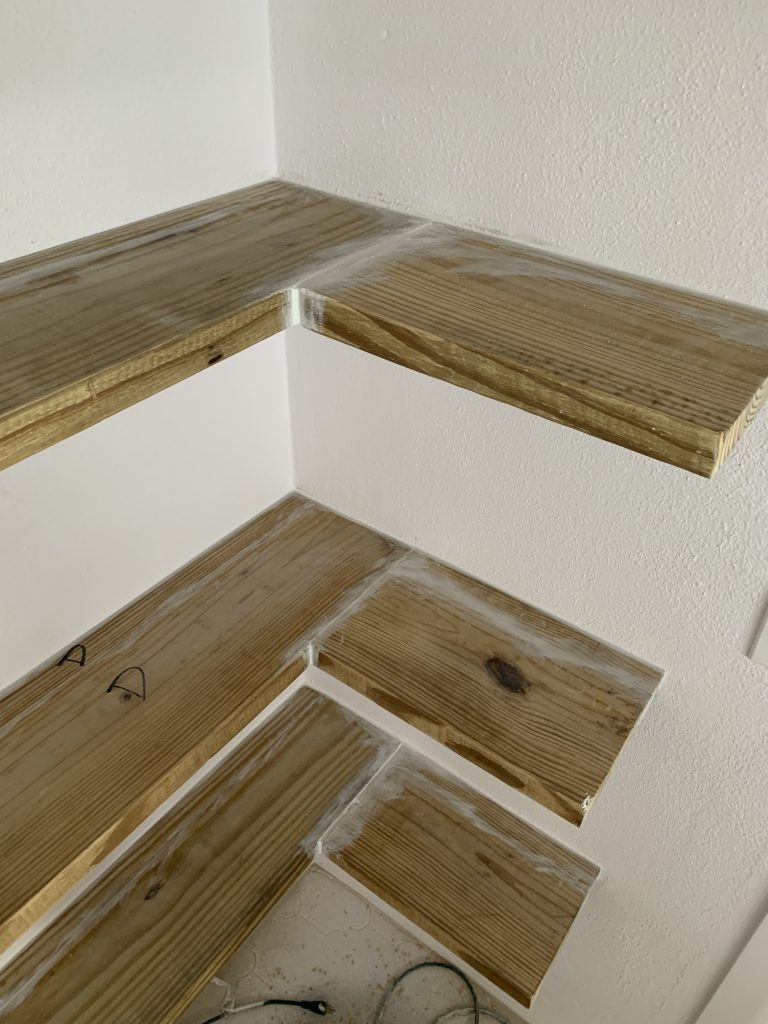
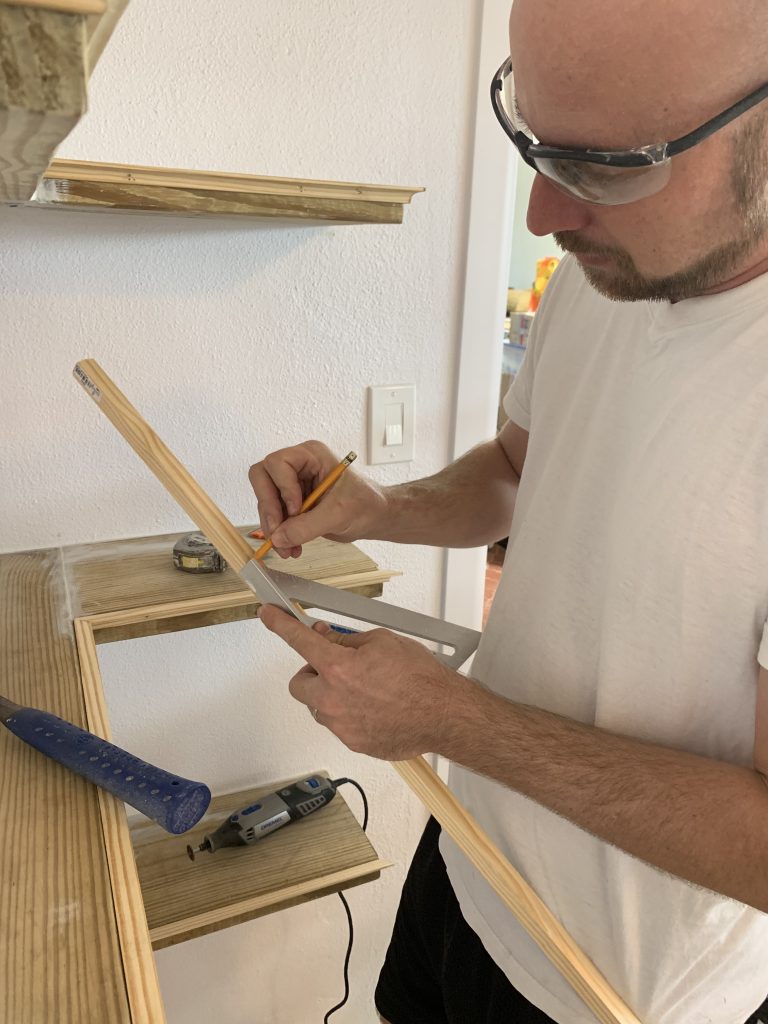
Trim is so simple to do, and adds so much to the final product. You can buy it super cheap as well. I got some small trim to add to the top edges of the shelves. Simply measure the length of each, and cut the ends of the trim on a proper 45 so that it matches up with the next piece for that corner.
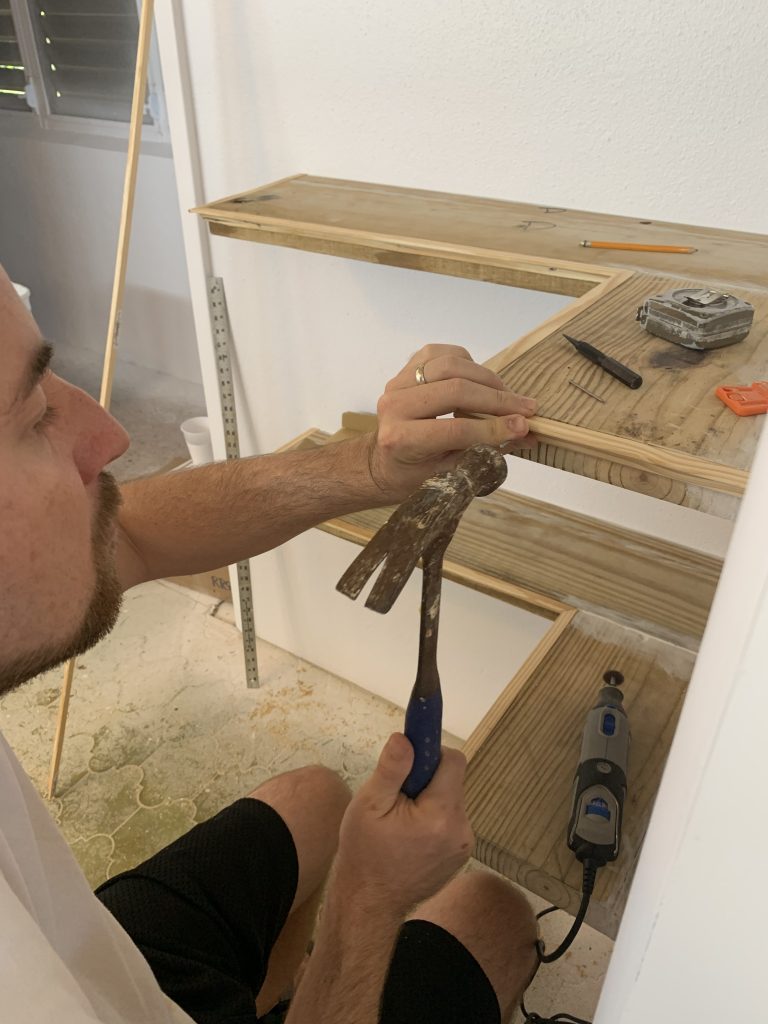
Use finishing nails to attach the trim to the edge of the shelves.
Step 4 – Sand More, Then Paint Your Shelves!
Do a bit of final sanding now that they are on the wall and you can see what needs to be sanded. Do a little final fill with caulking as well if you plan on painting to hide other imperfections, or fill the finishing nail holes for example on the trim.
Paint Paint Paint – multiple coats looks best. Use a primer to start with on the raw wood.

Step 5 – Go to the Beach