We recently invited Shane LeBlanc of Selective Designs to fly out to St. Croix and spend the afternoon with us discussing the design and our dreams for our outdoor living space, pool, and major remodel to the structure of our house by adding a wrap-around gallery style balcony. We had all sorts of ideas, infinity edge on the cliffside, lowered bar on the cliffside with multiple levels of decking, fire pit, lounge space – lots of lounge space, wet deck, outdoor grille and kitchen area, and a room for my scuba gear easily accessible from our Jeep for cleaning, rinsing, drying, and storage.
Shane is an award winning globally known pool and landscape designer. His work is simply incredible. When he saw where we were, he immediately wanted to do the project because in his words, “With this view we can create an award winning pool, and that’s what I do, award winning pools.”
When he got to the house, Shane seemed to grab our vision immediately, and snapped some photos of the house and surrounding views. I sent him our survey so he had the setbacks and exact dimensions of the current structure. Honestly, for as short of a time as he was here (maybe an hour or so), I was a tad worried he wasn’t going to be able to have all he needed to create the design.
Boy was I wrong.
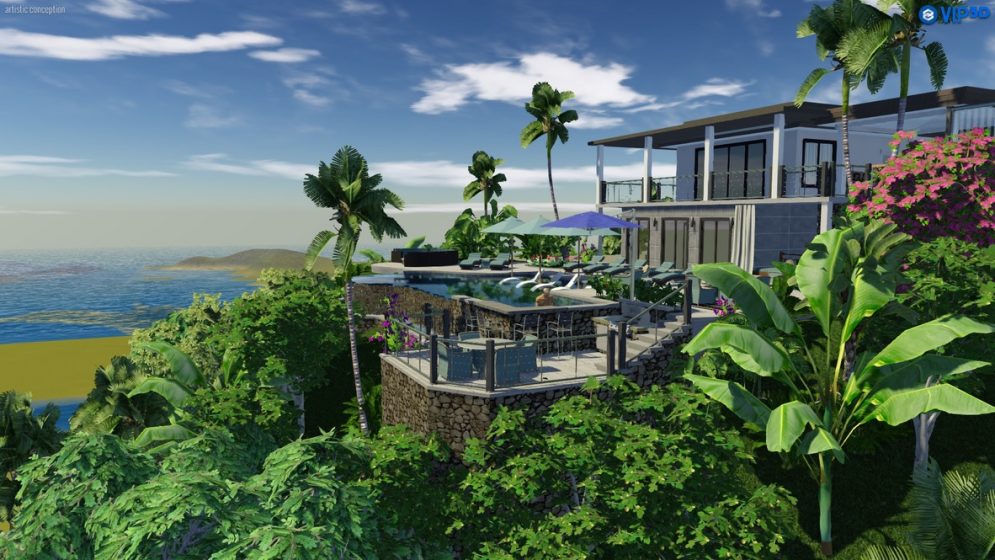
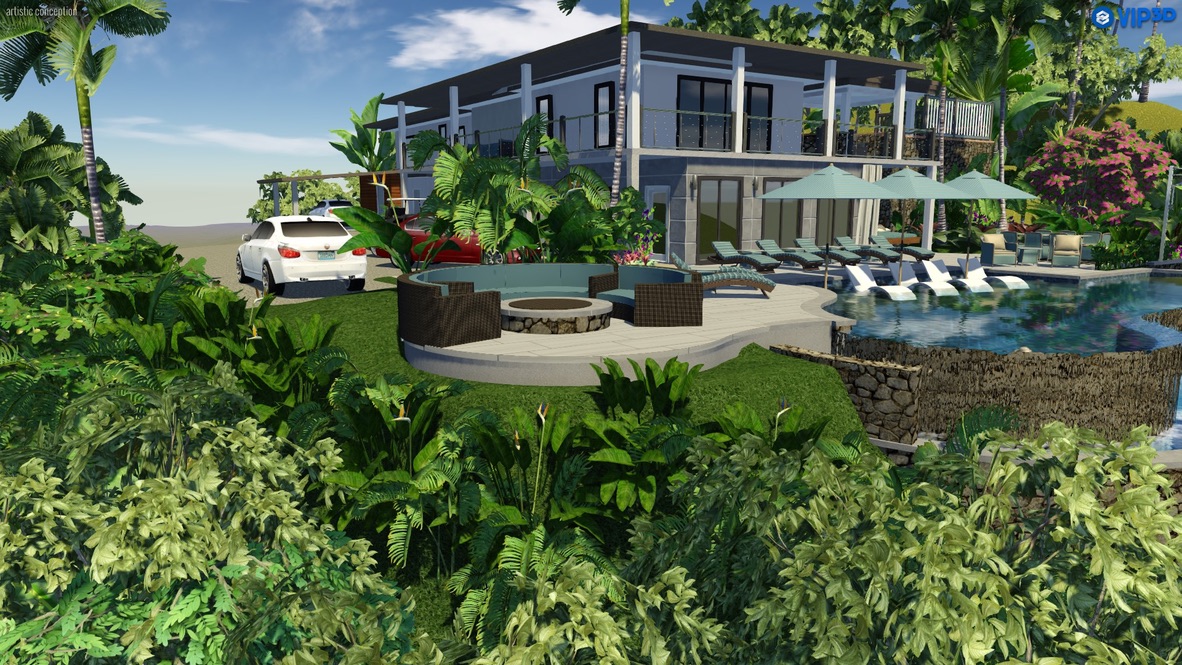
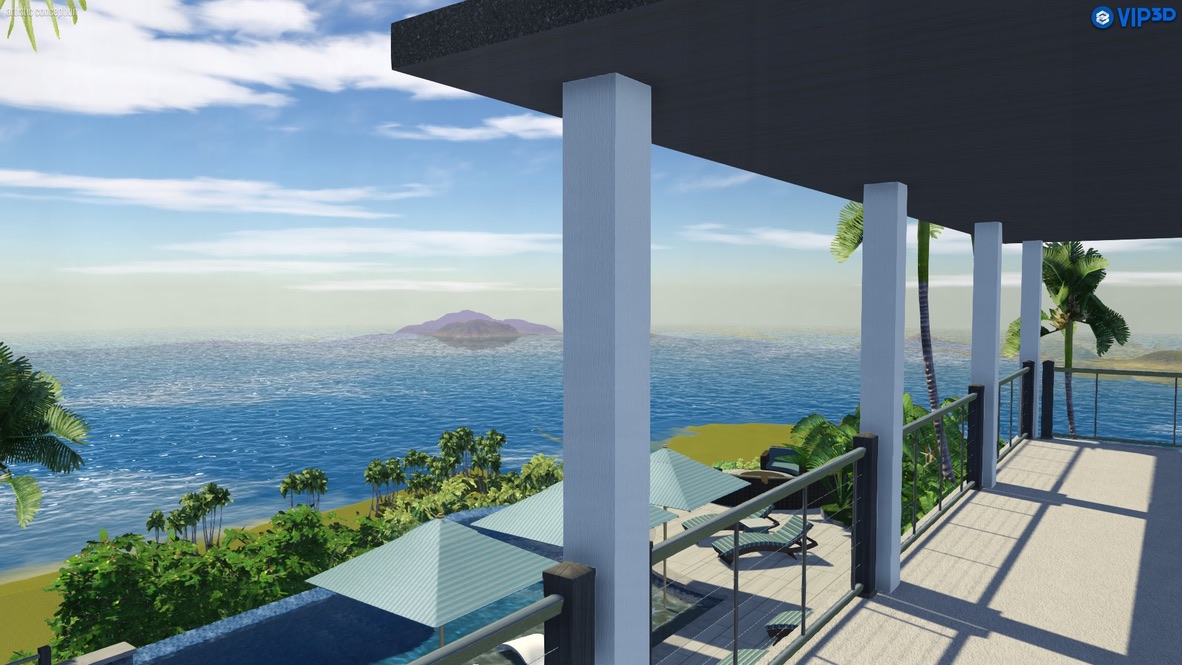
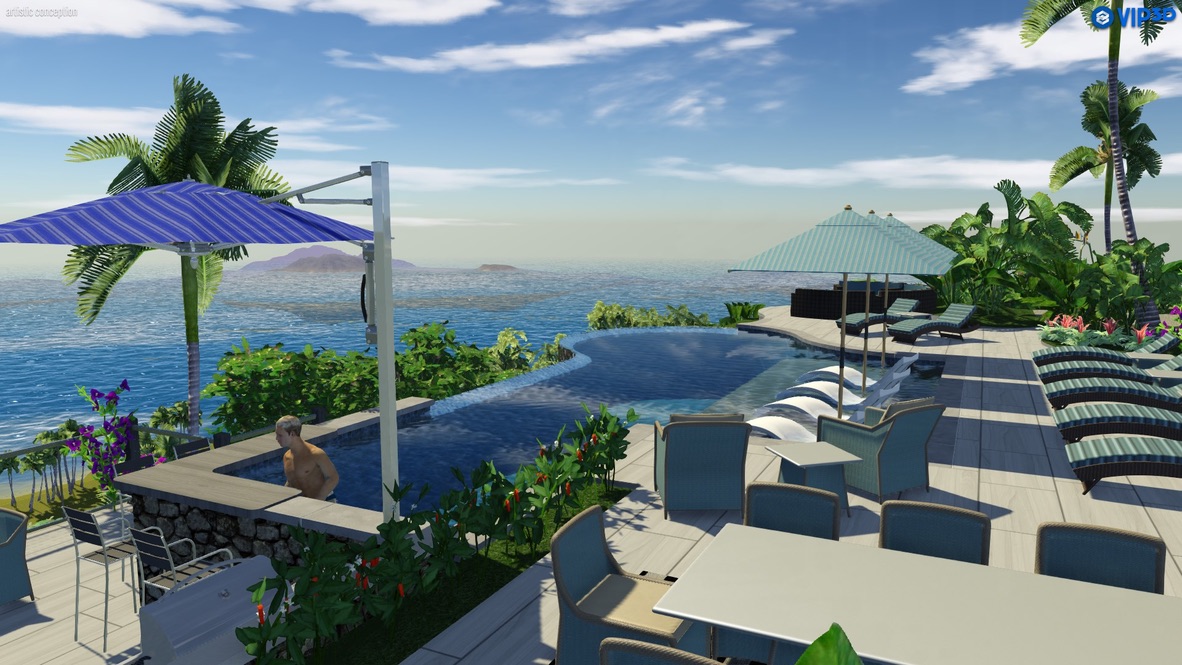
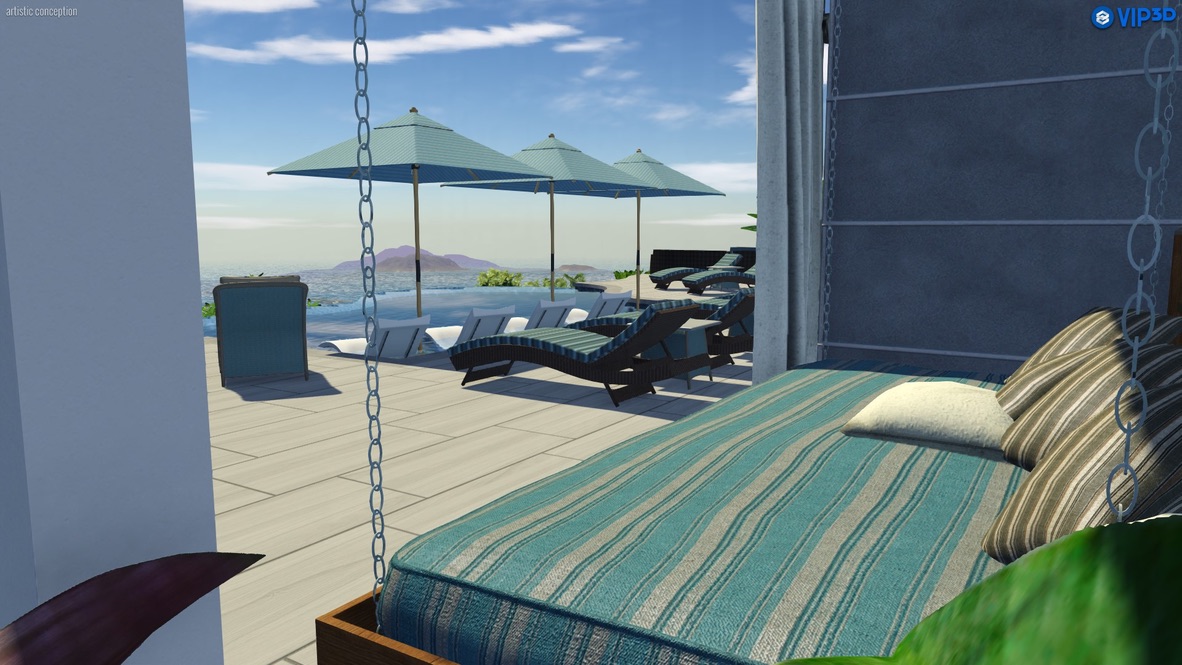
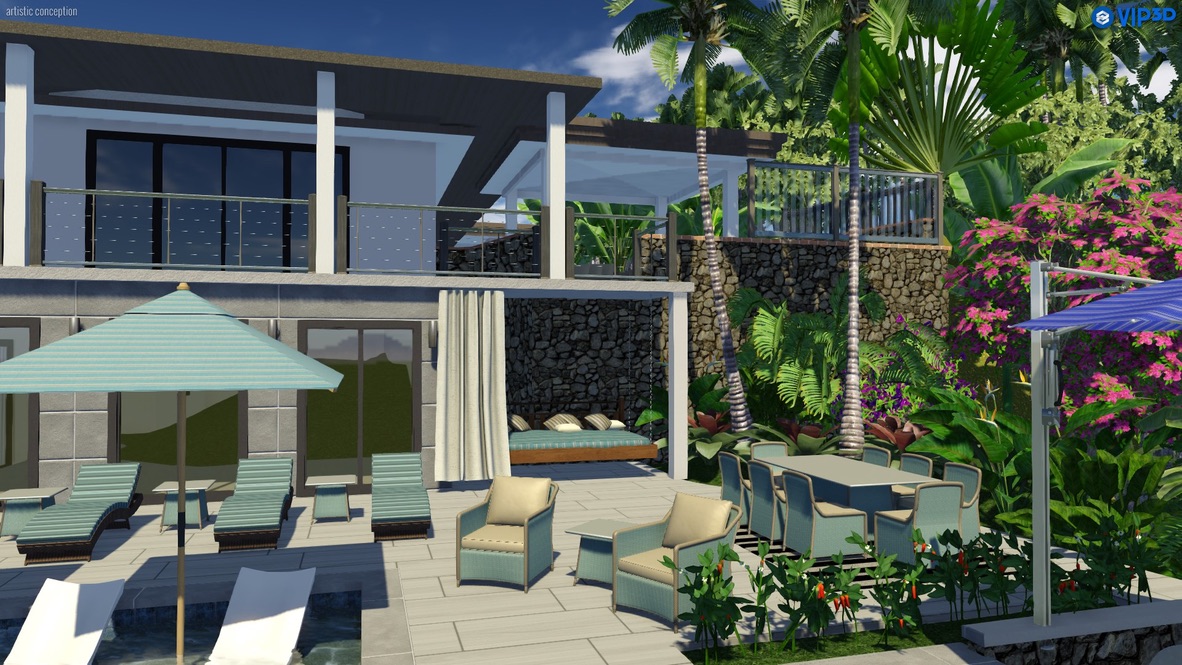
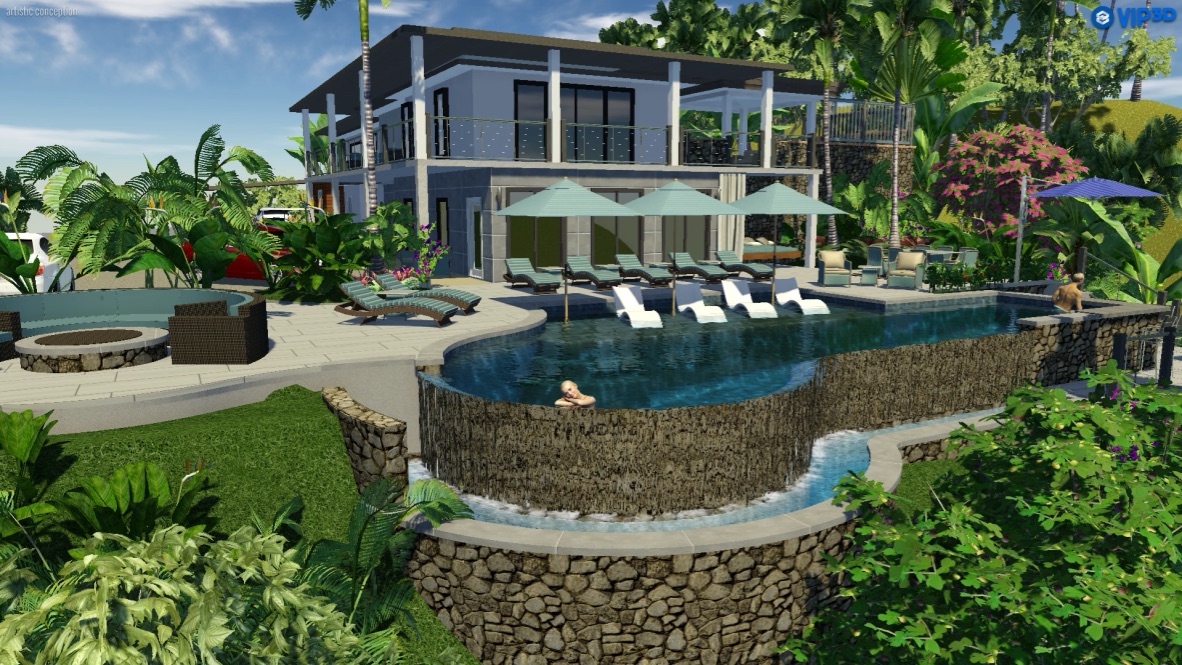
The design he sent over captured our vision almost perfectly! Sure, some doors are going to look a little different, maybe a plant or two, and who knows on the colors, but more or less everything is sitting in its place! It literally IS our dream backyard! He not only did the 2D drawings, which we’ll now be taking to contractors to bid the project, but a 3D model of which we got lots of still shots and a fly-through video to really show off the idea. We now have our eye literally on the prize. If only we could speed up the next two years that it will take to build it. So, who’s coming to visit?
Pool and Balconies 3D Video Fly Through
3D Rendering Still Images
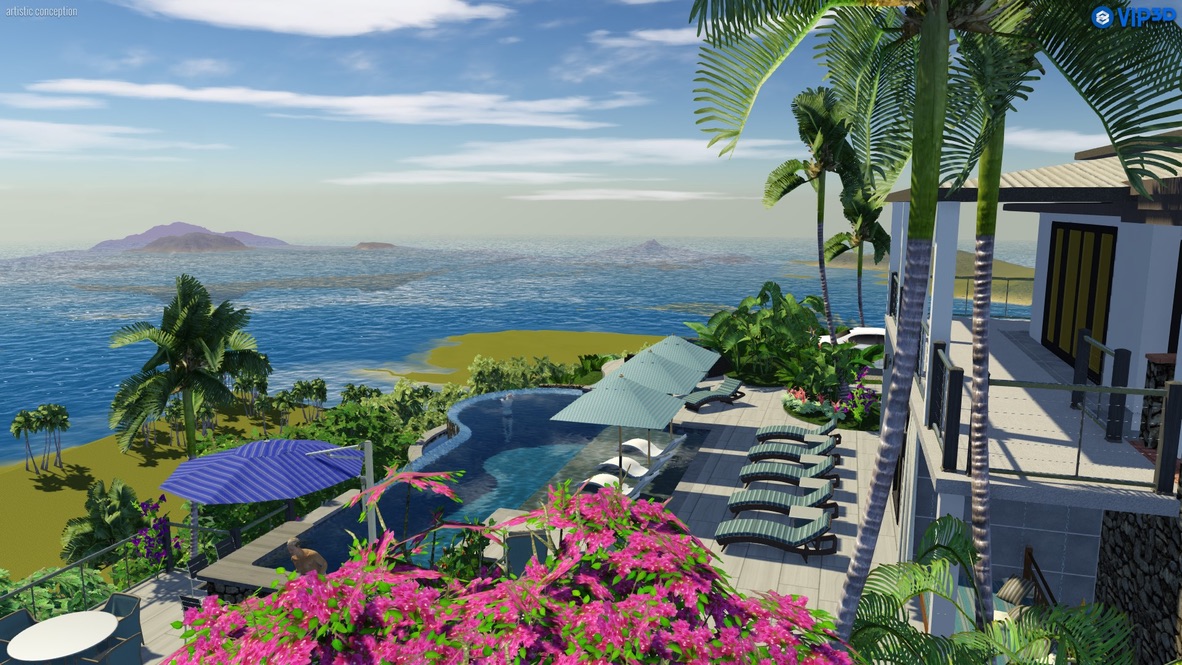
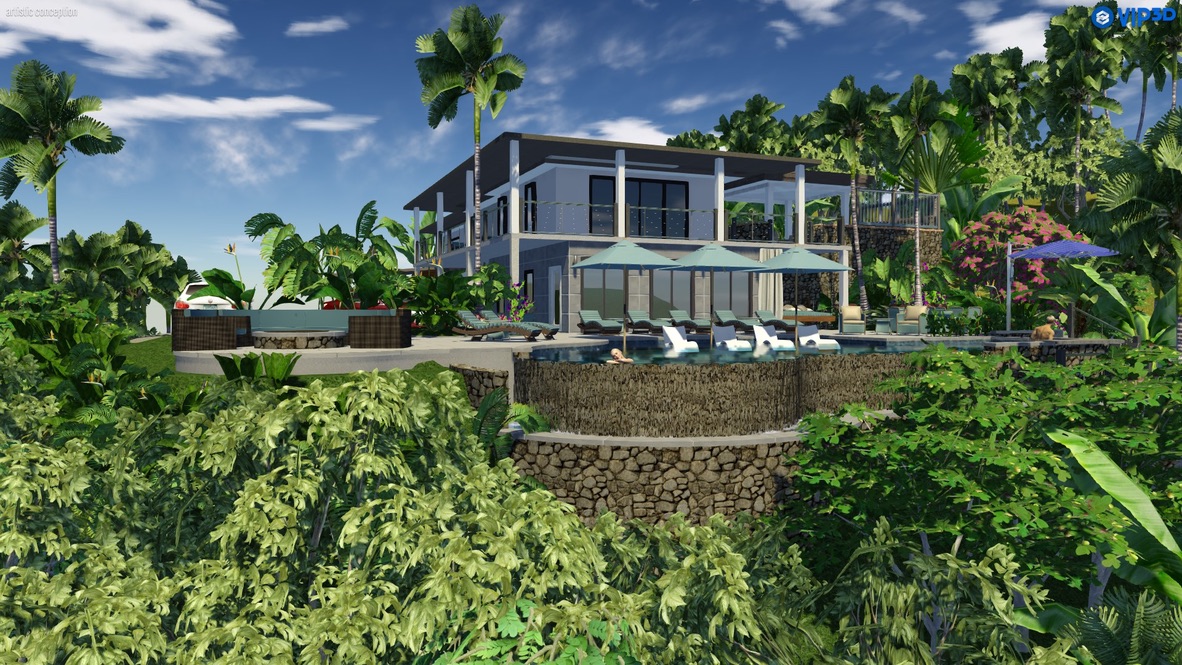
View from Above Facing South East
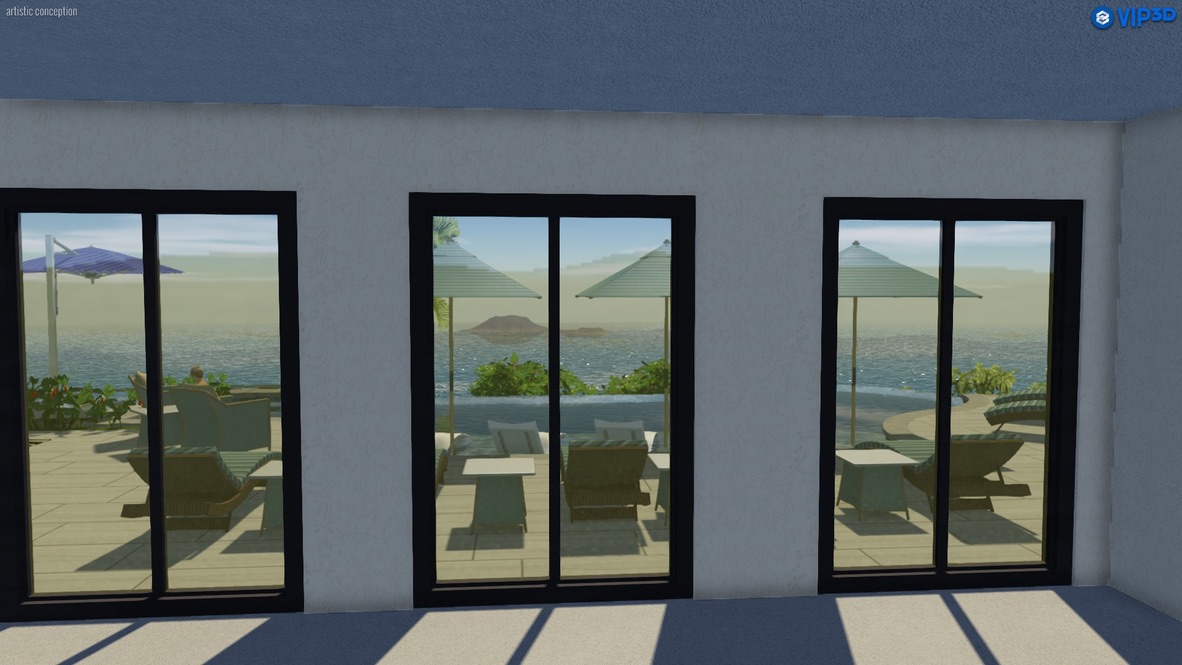
View from “The View” Villa
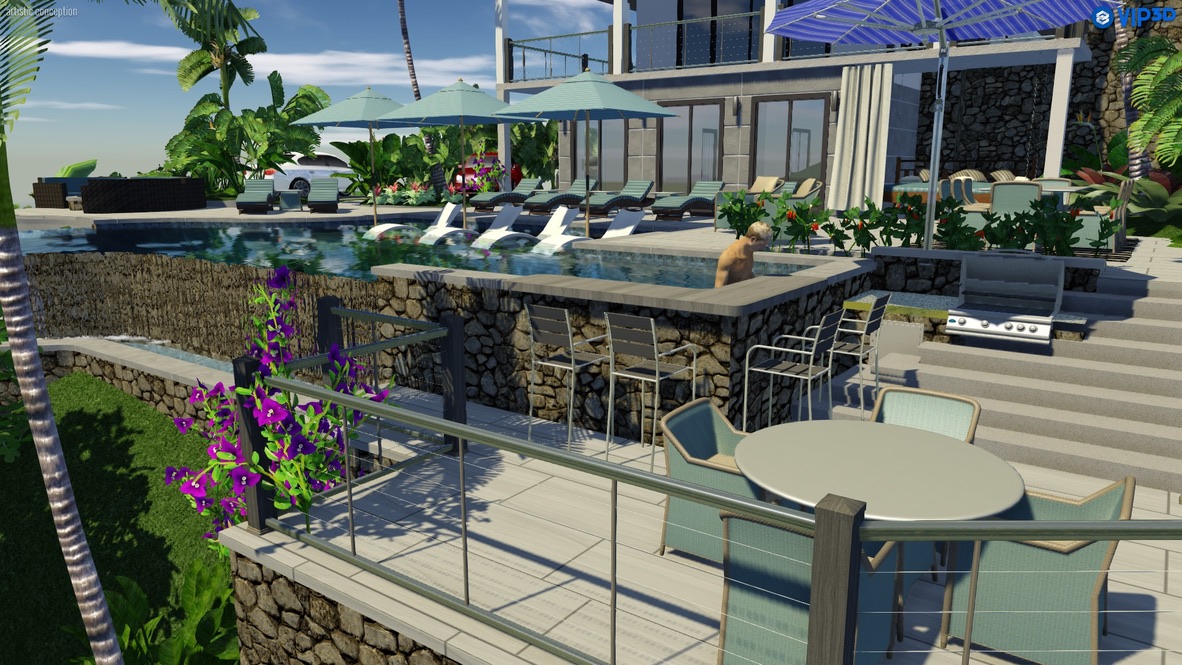
View Facing South of Pool Side from Bar
View Looking up at Lower Deck and Bar Facing South West
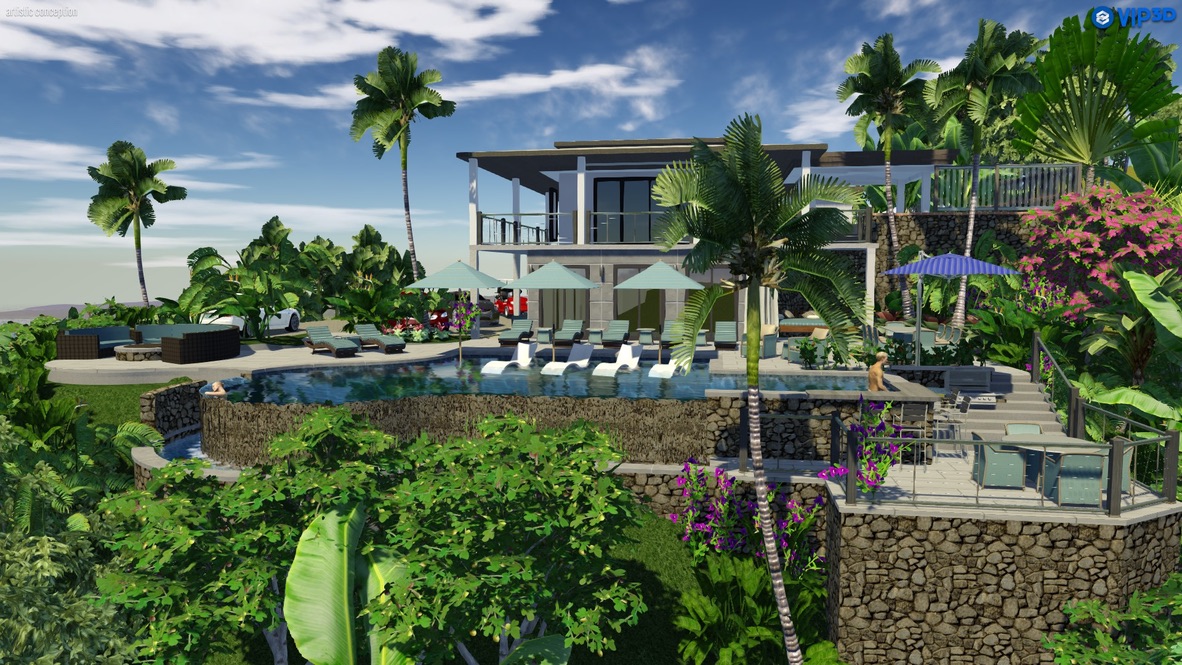
View Facing West at Pool, Looking at Eastern Side of House
View Facing North West of Cliffside and Pool Wall
Facing East from Wet Deck
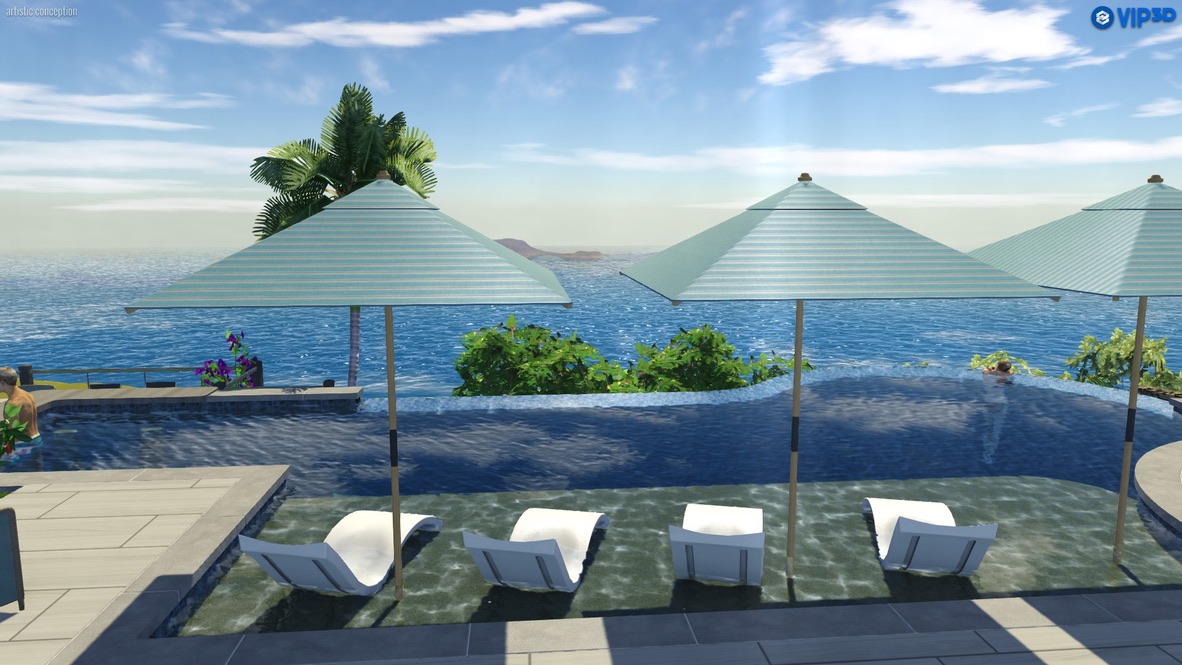
View from infinity Edge Pool Looking at Buck Island
View Facing South West of Cliffside and Lower Deck
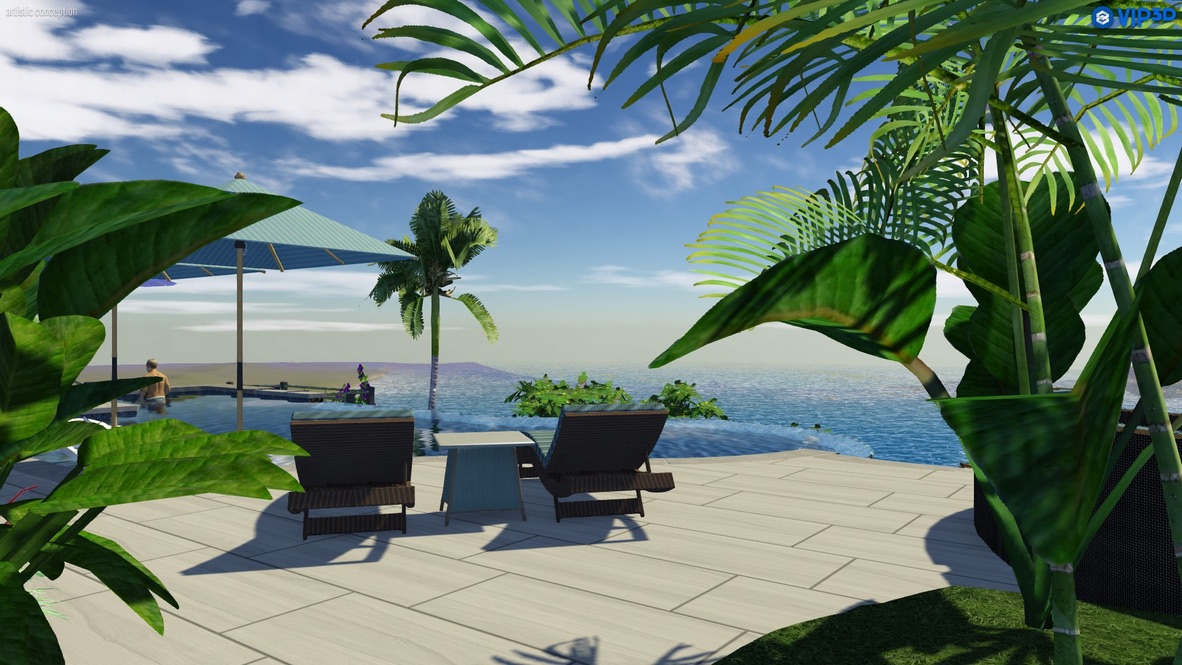
View from Garden Pool Deck
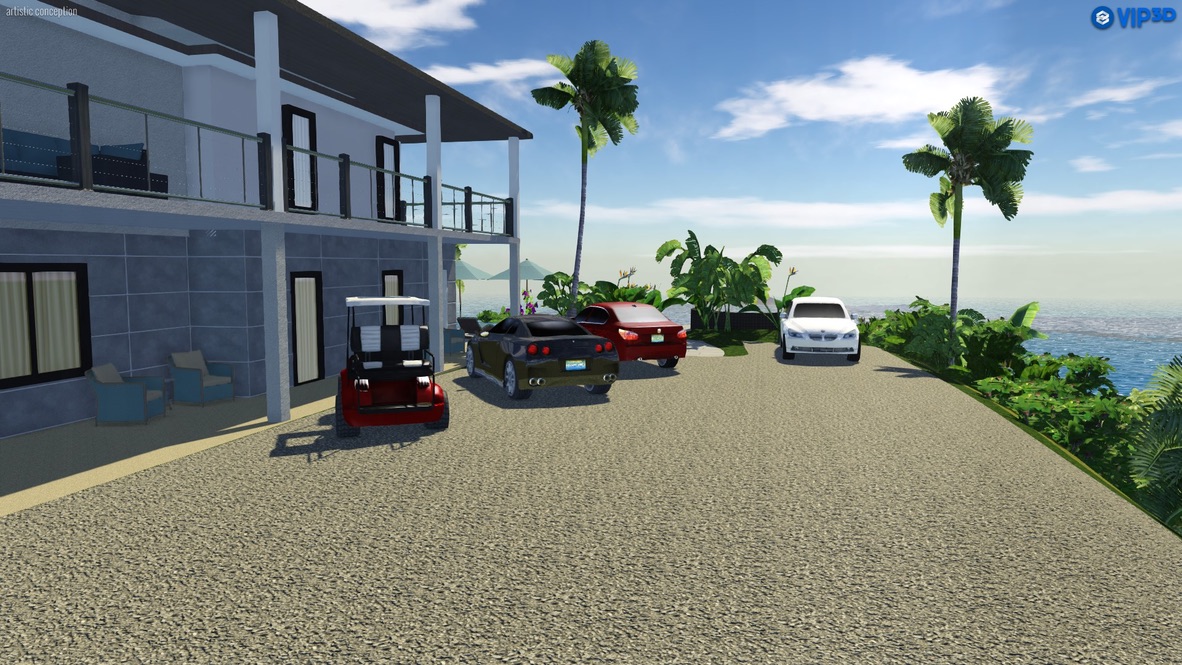
Driveway with South Facing Balcony
South Facing Balcony and Covered Parking with Scuba Room
View from Northwest Looking at Fire Pit
View from East Balcony Facing Buck Island
View from Top Level Pool Deck Facing South East with Bar
Day 155
Total Spent So Far: $52,558
30 Yard Dumpsters Filled: 3
Well, just two weeks after Dave left St. Croix, we flew him back down. I’m not sure if he’s coming for the Rum, the beaches, or just to hang out, but he was happy to play a big roll in getting the middle apartment “The Mermaid” further along this time around. One of my partners I work with is coming to live in St. Croix for our new software product, PromoJuice, and he arrives November 10th. Since I’m gone for a few weeks during October and there is limited time between now and then, we really needed to focus and move this project along. And so we did.
We didn’t finish though, and I’ll be able to get quite a bit done myself the end of October. Dave has another trip already booked for the first week in November to help me wrap it up, and possibly start on the upstairs again if there’s enough time. There is a ton of tiling to do still in the apartment before then. Terry is still helping us with the painting there too, which there is also a ton to do. I need pictures of Terry… She’s always working in there when I’m too busy to be doing so during the week, so I never seem to capture her all painted up. I will though at some point and make sure to include it in this blog. We can’t thank her enough for what she’s doing for us recently. Dave too. We’d definitely be a lot further behind without them!
Demo to Mermaid St Croix
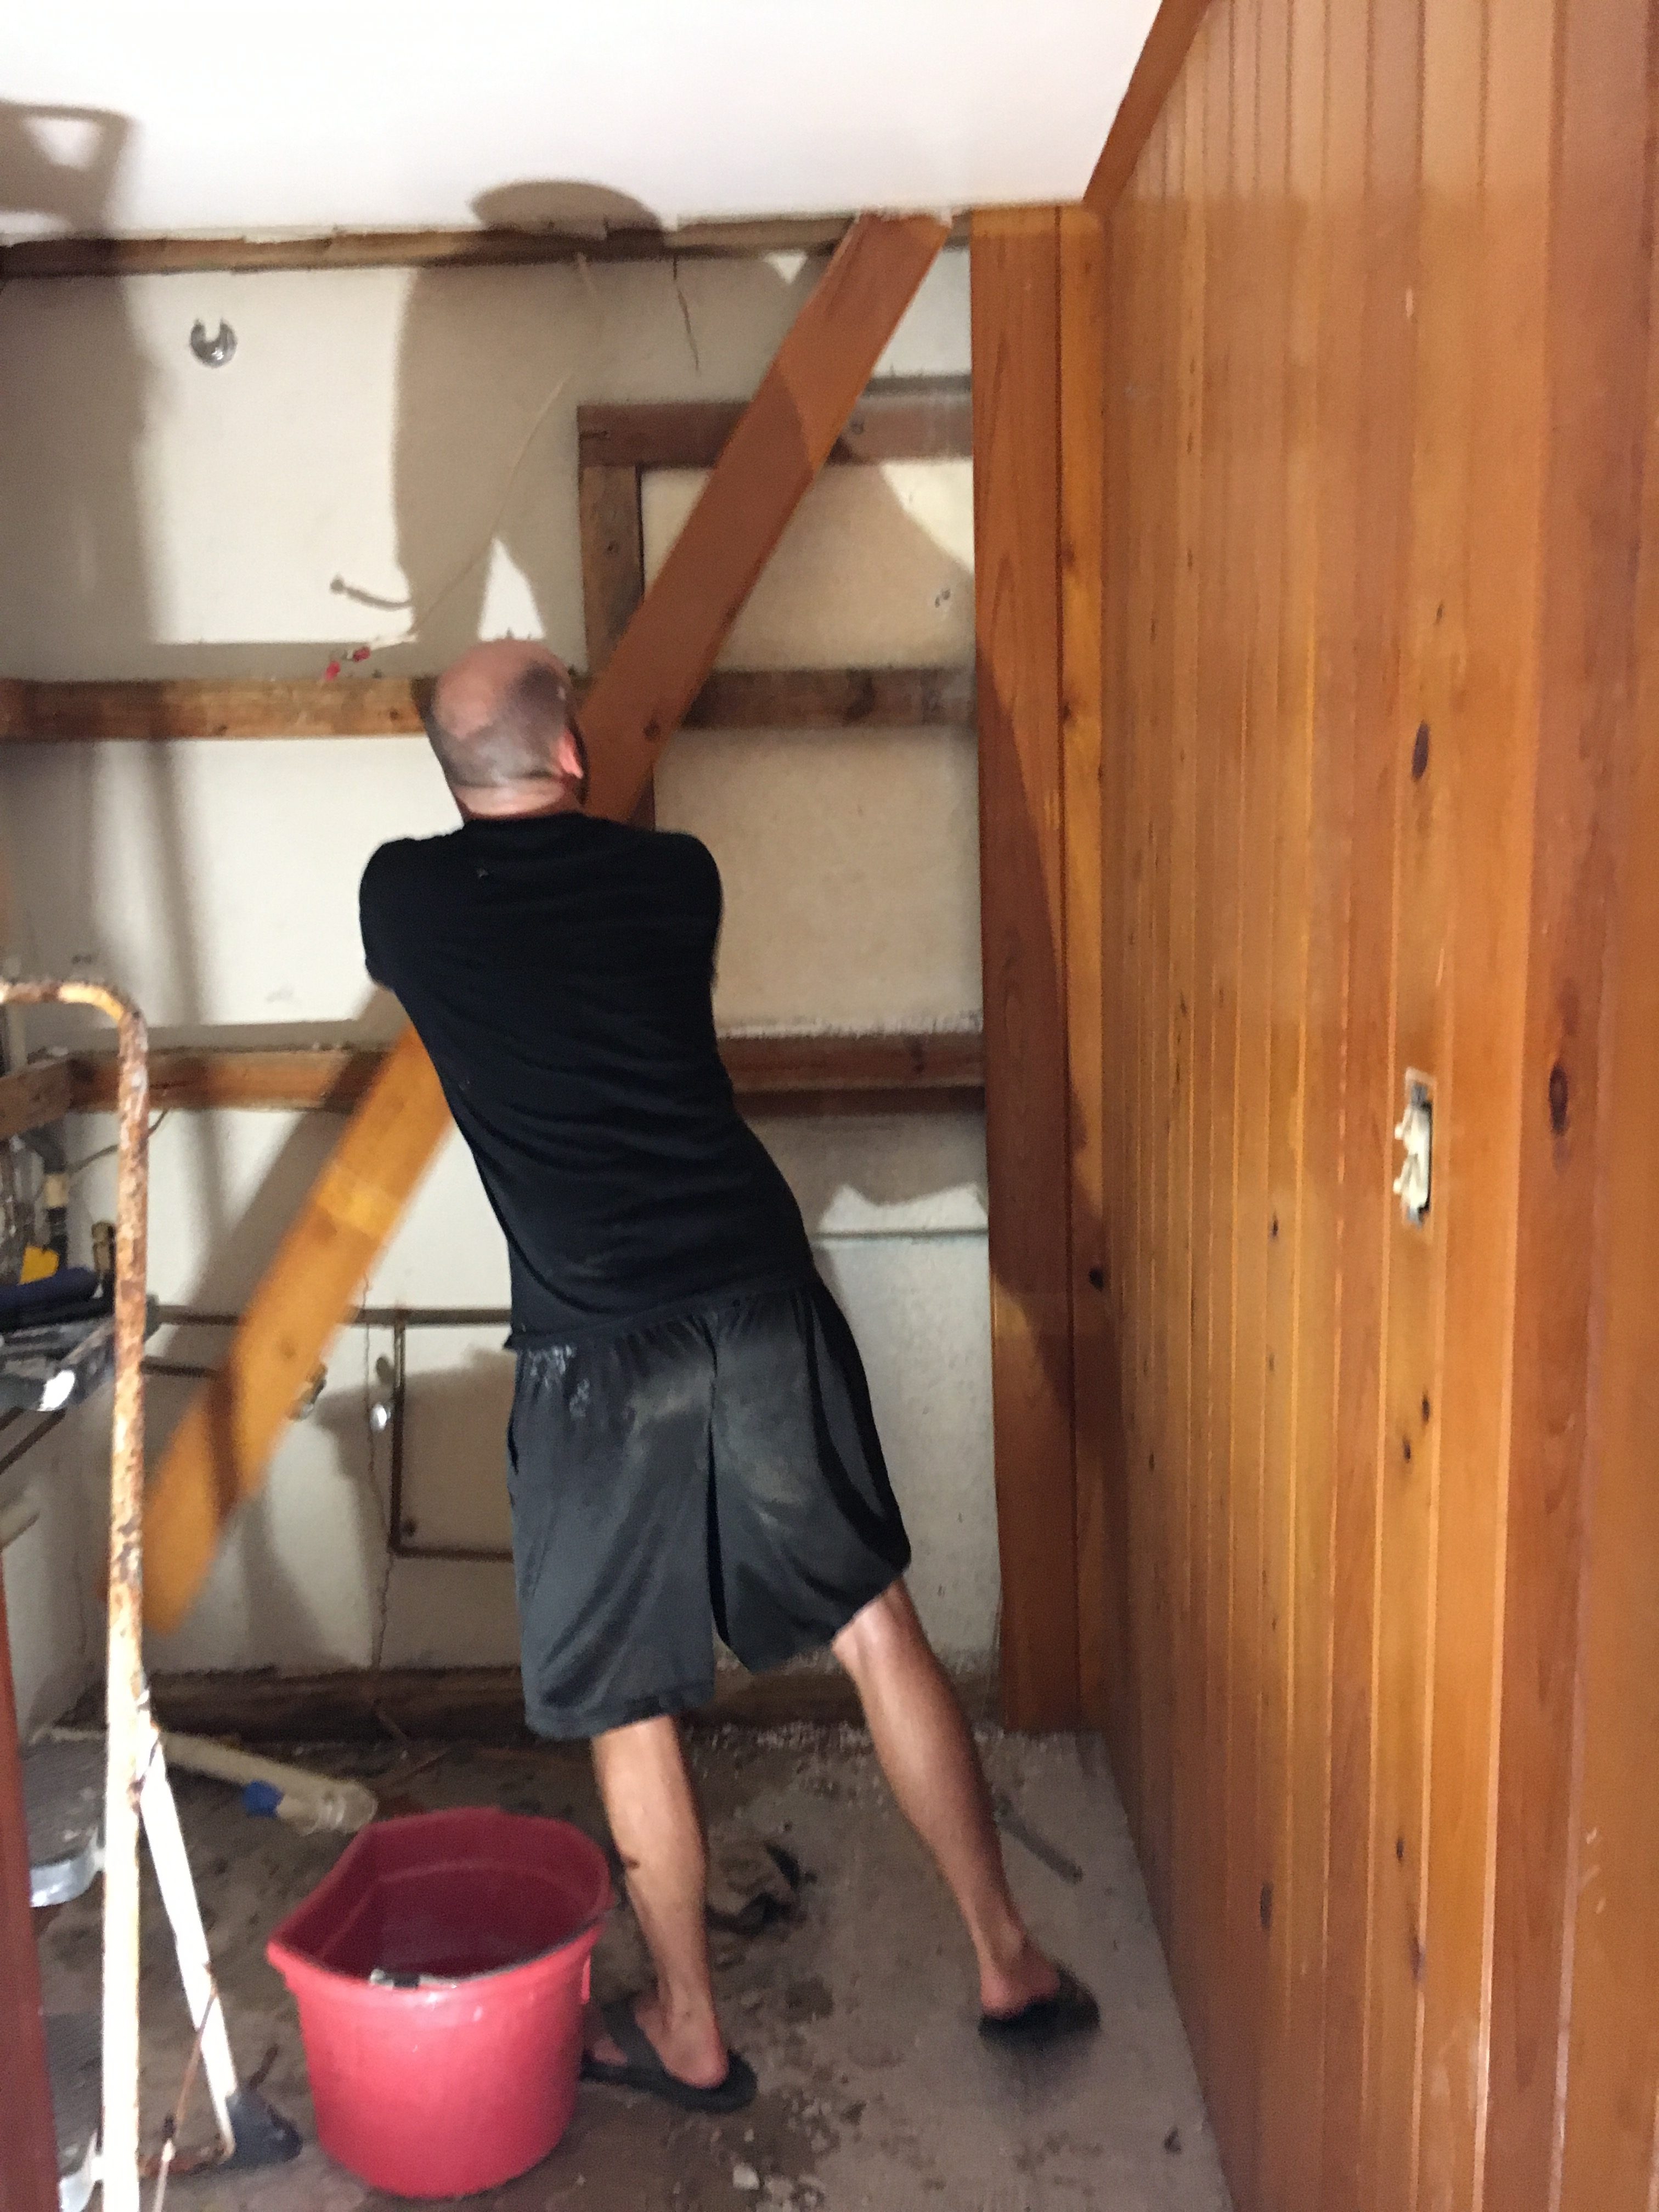
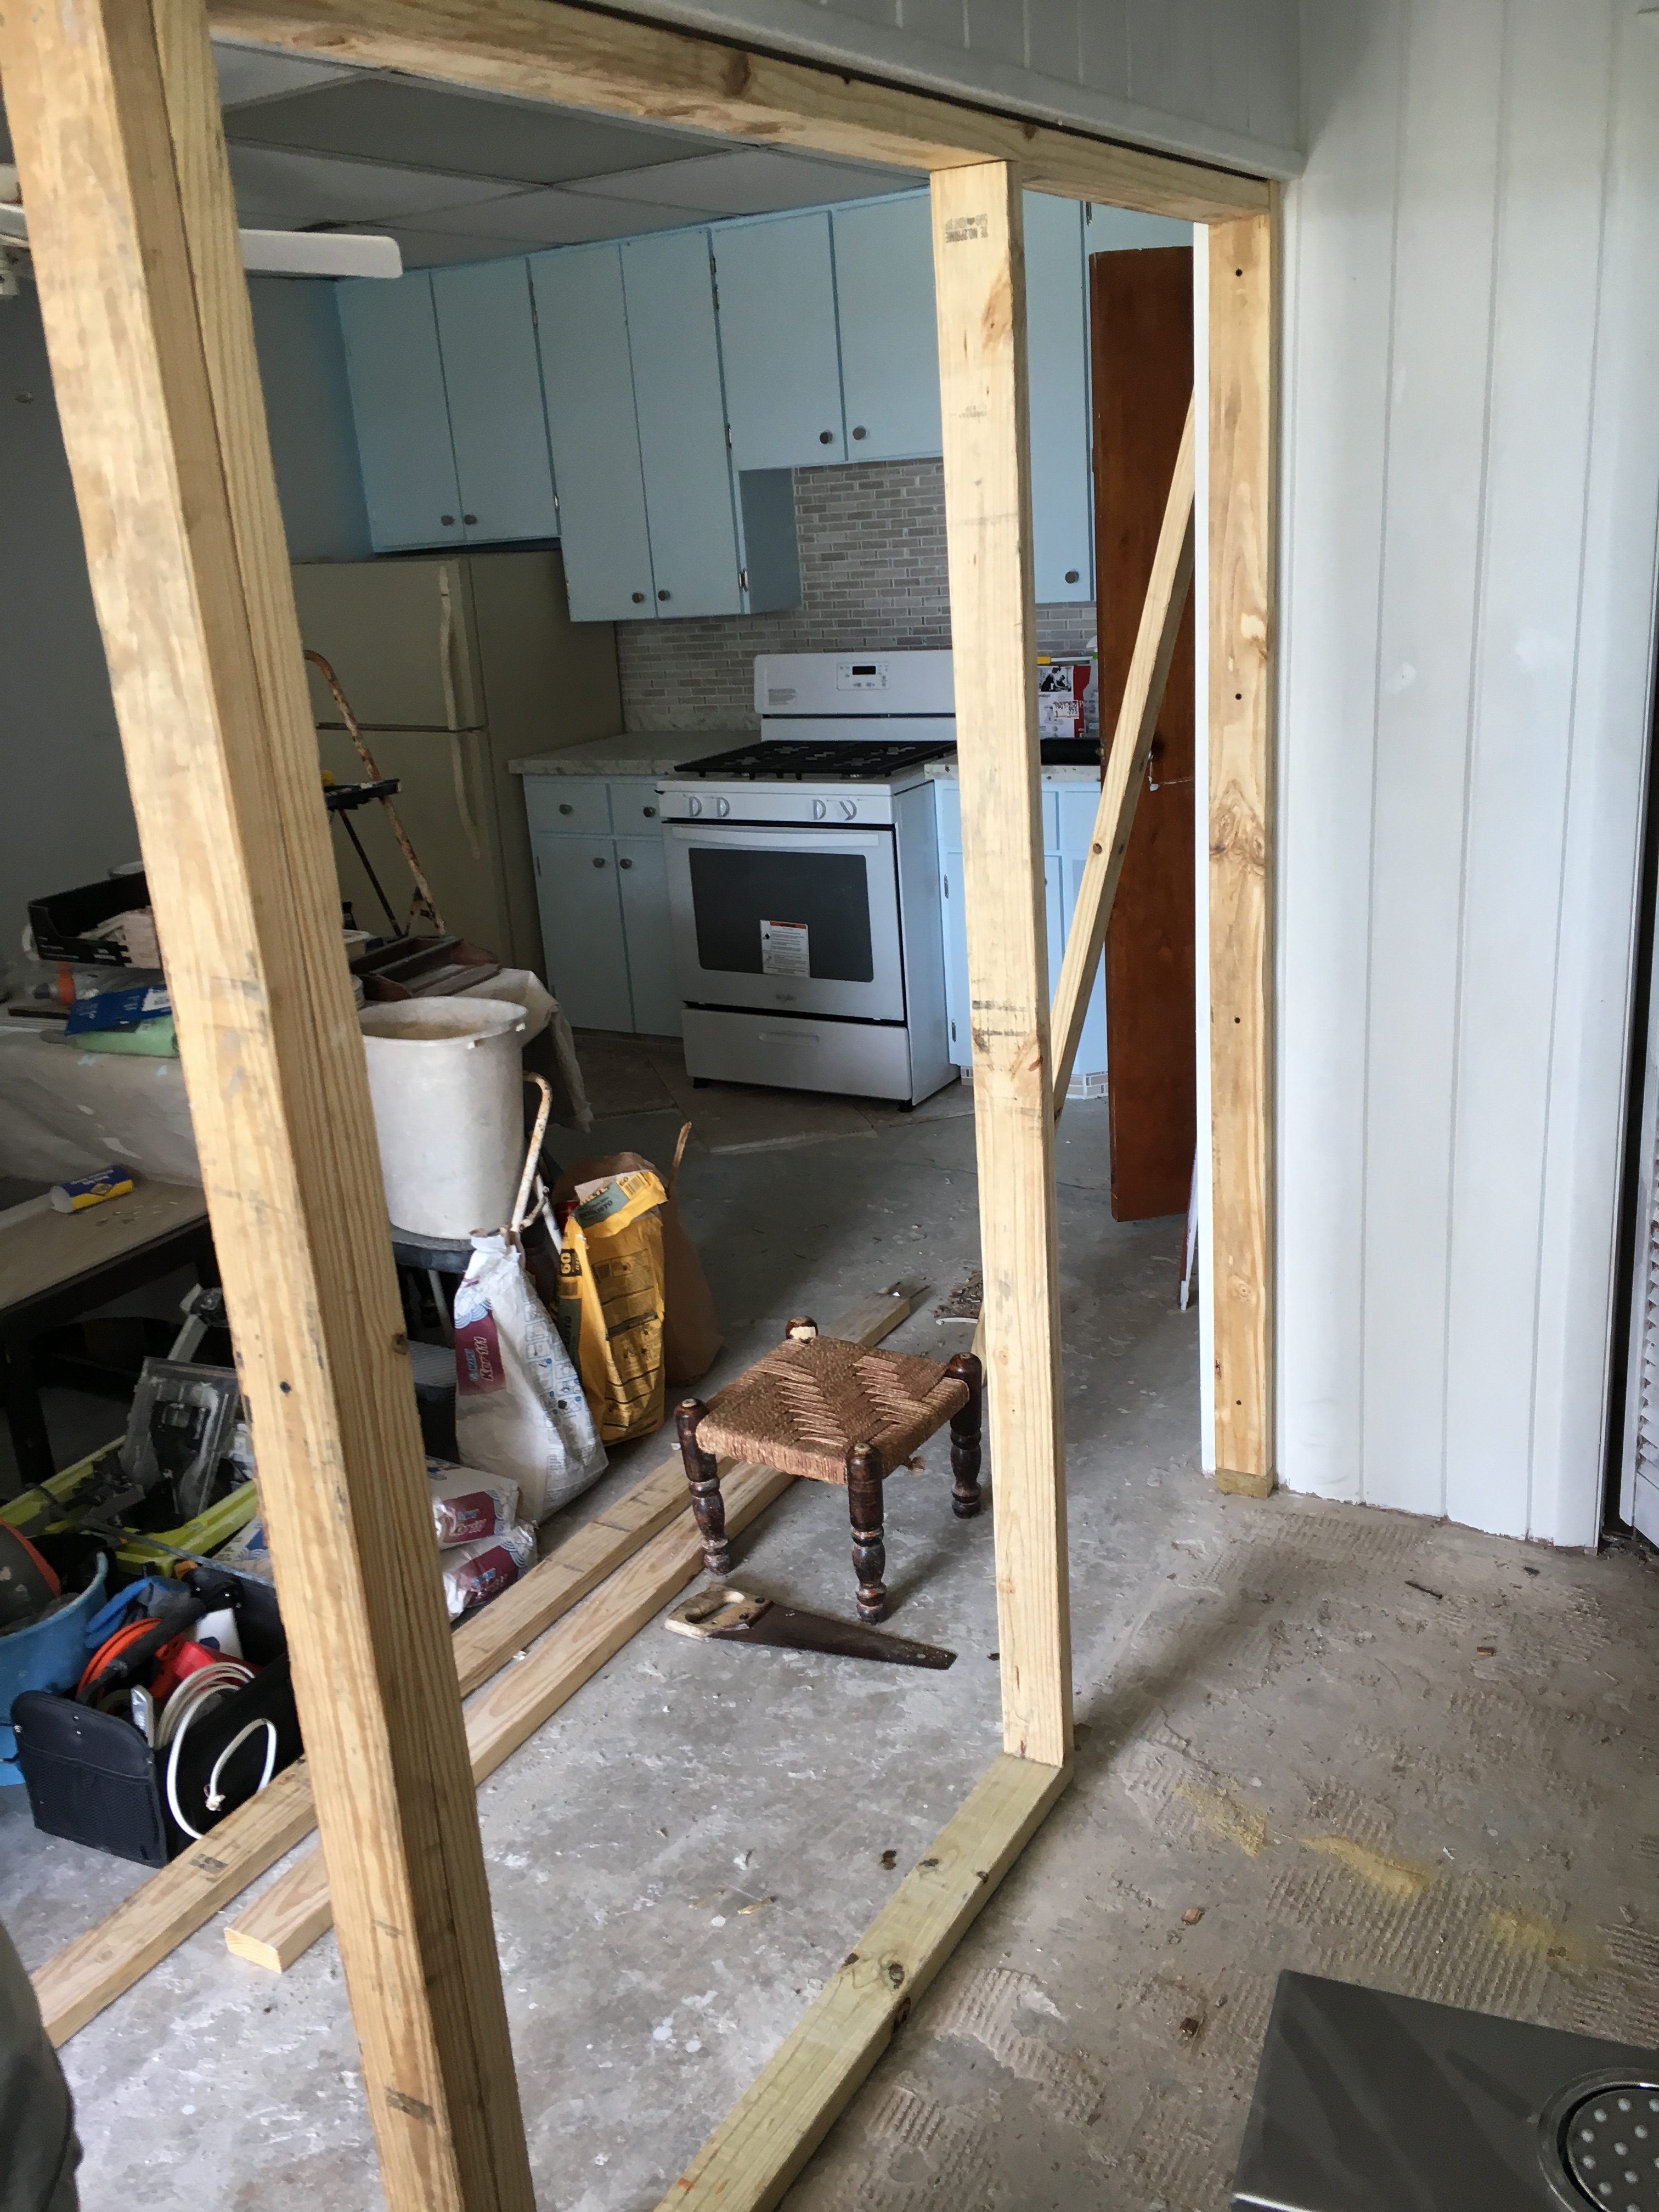
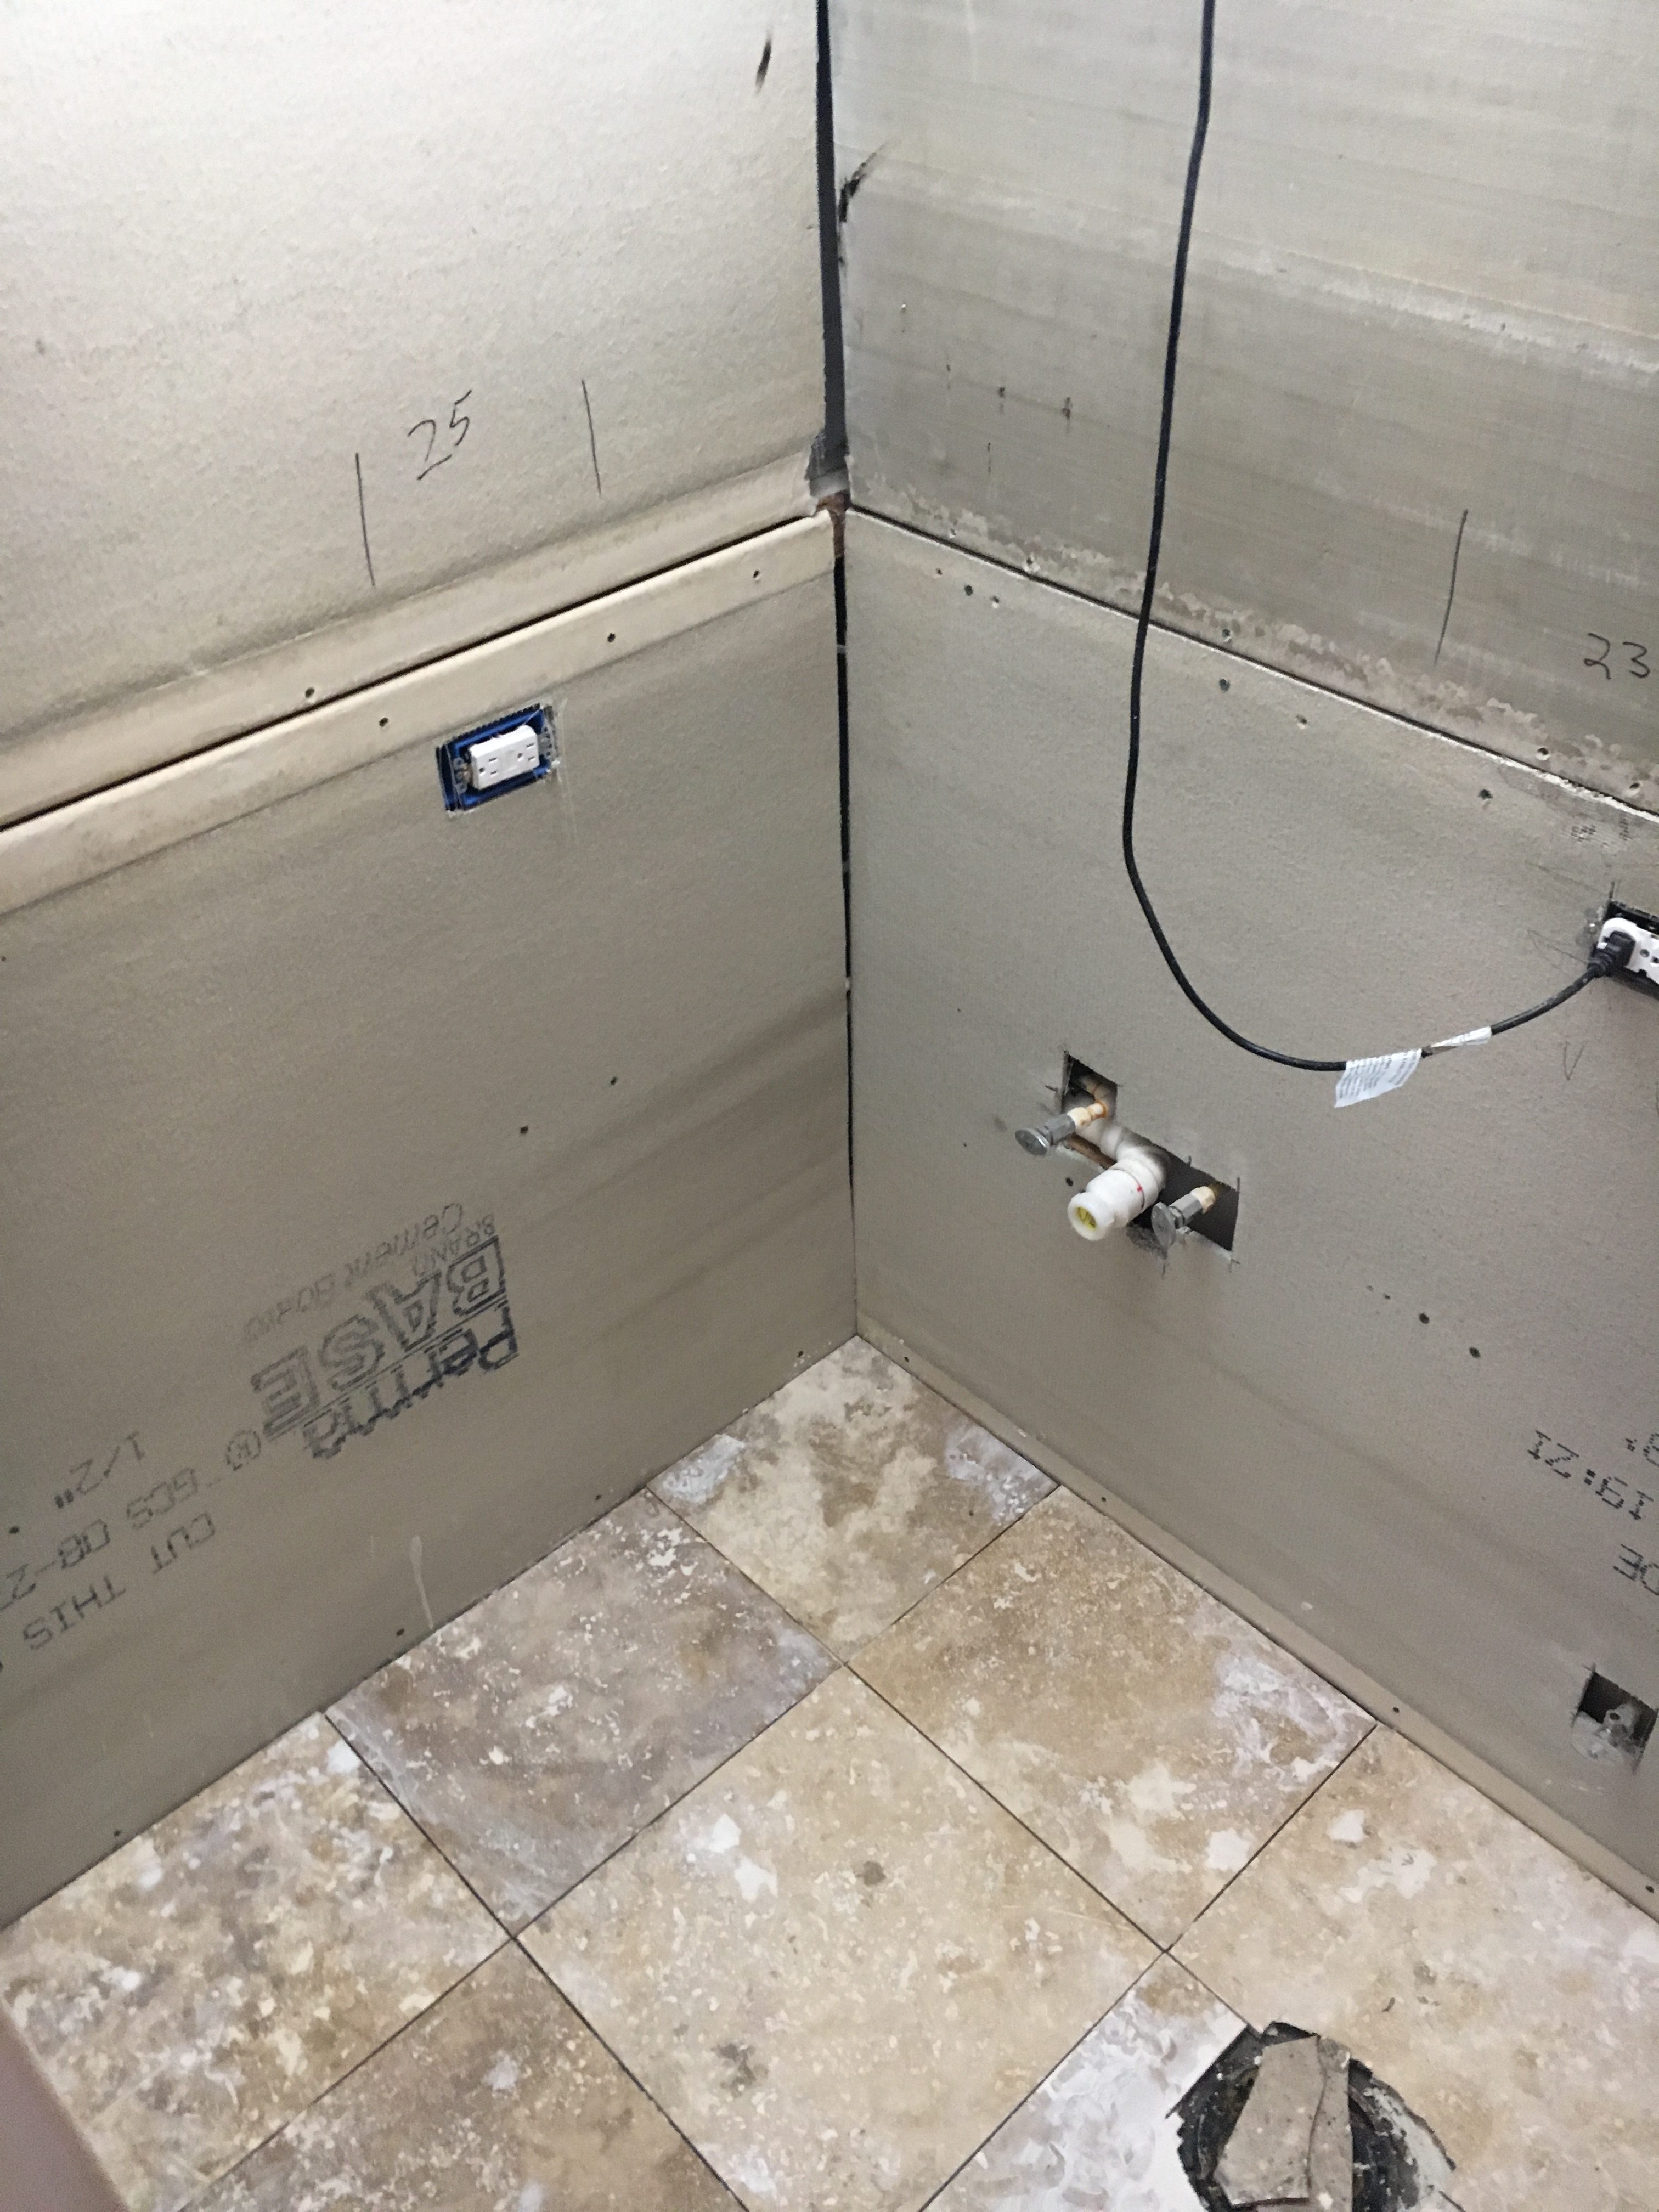
One week ago, I completed the demolition of the bathroom in the apartment in preparation for last weekend when Dave would be here to help. I had a lot of comments last time on my “demolition in flip flops” and here again I see in the photos I didn’t learn my lesson. It’s just so natural here not to wear shoes. Besides a recent trip to Vegas for work, I literally think I’ve been wearing flip flops now for over a year. Once you get into that mode, it’s incredibly hard to wear a pair of socks and shoes. Anyways, I tore out most of the wood walls in the bathroom to expose the plumbing and electrical we were planning to redo, and removed the toilet and bits of tile that remained. We did leave a wall and a half of the wood, which we’ll paint to tie into the bedroom of the apartment and give it a beach feel. The rest of the walls will be tiled all the way floor to ceiling.
I also leveled the floors with self leveling concrete both upstairs in the kitchen, as well as downstairs in the Mermaid Bathroom before Dave got there. It is allowing us to tile smoothly, without the imperfections that existed from the demolition.
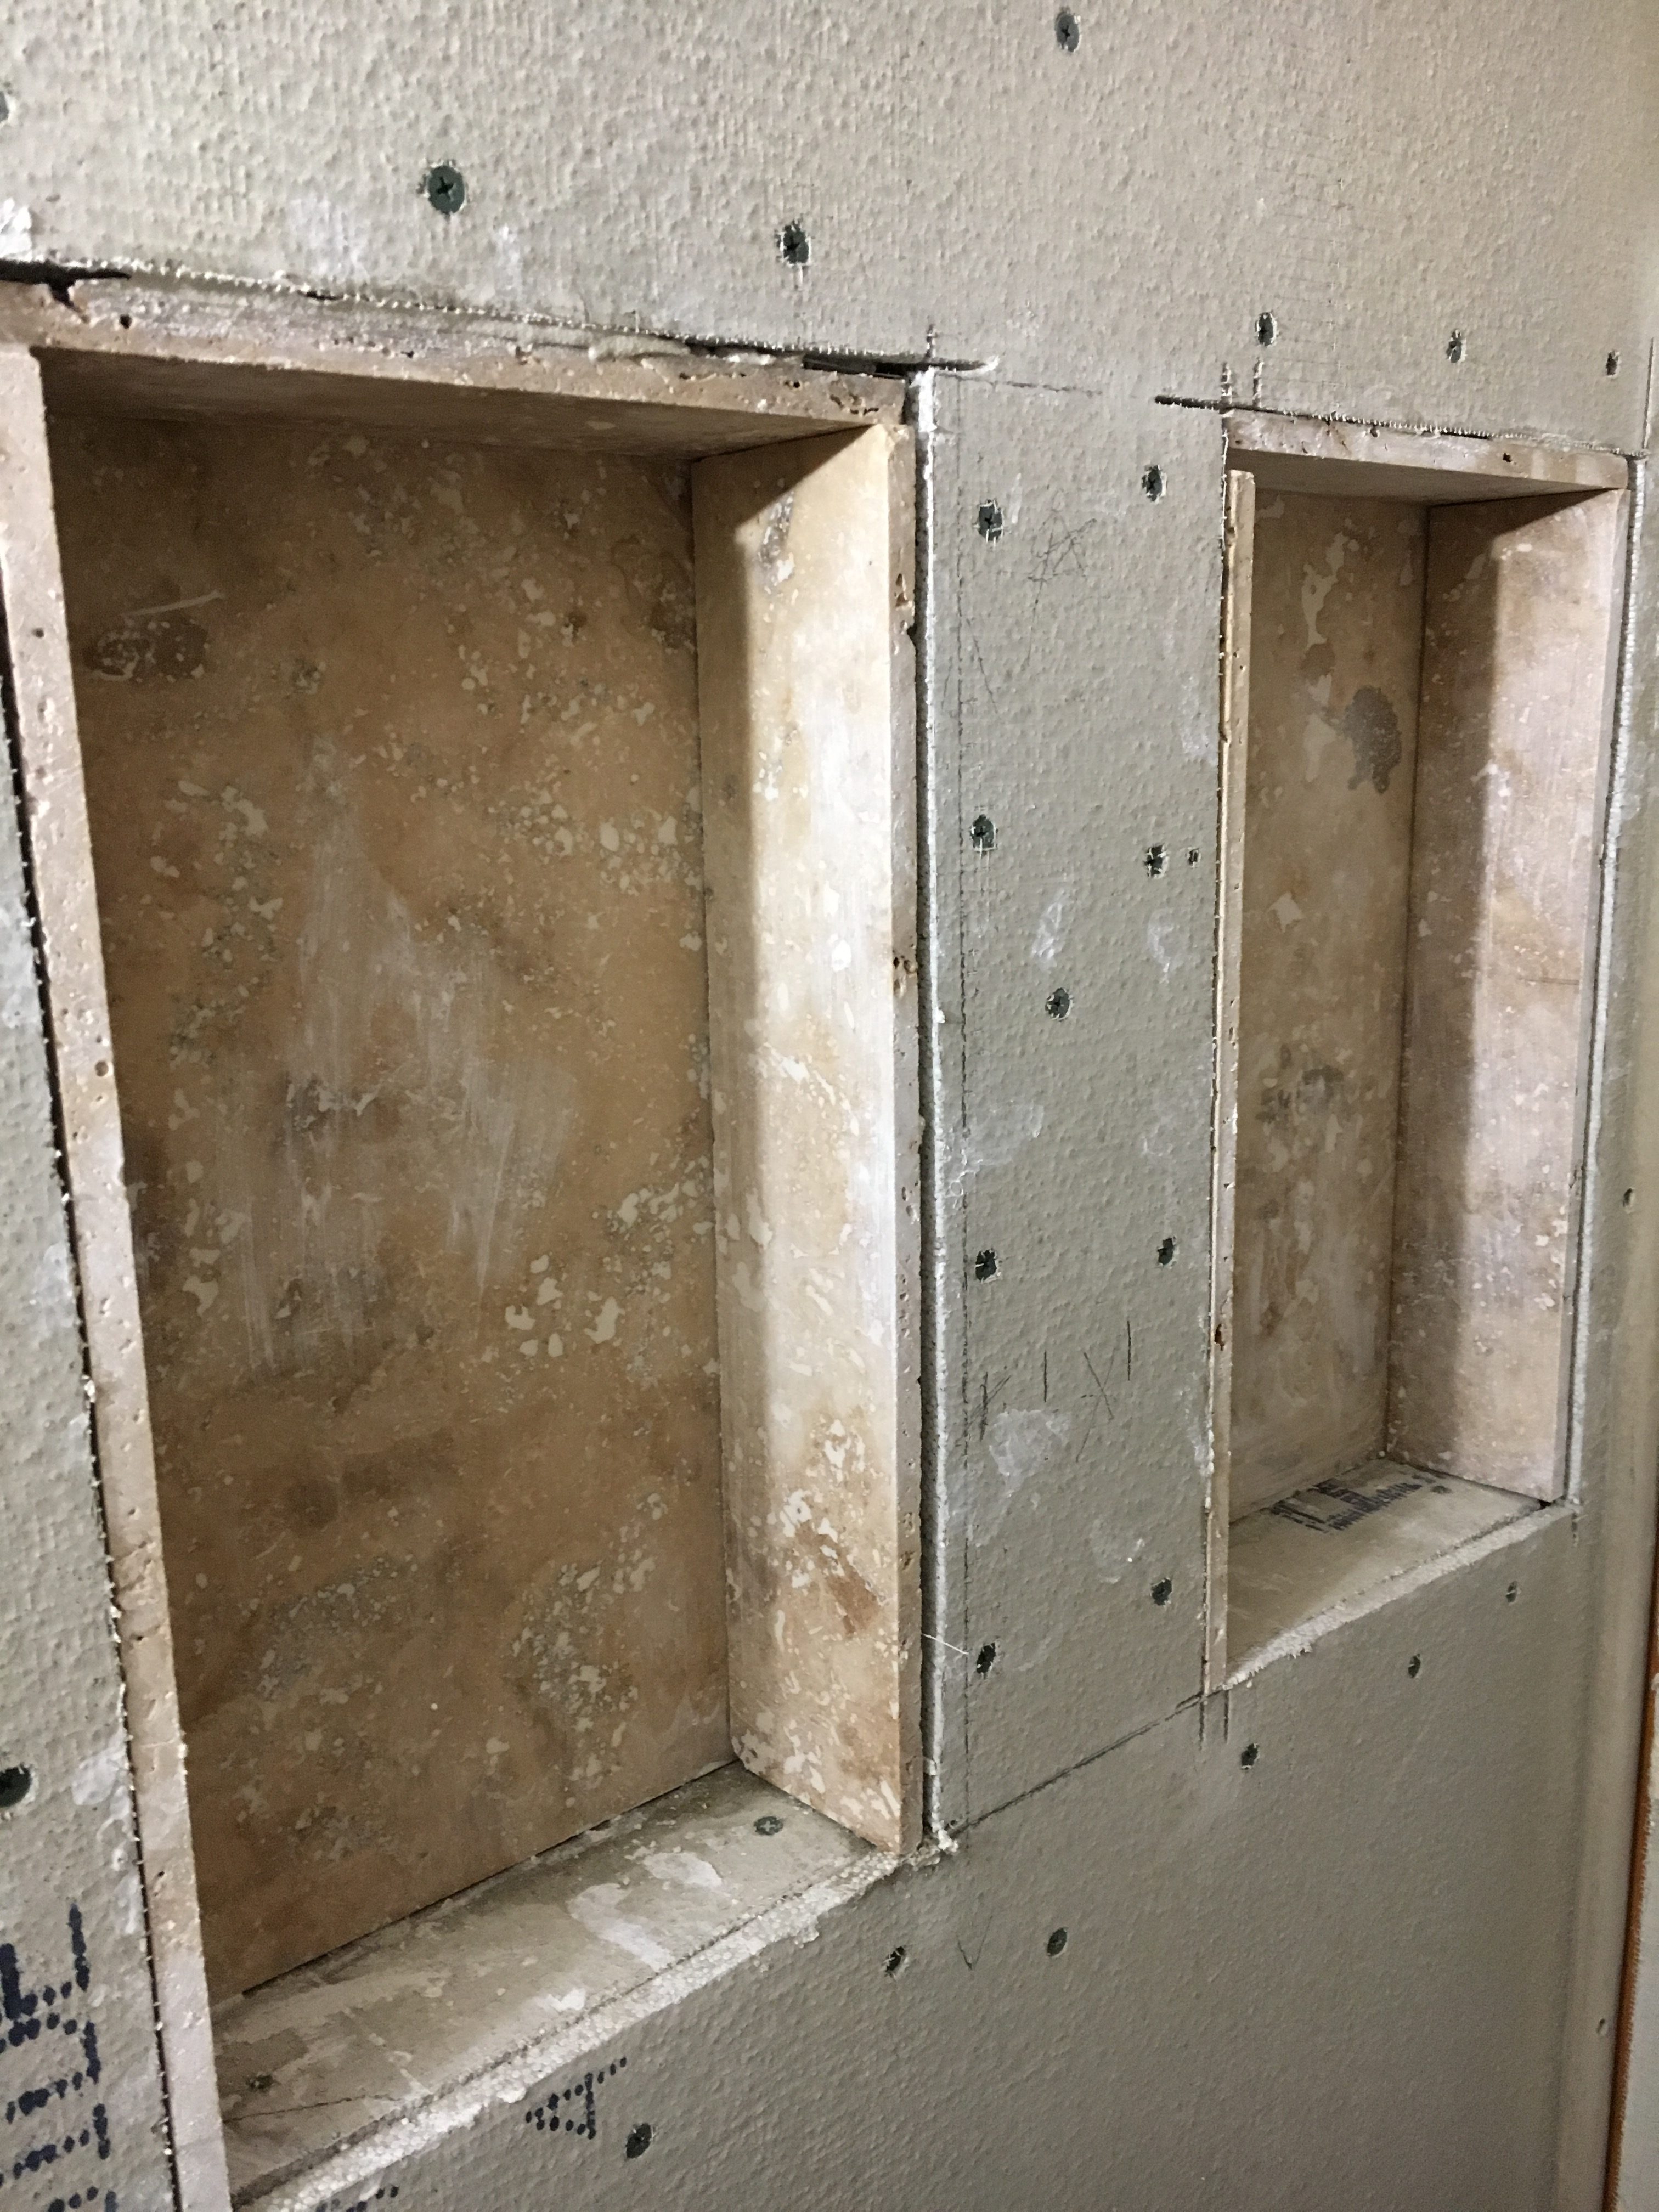
Shower Floor
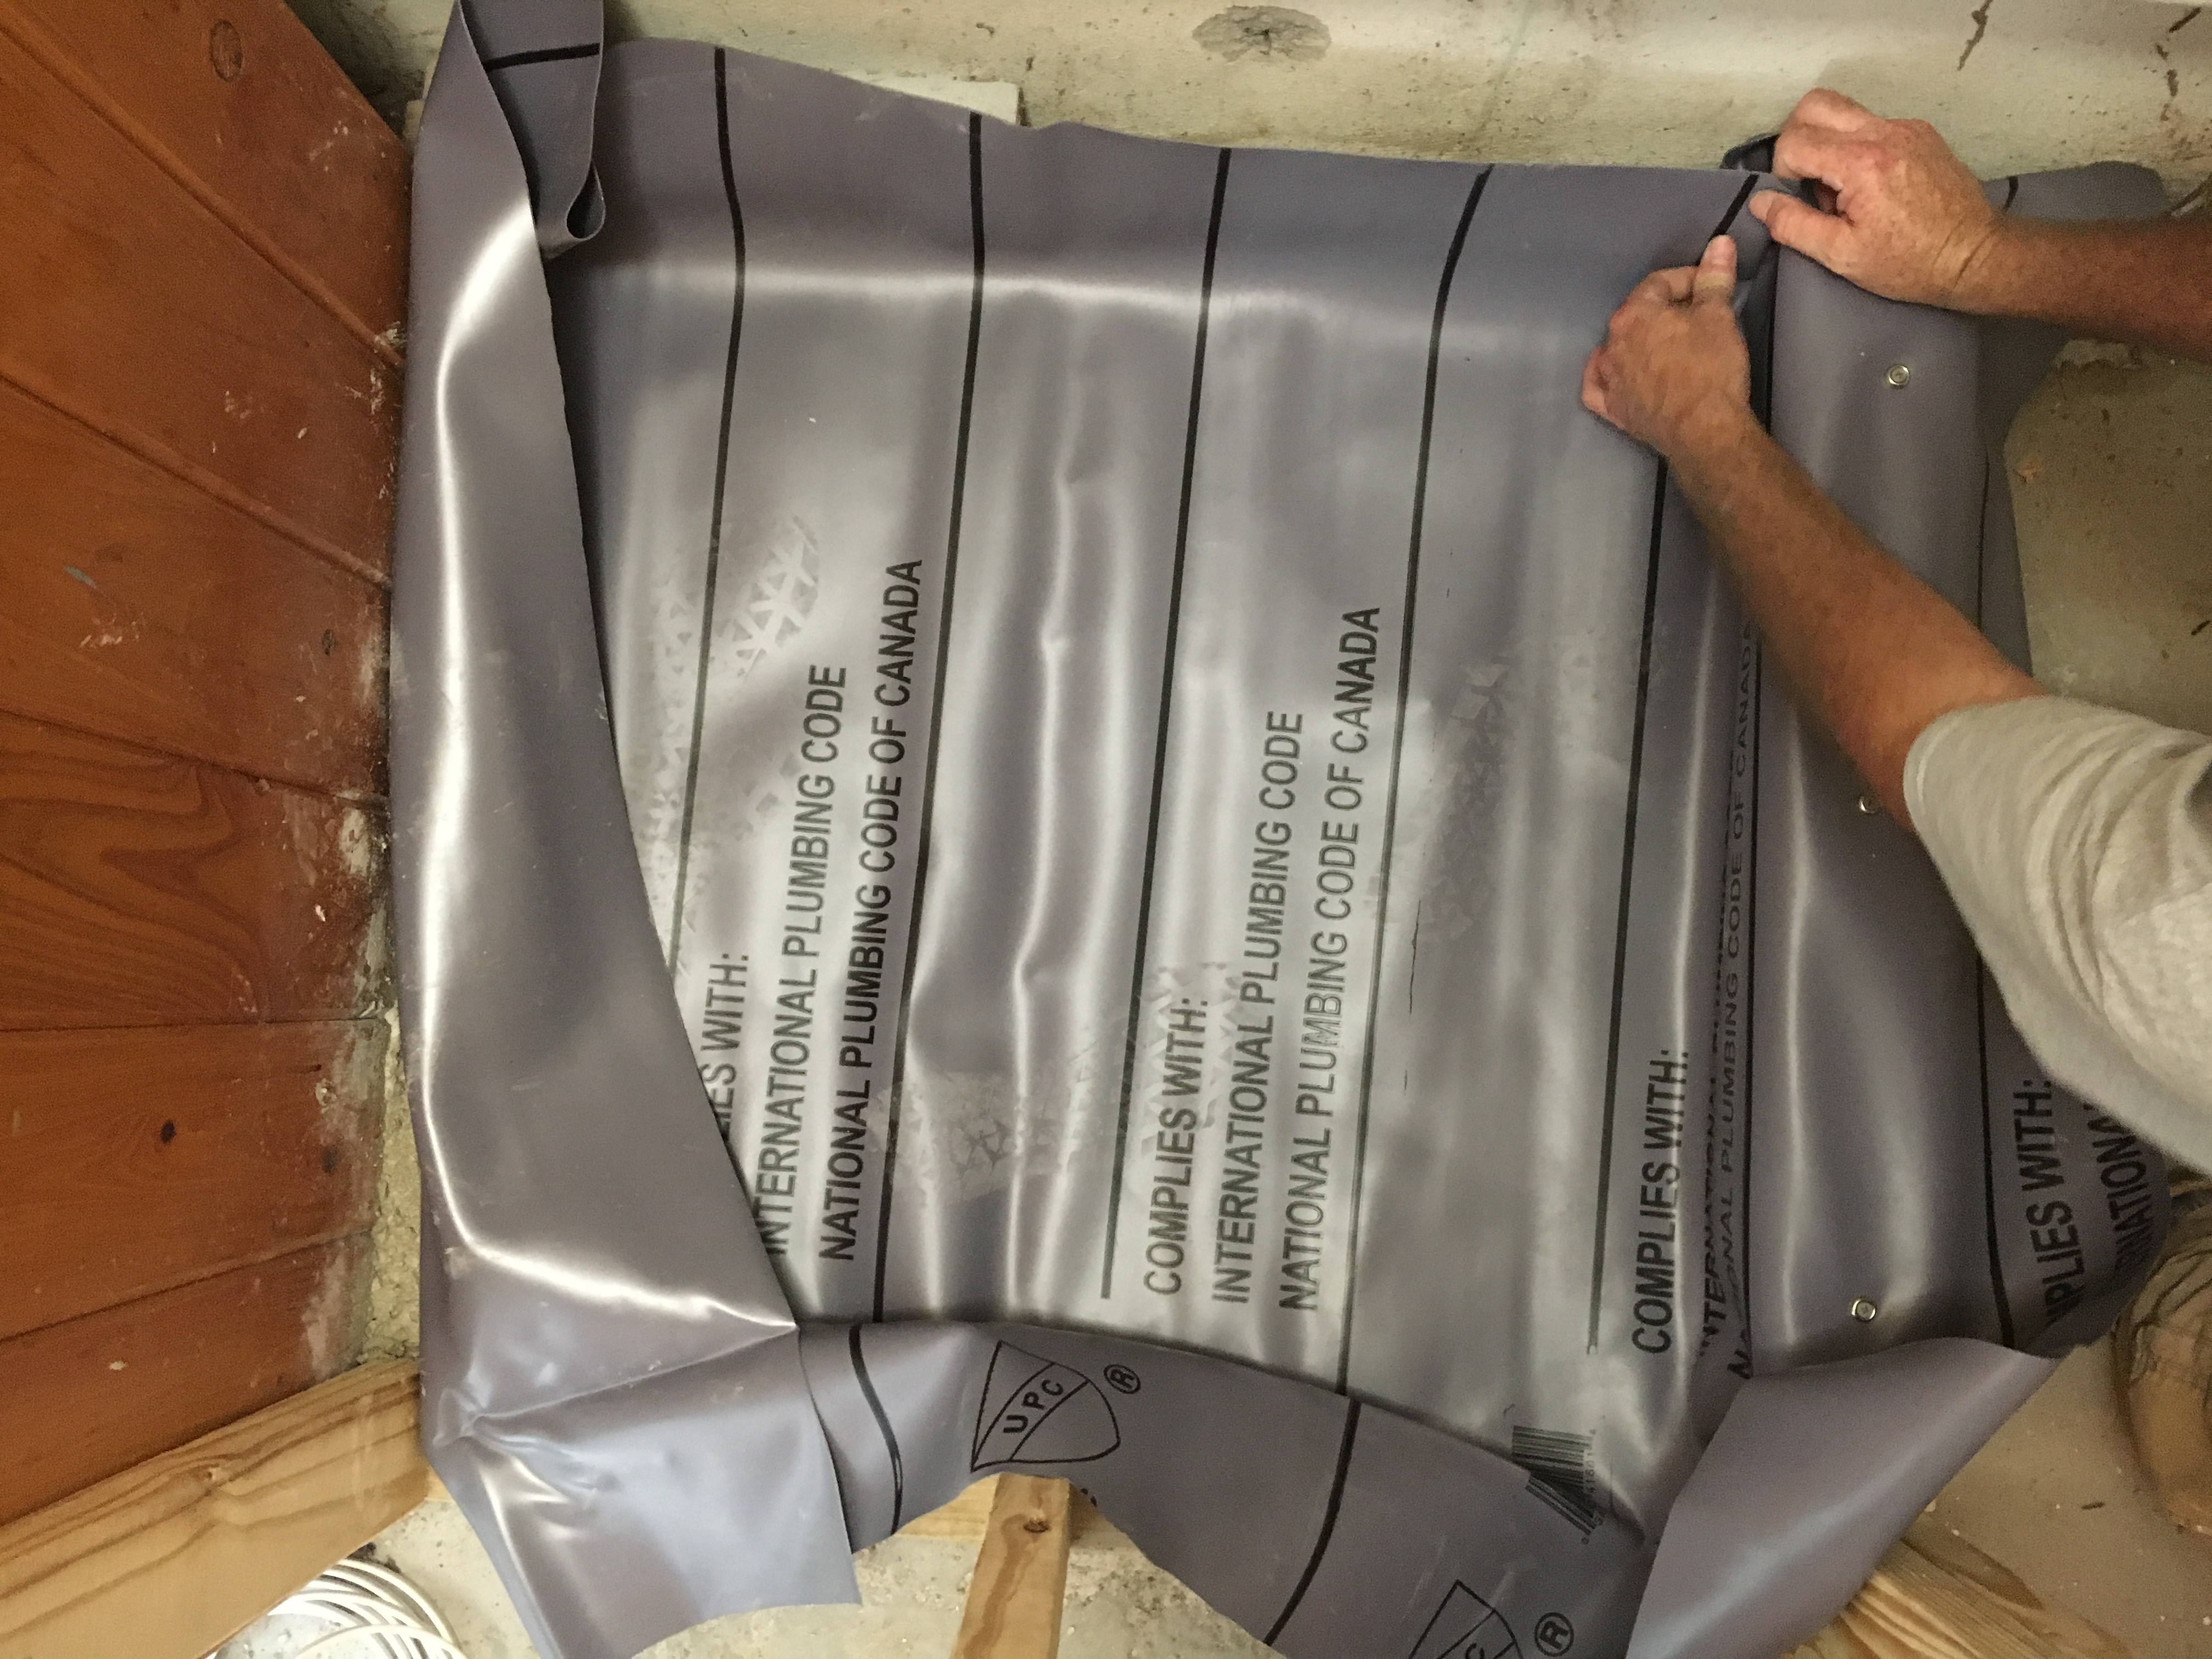
When Dave arrived our first order of business was to get the shower wall framed out, drain hammered out so we could put a new one in, and start pouring the concrete which would eventually hold our new shower pan. We wanted a day for the concrete to dry so we could finish the shower pan and drain by the time Dave left. The old shower was literally a plastic insert from an RV, so we were building this shower from scratch.
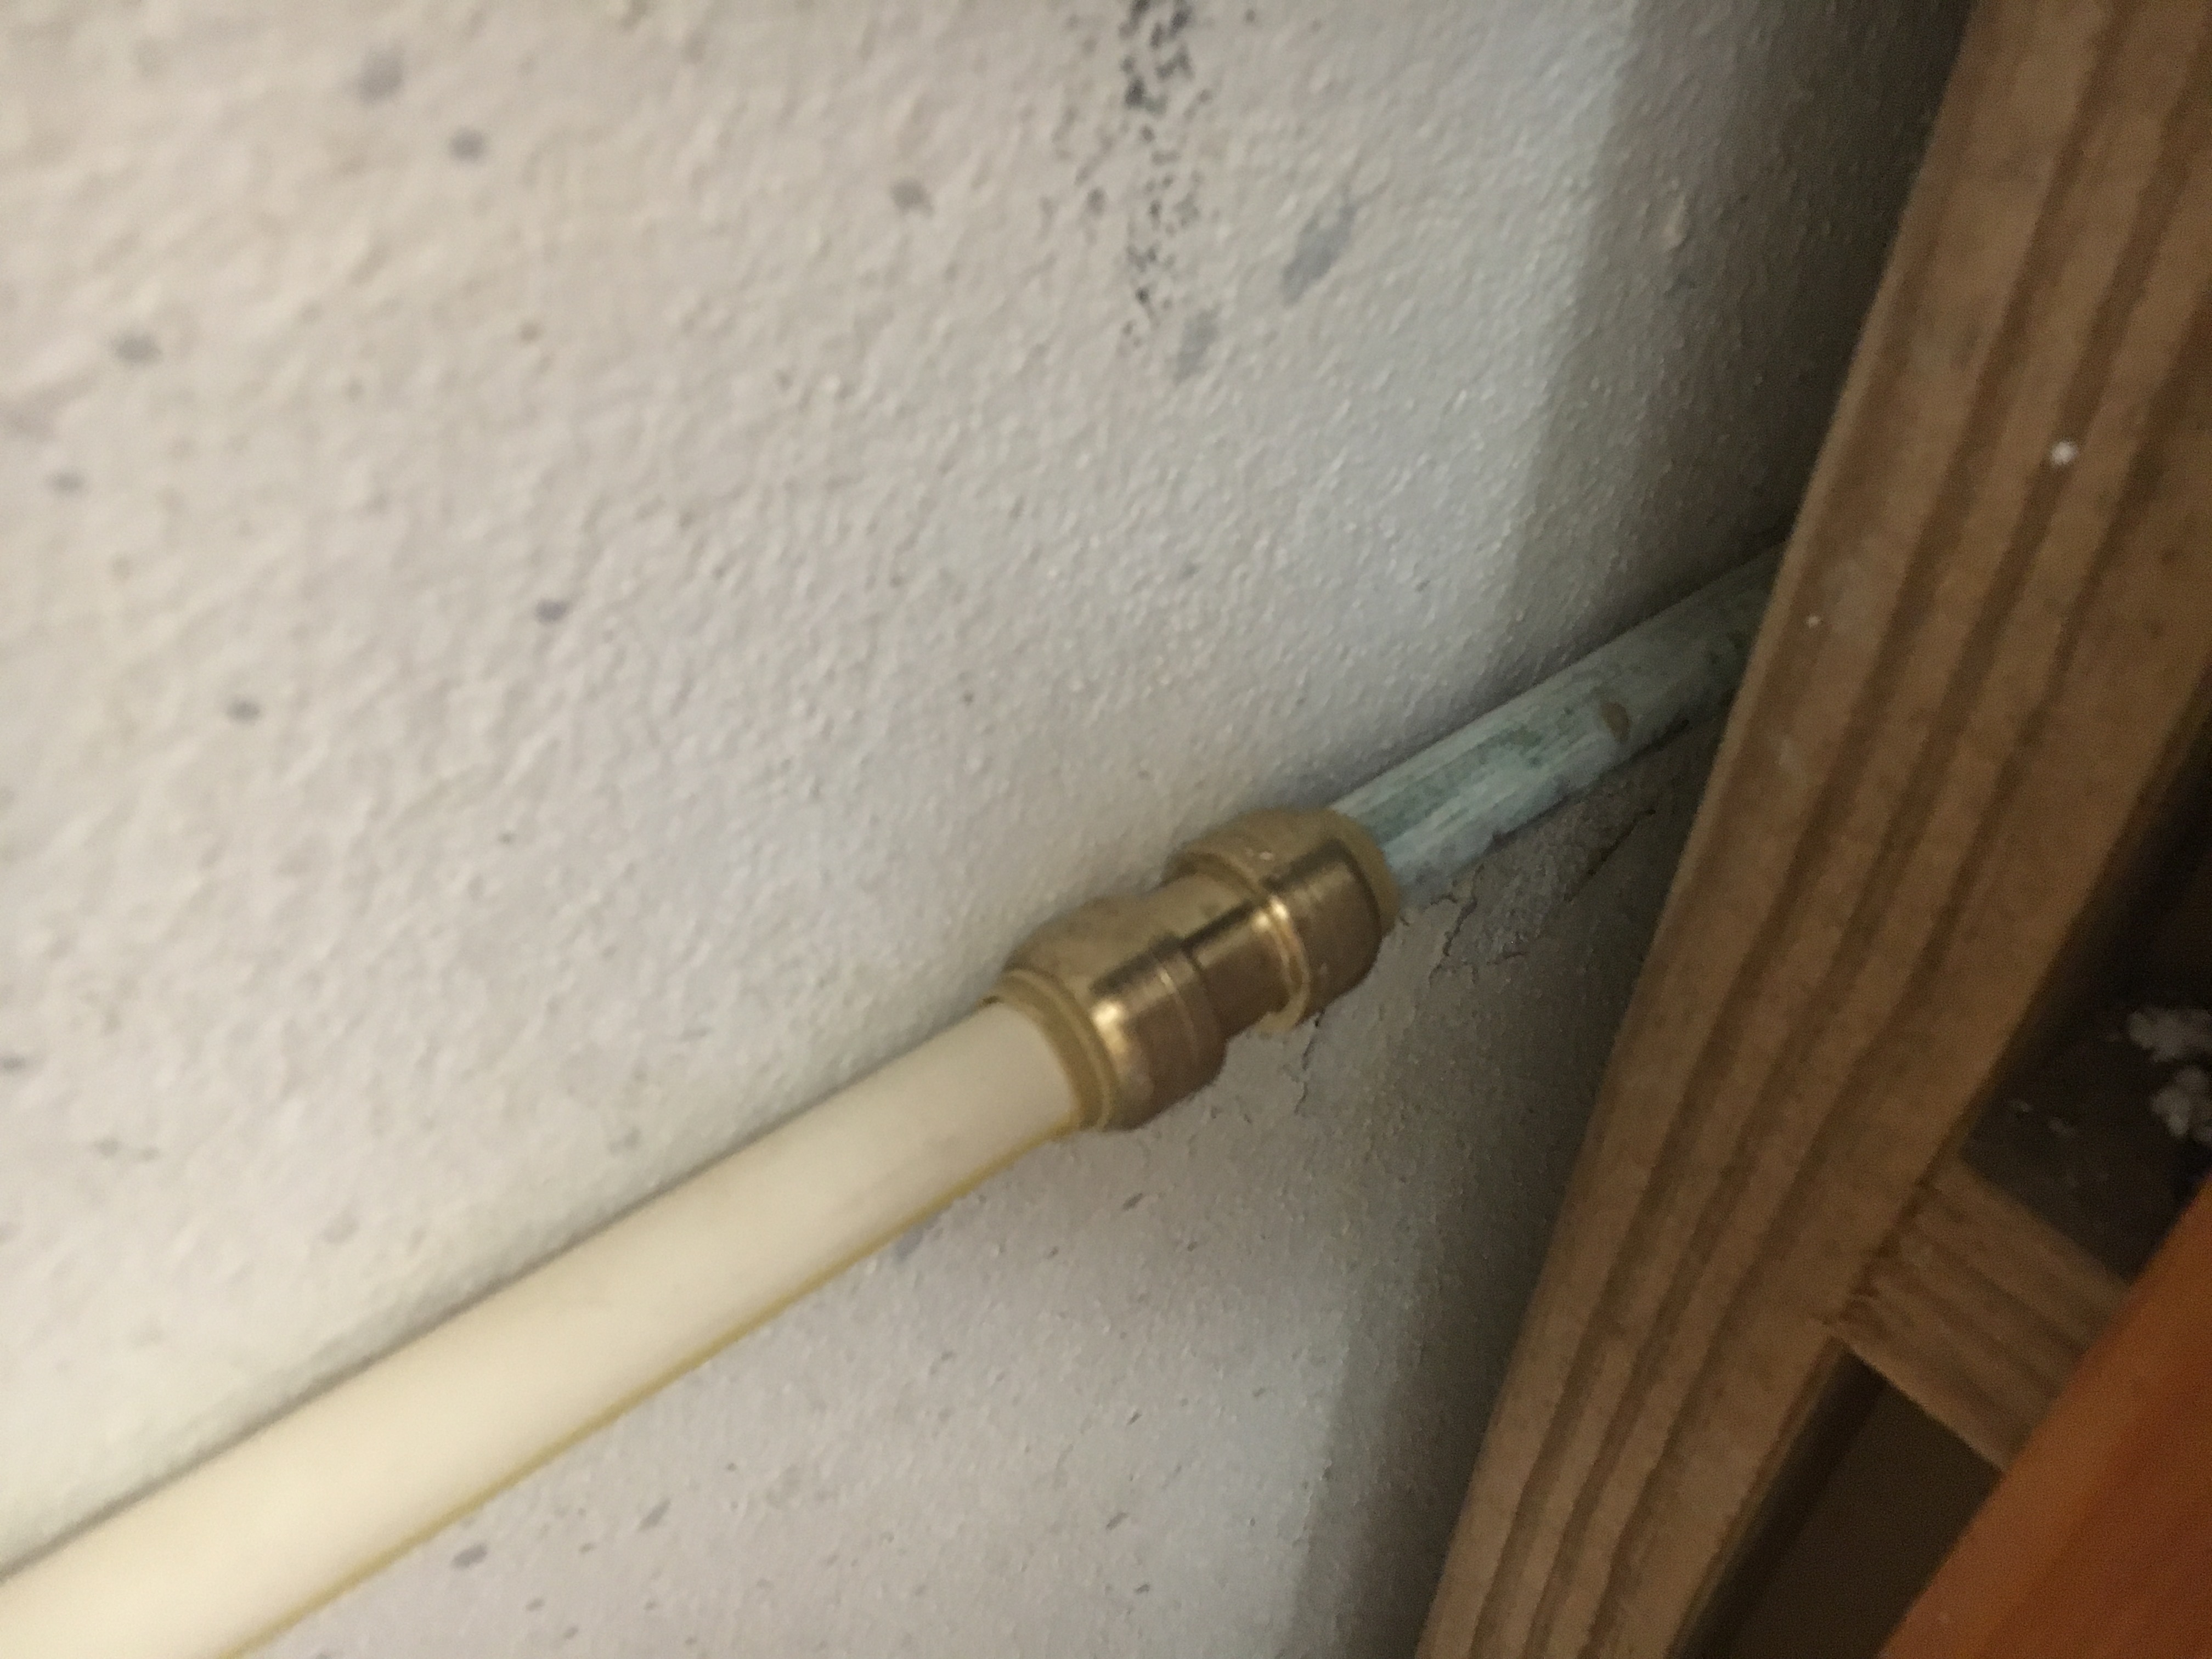
New Pumbing
After completing the shower wall and pan, we started replacing all the copper piping and electrical in the walls, including the first proper installation of a GFCI outlet in the house. Yay! Believe it or not, none of the outlets in the house have protection on them in the places they should currently, and when we removed the shower we literally exposed a live outlet that was installed behind the shower wall! Needless to say we removed that before replacing the walls with concrete tile backer board. All copper piping was removed and replaced with CPVC, which will help prevent leaks behind the walls in the future.
If you are building a custom shower, go with the PVC shower pan we did, and use concrete to build it to your custom size:
New Tile on Floor
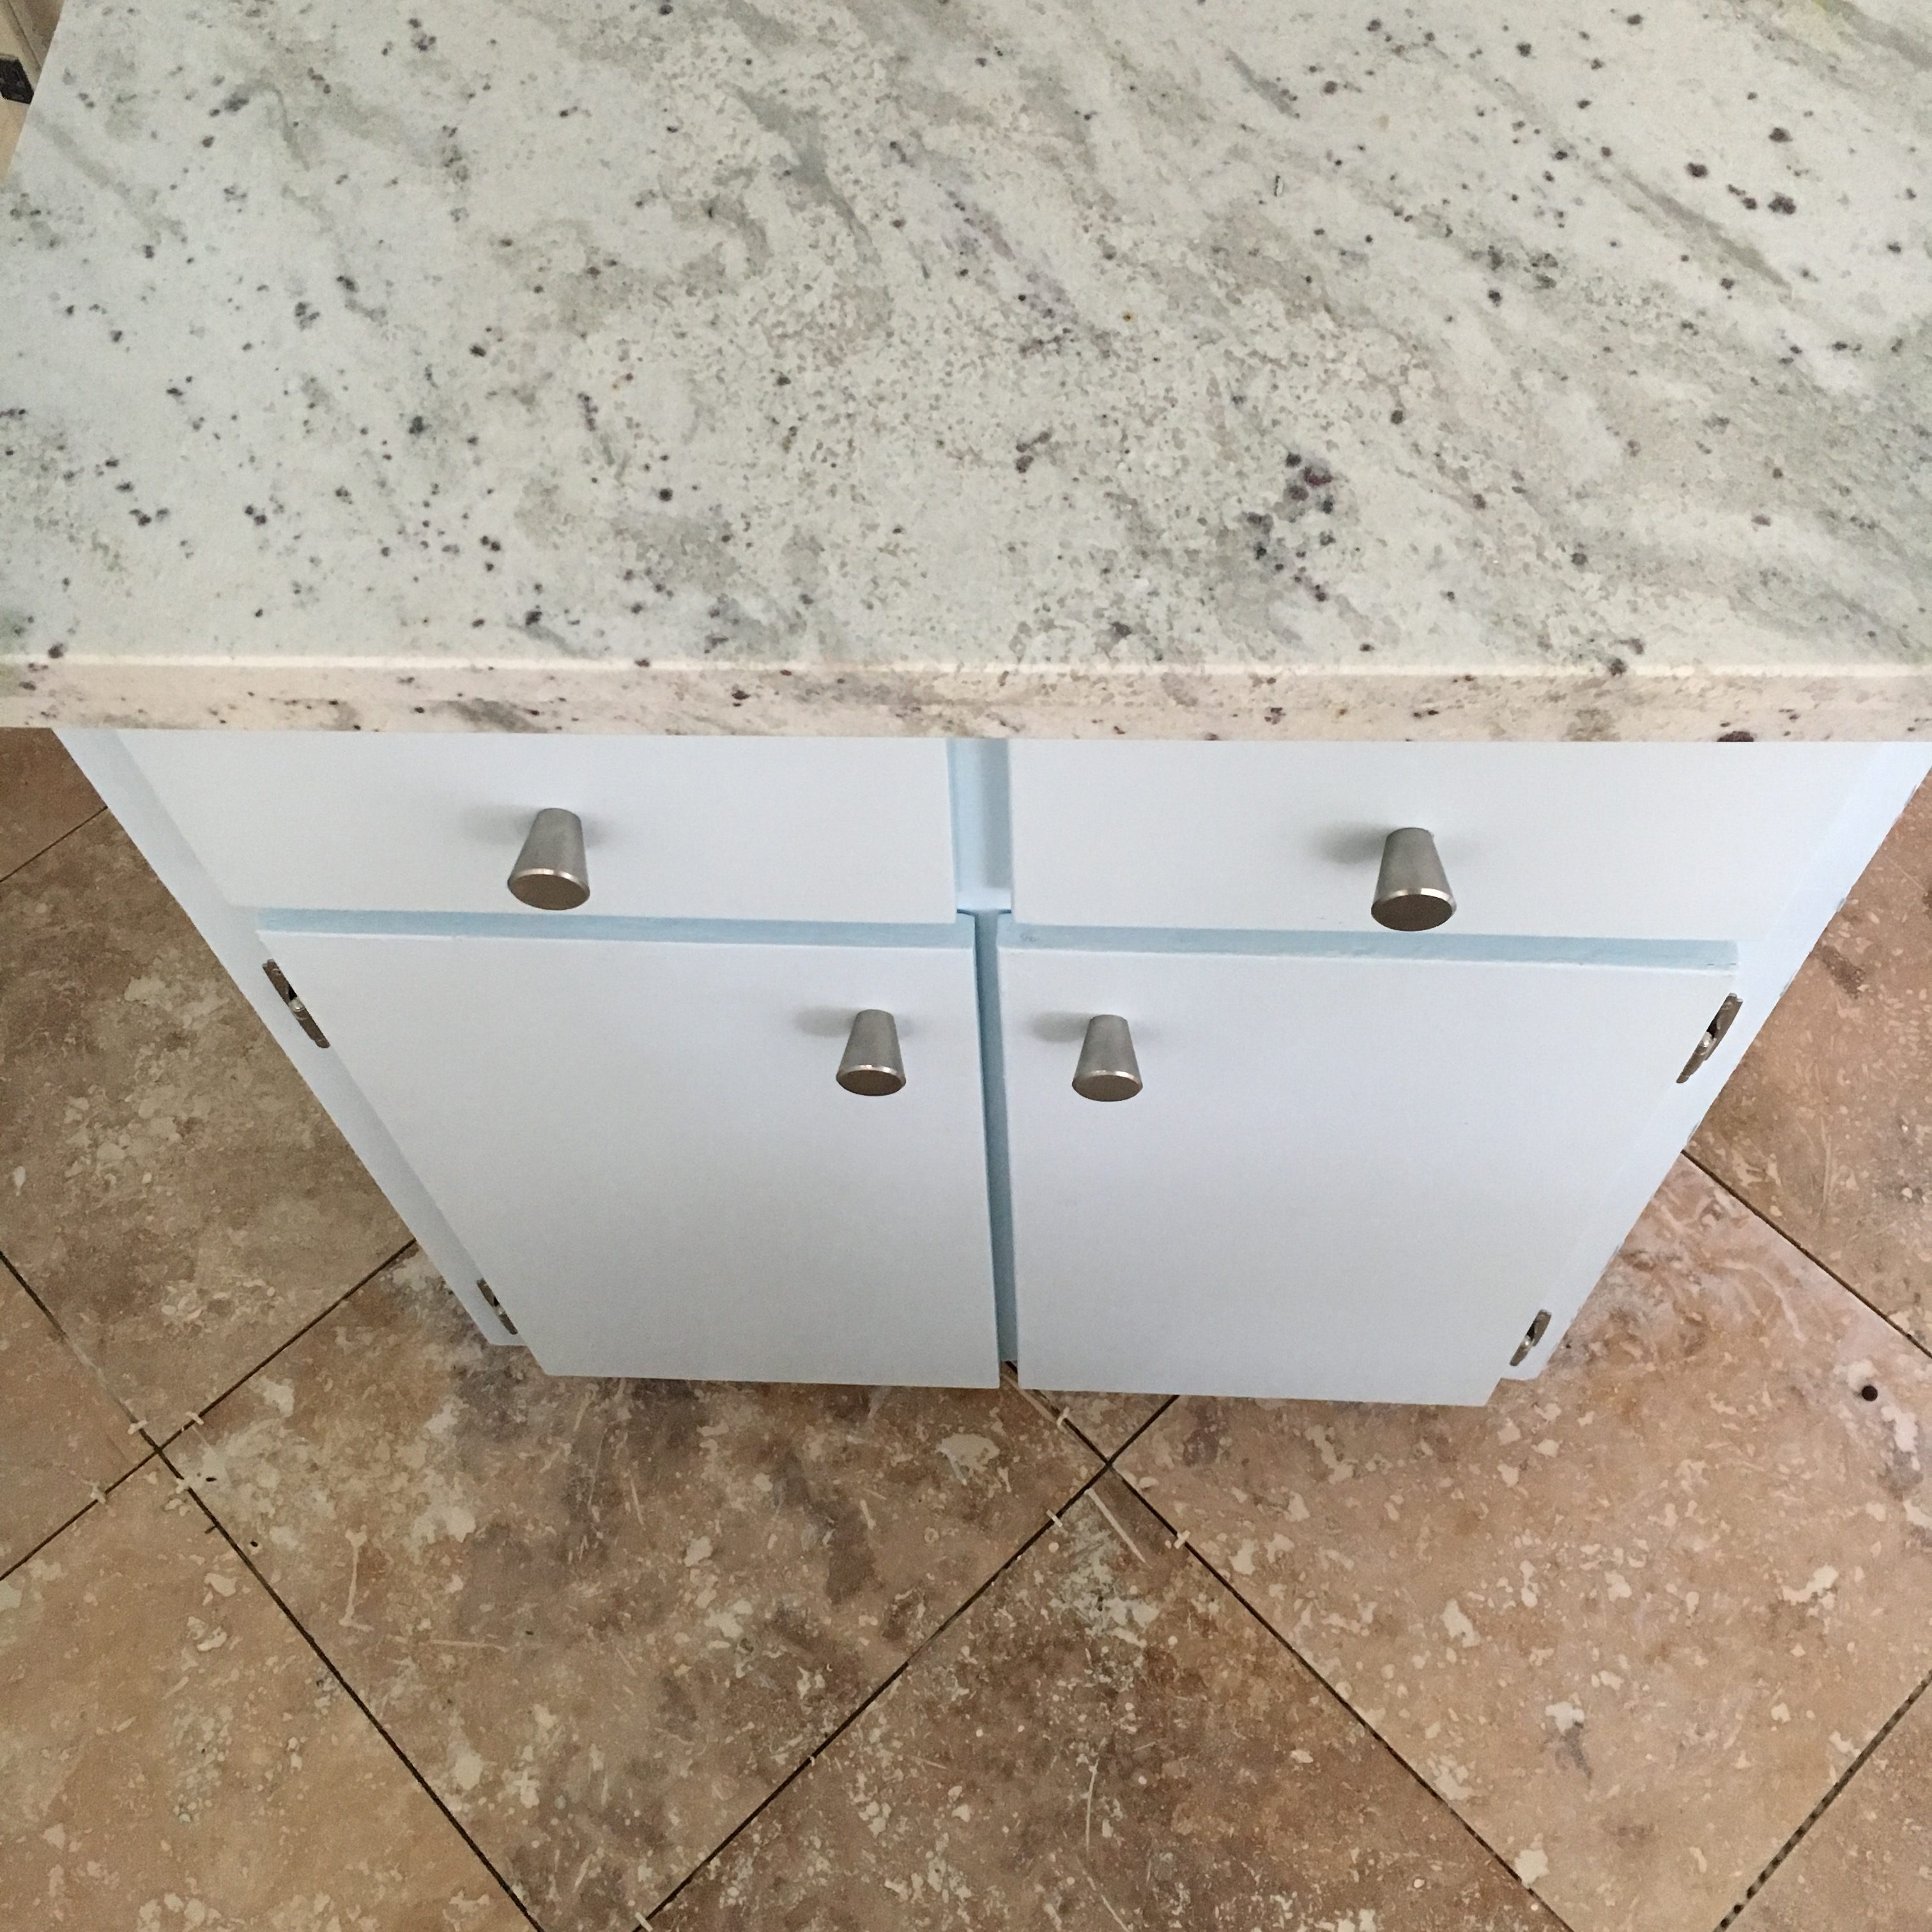
We did start to tile some of the flooring but didn’t get incredibly far. While I tiled and rehung the cabinet doors with new hardware in the kitchen, Dave worked on reversing the bathroom door to add some additional space to the bathroom, as well as hang a new solid door on the pump room which will drastically cut down on the noise from the pump. Unfortunately that door got the best of Dave before he left this weekend as the frame was never built square to start with, so we’ve got a bit more to do on that in November.
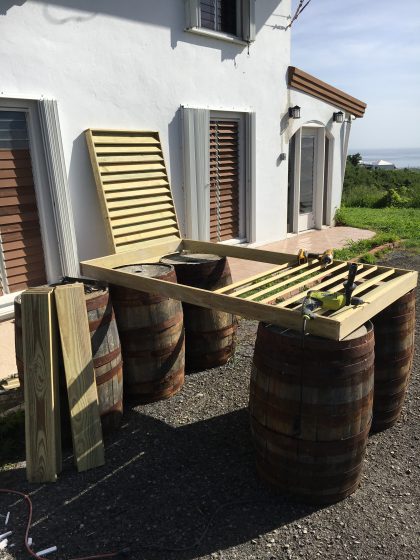
One Wall Panel Complete
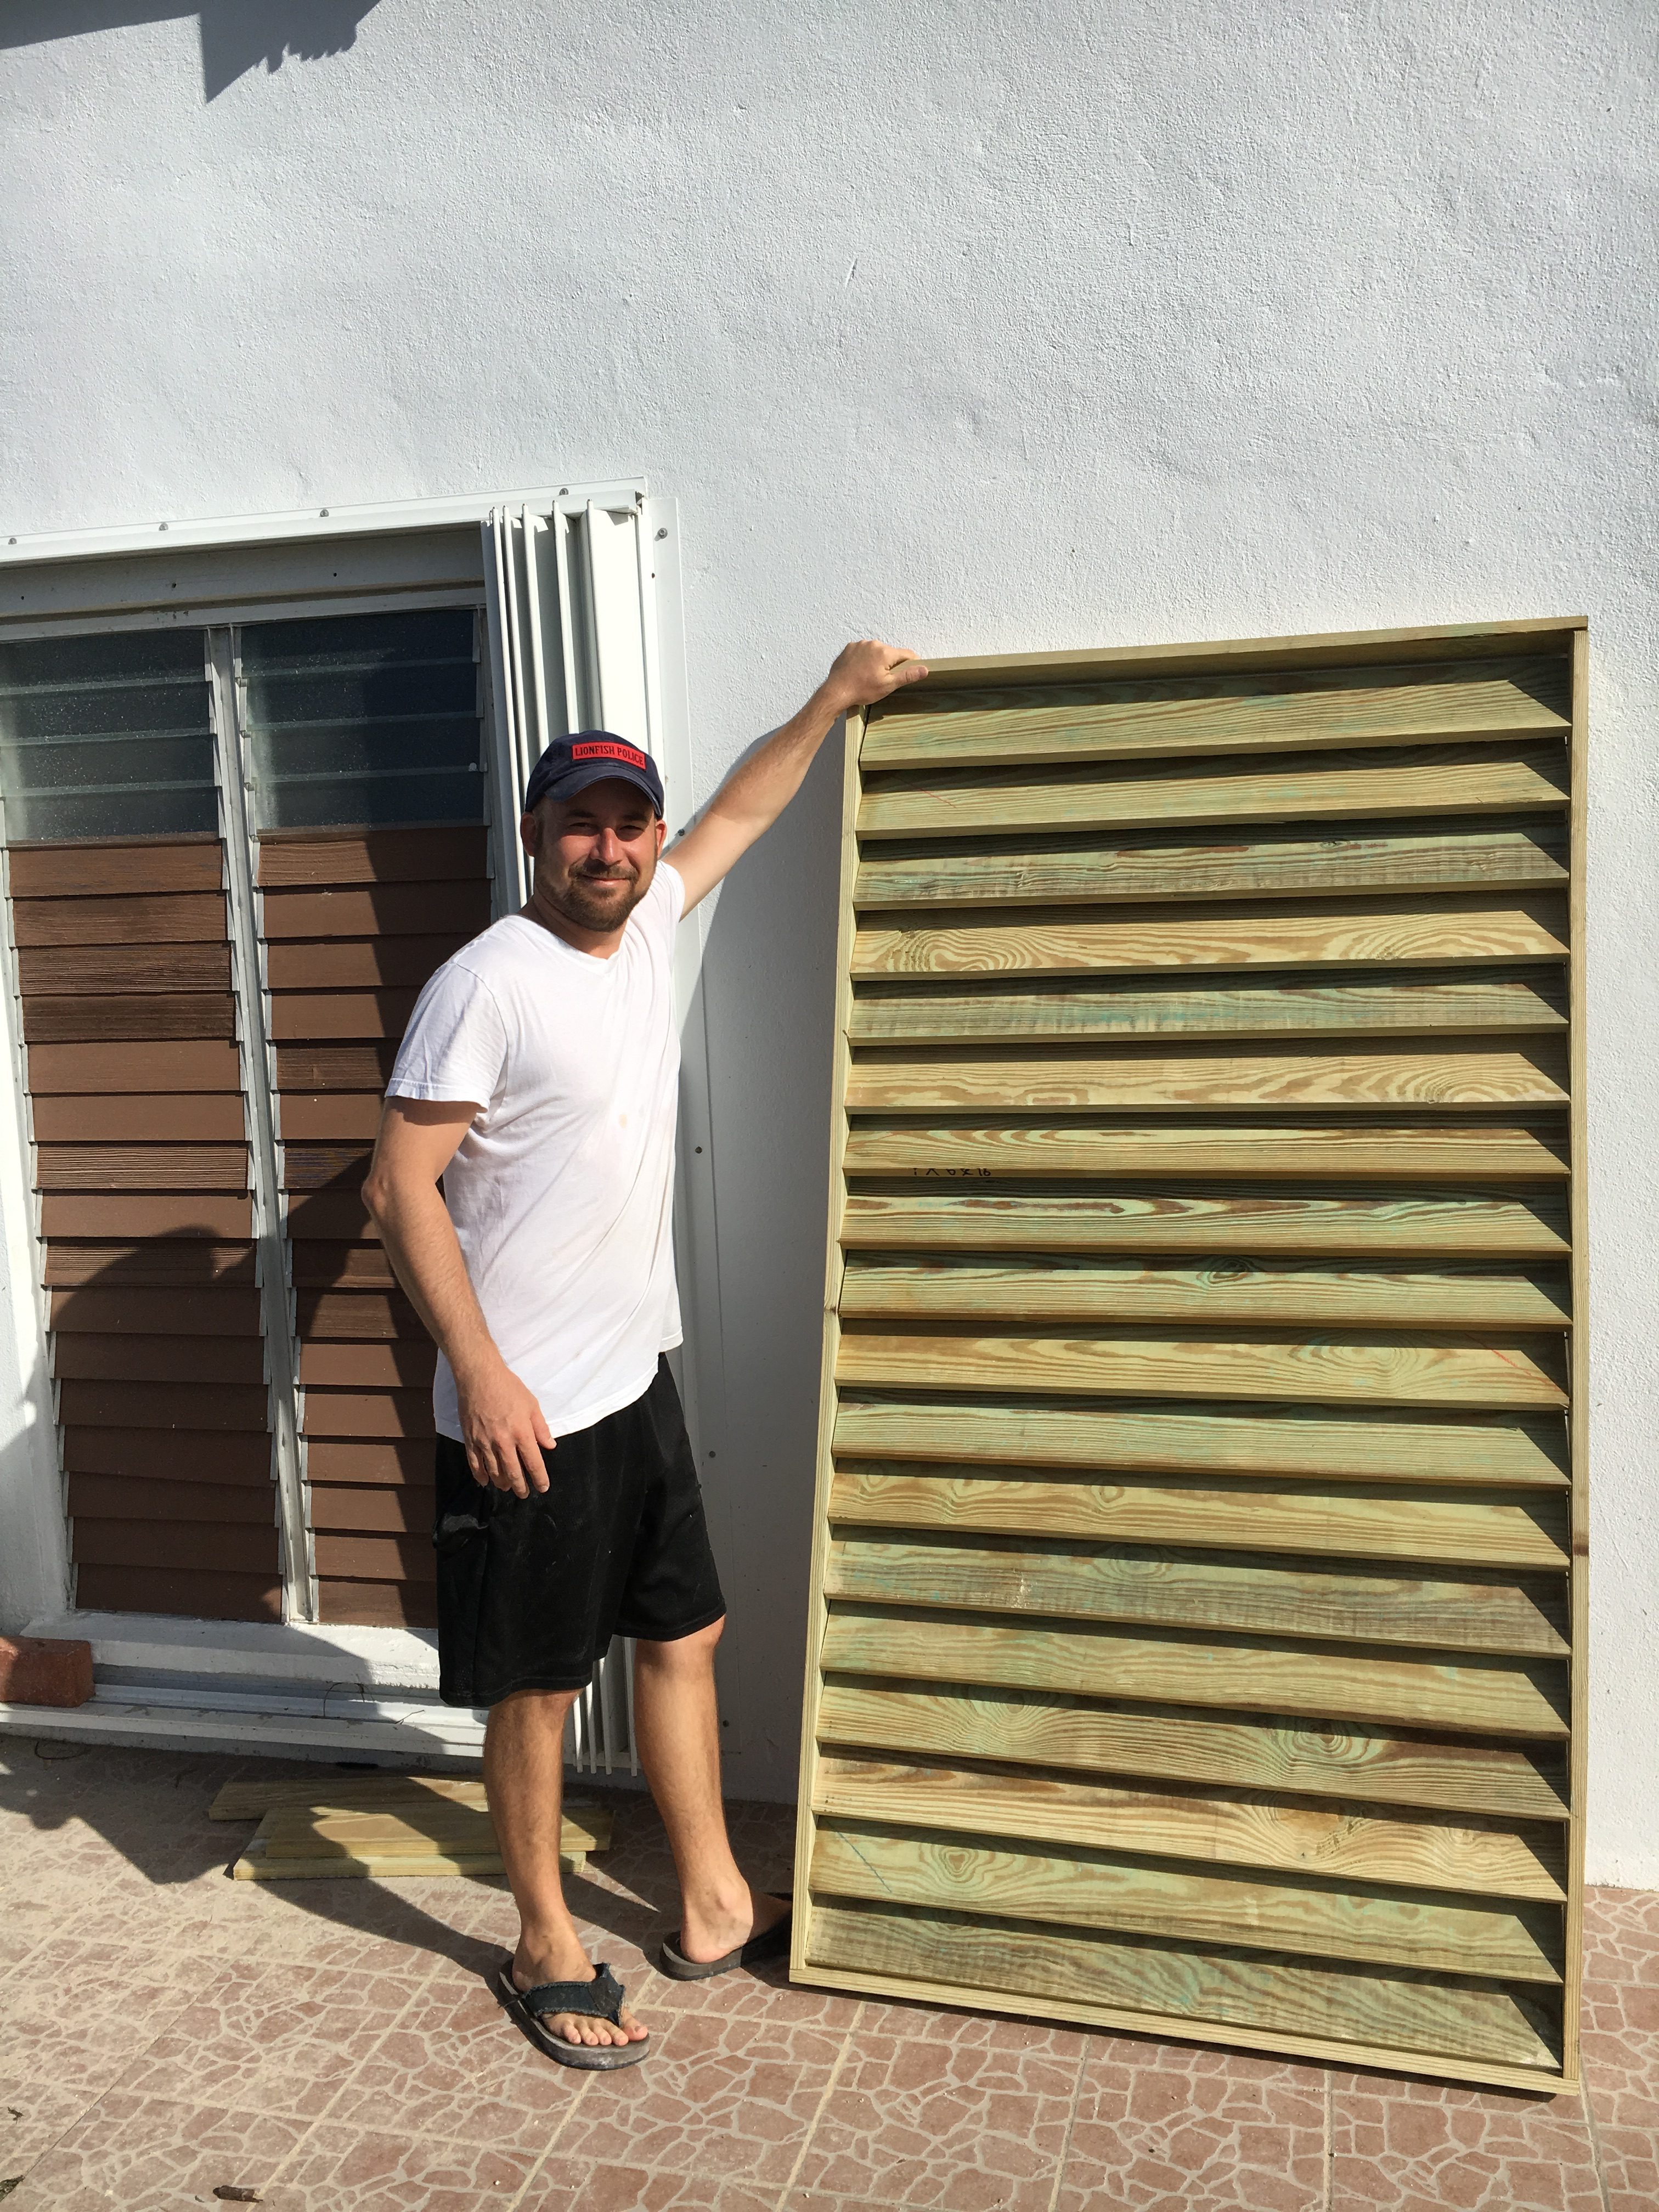
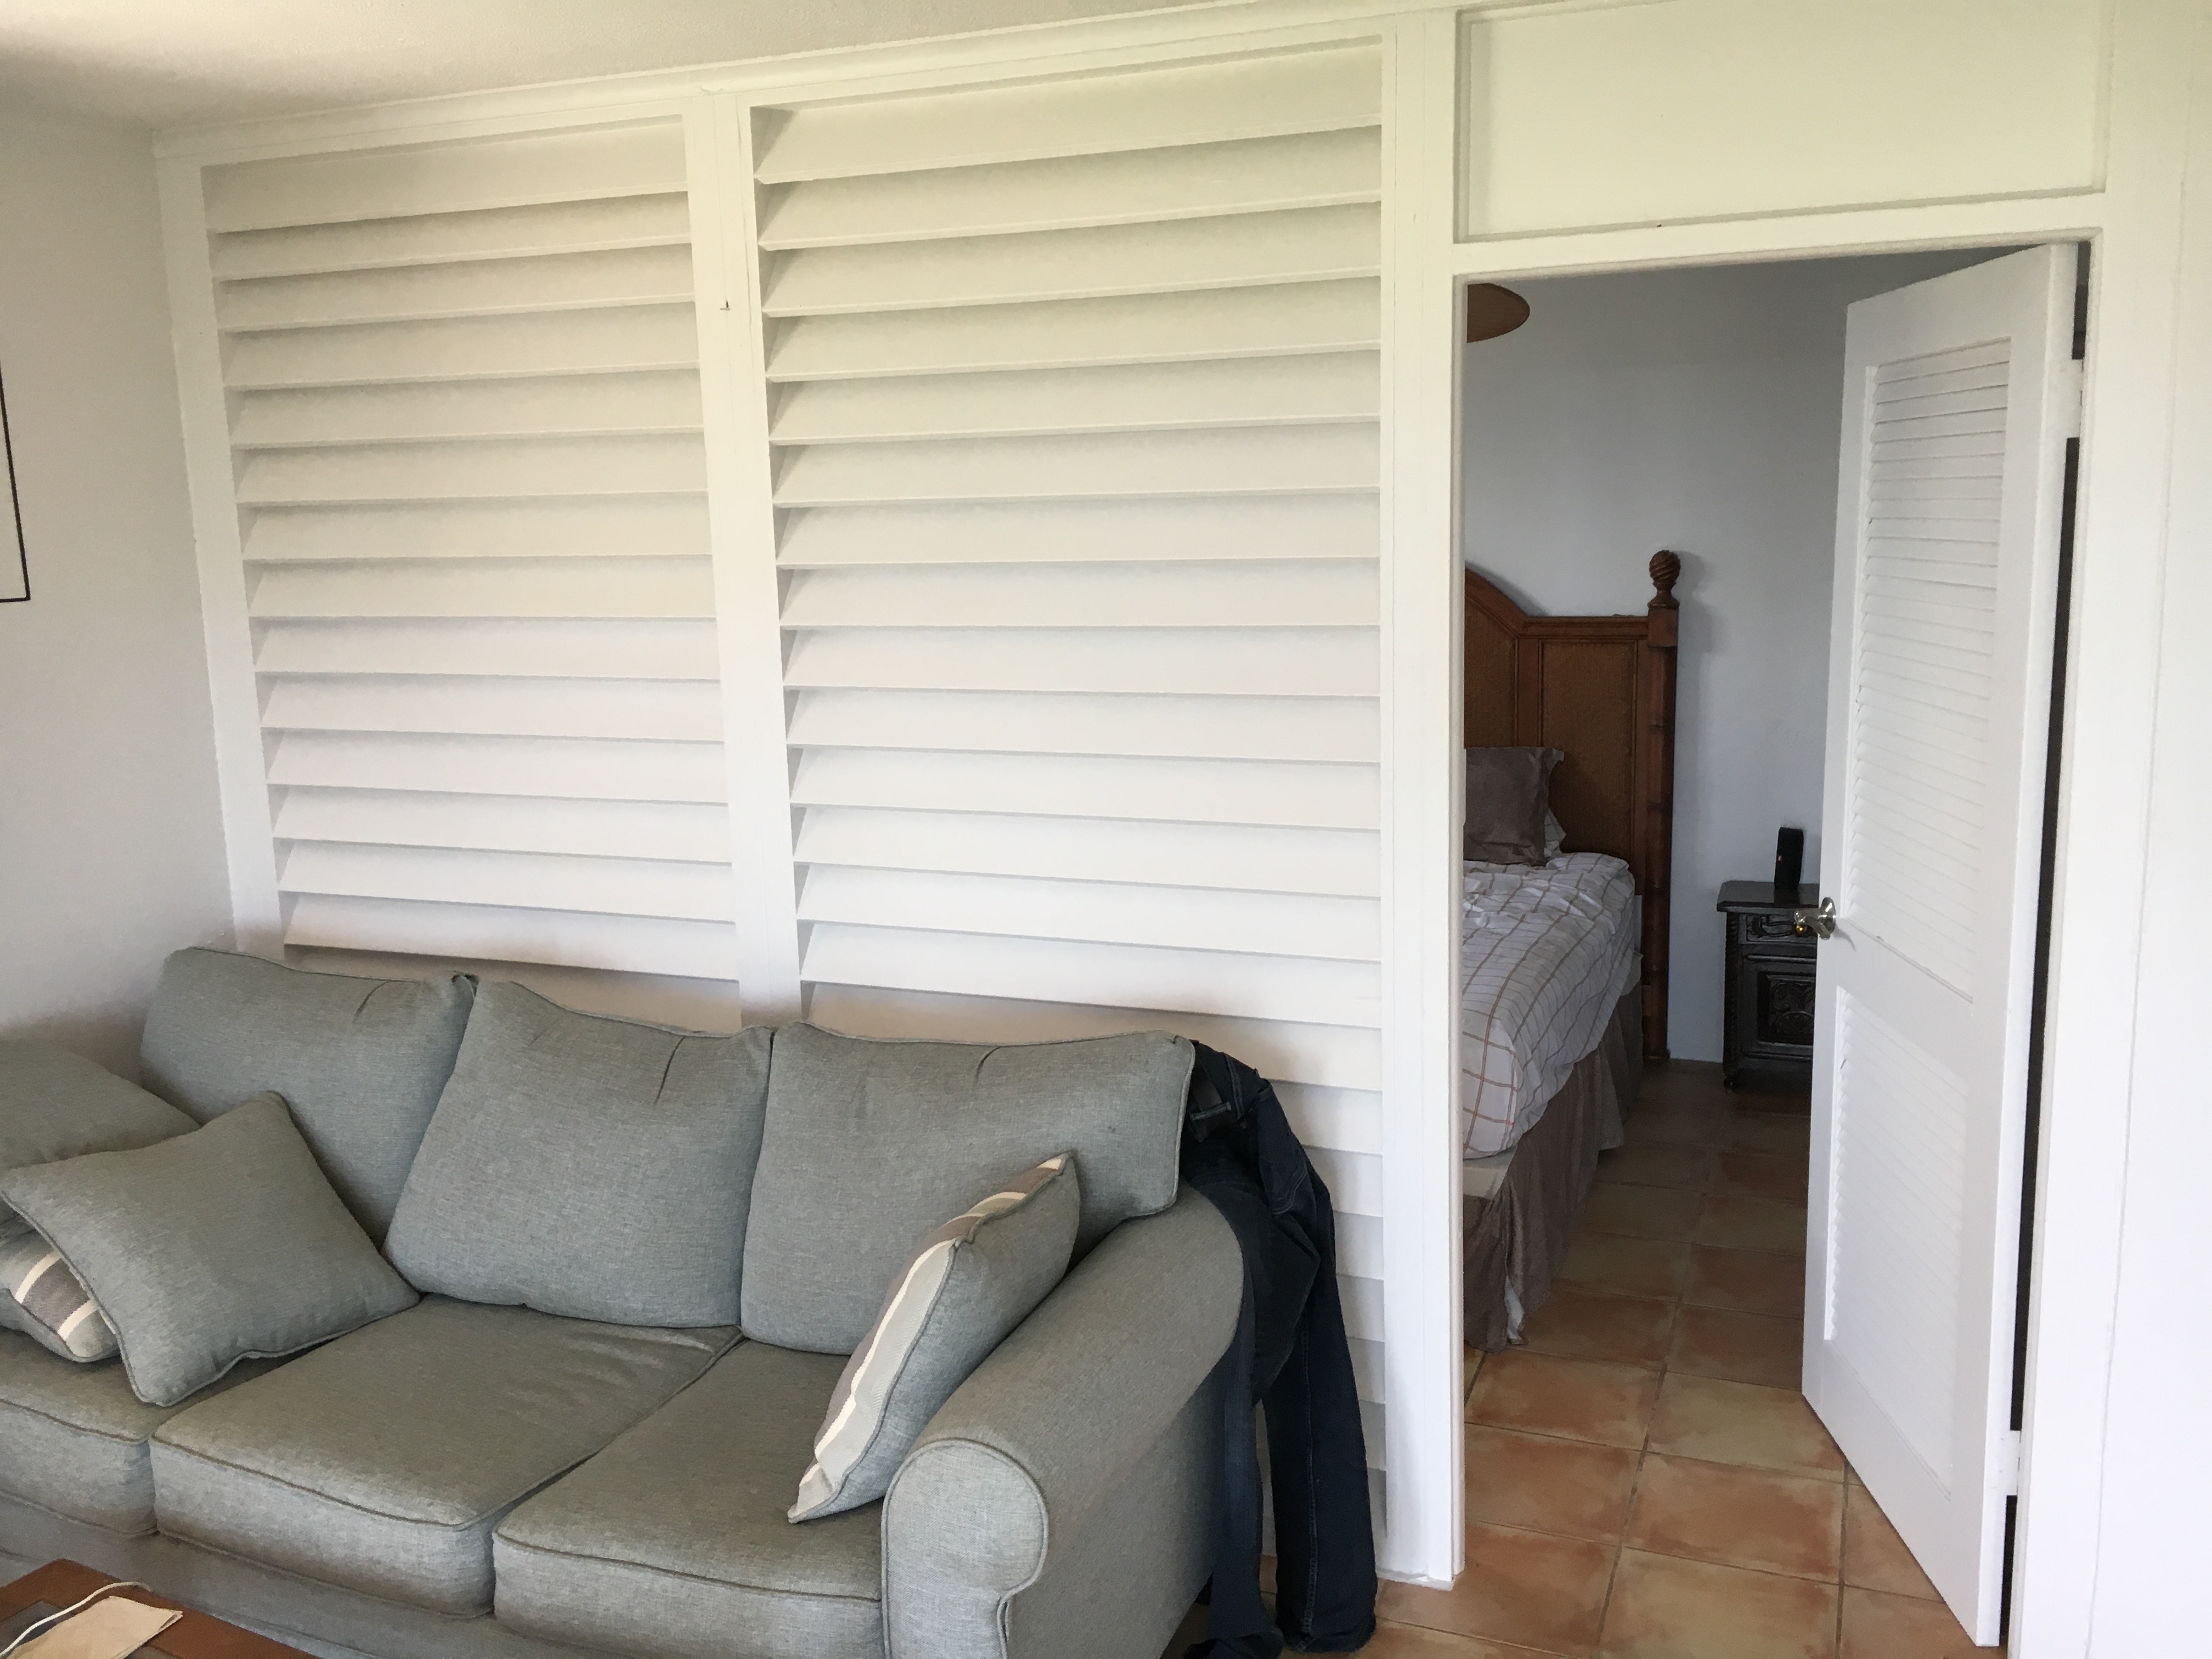
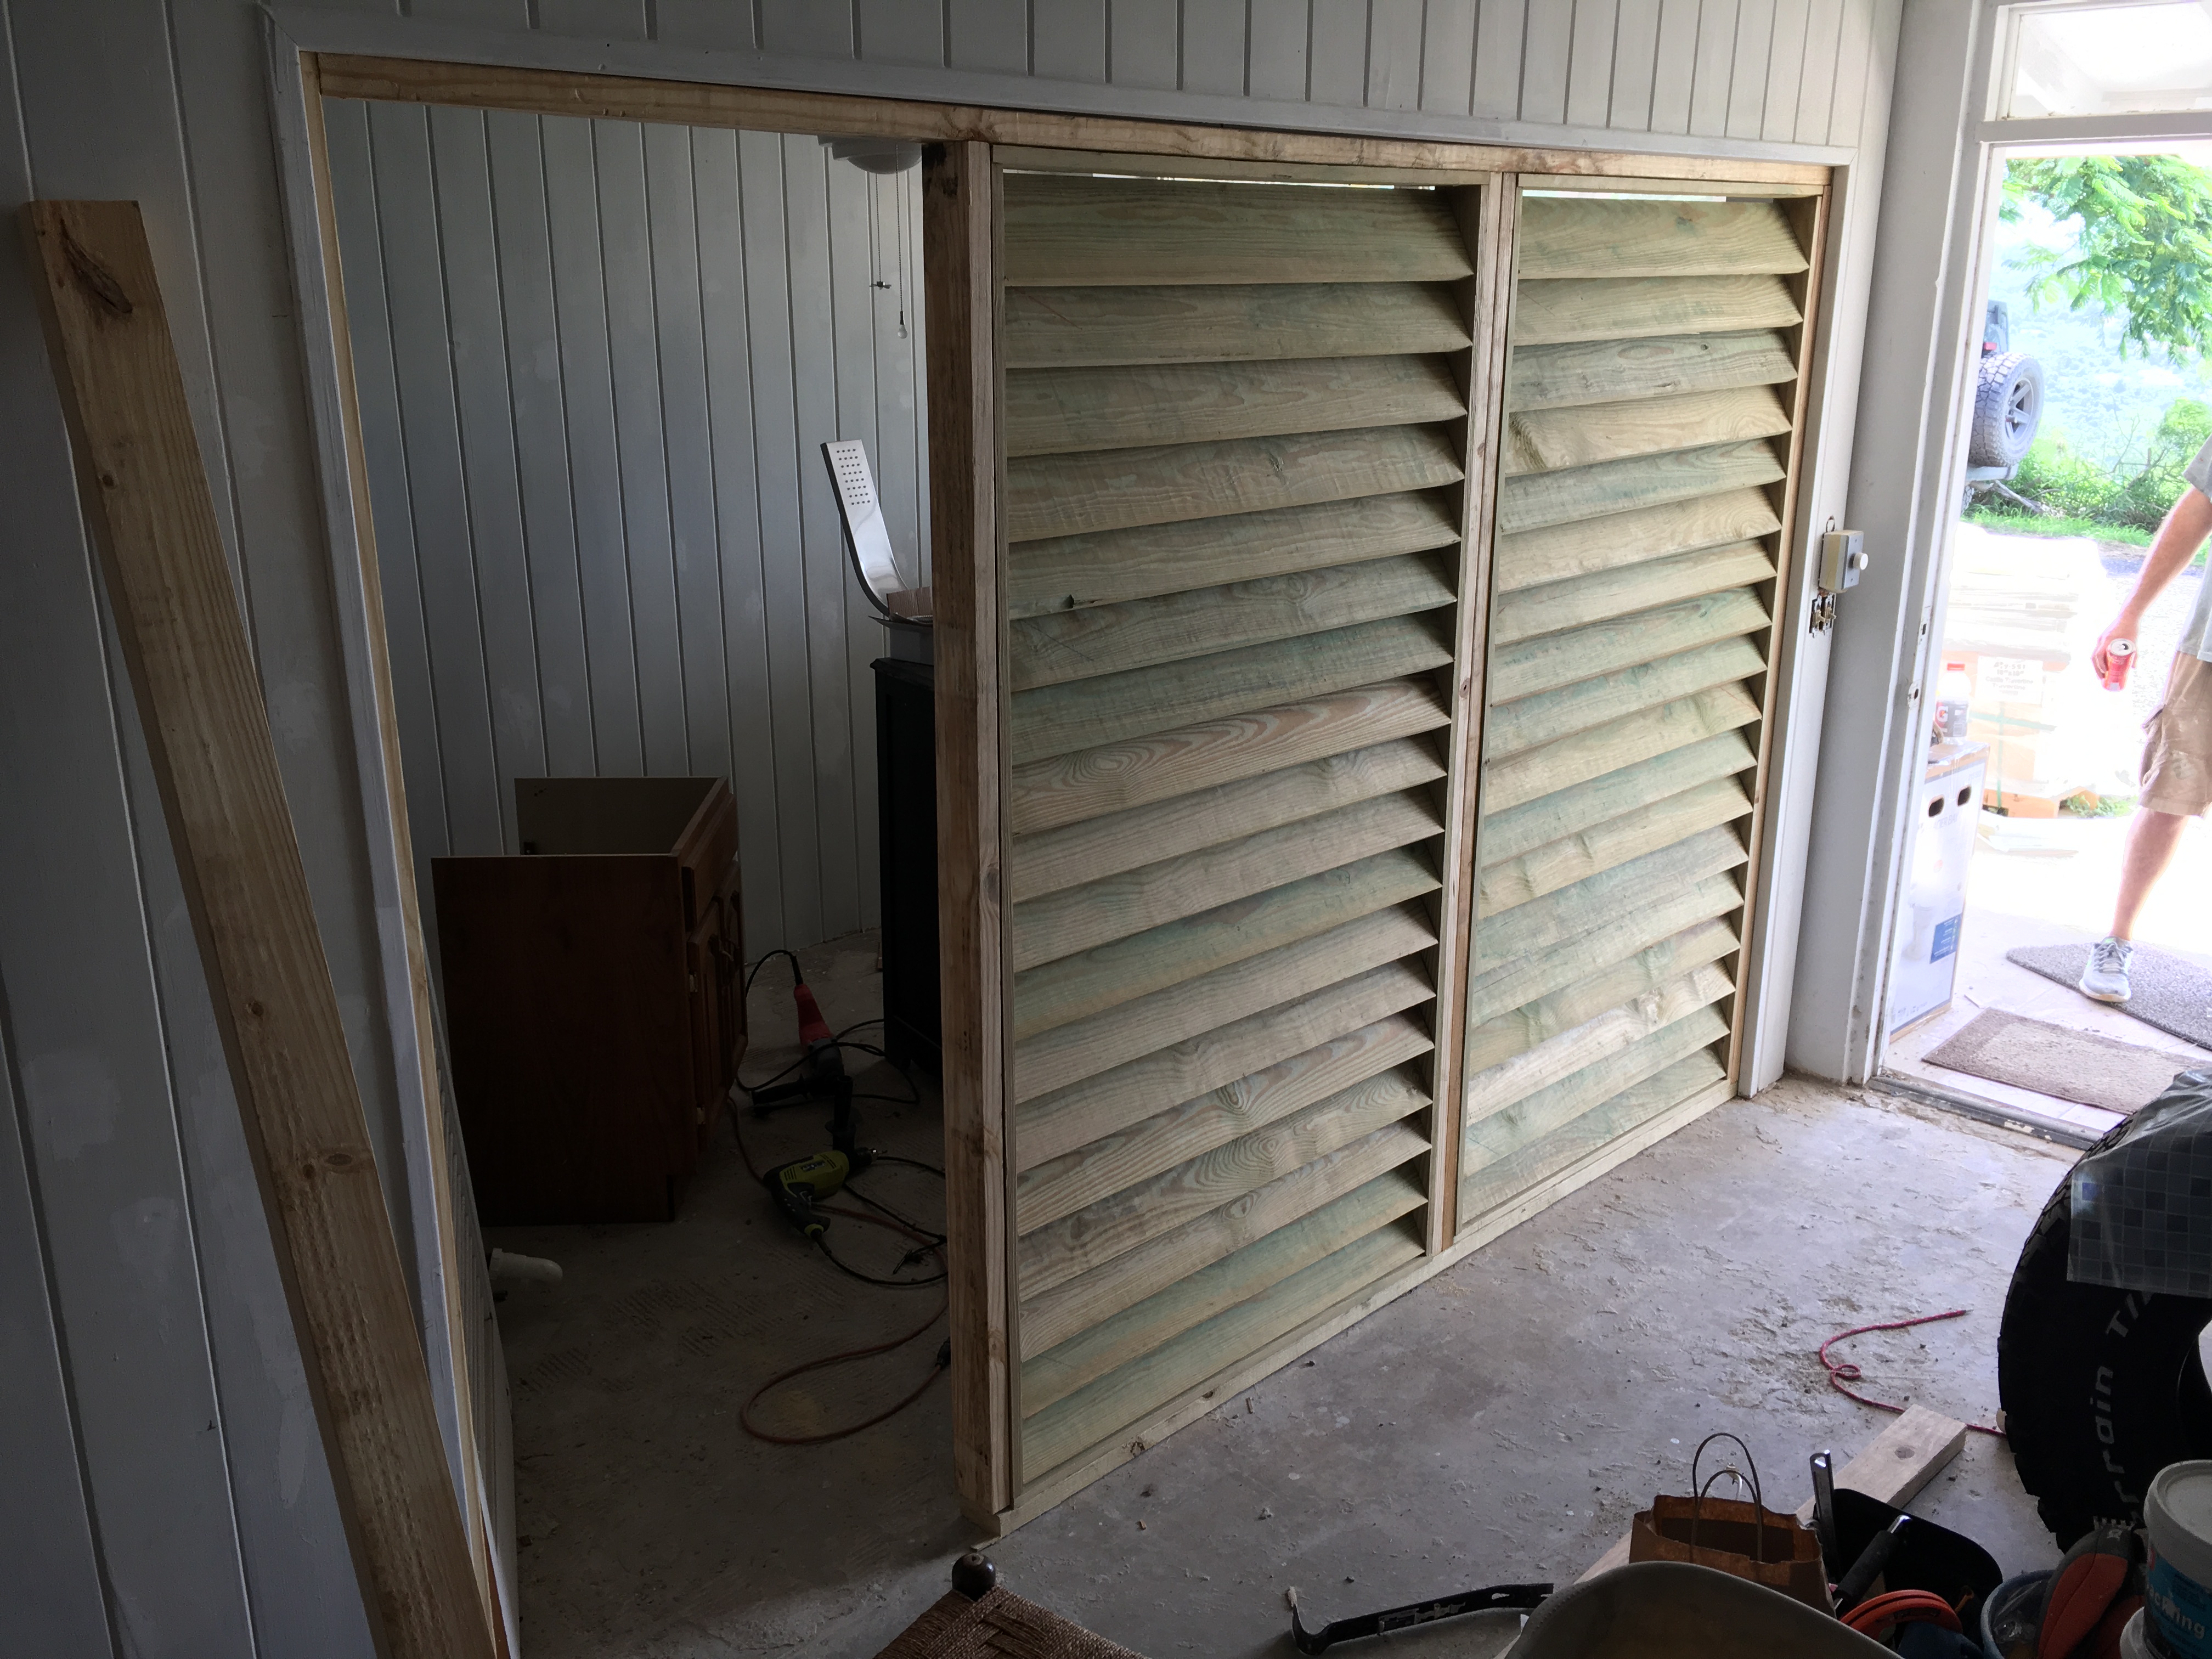
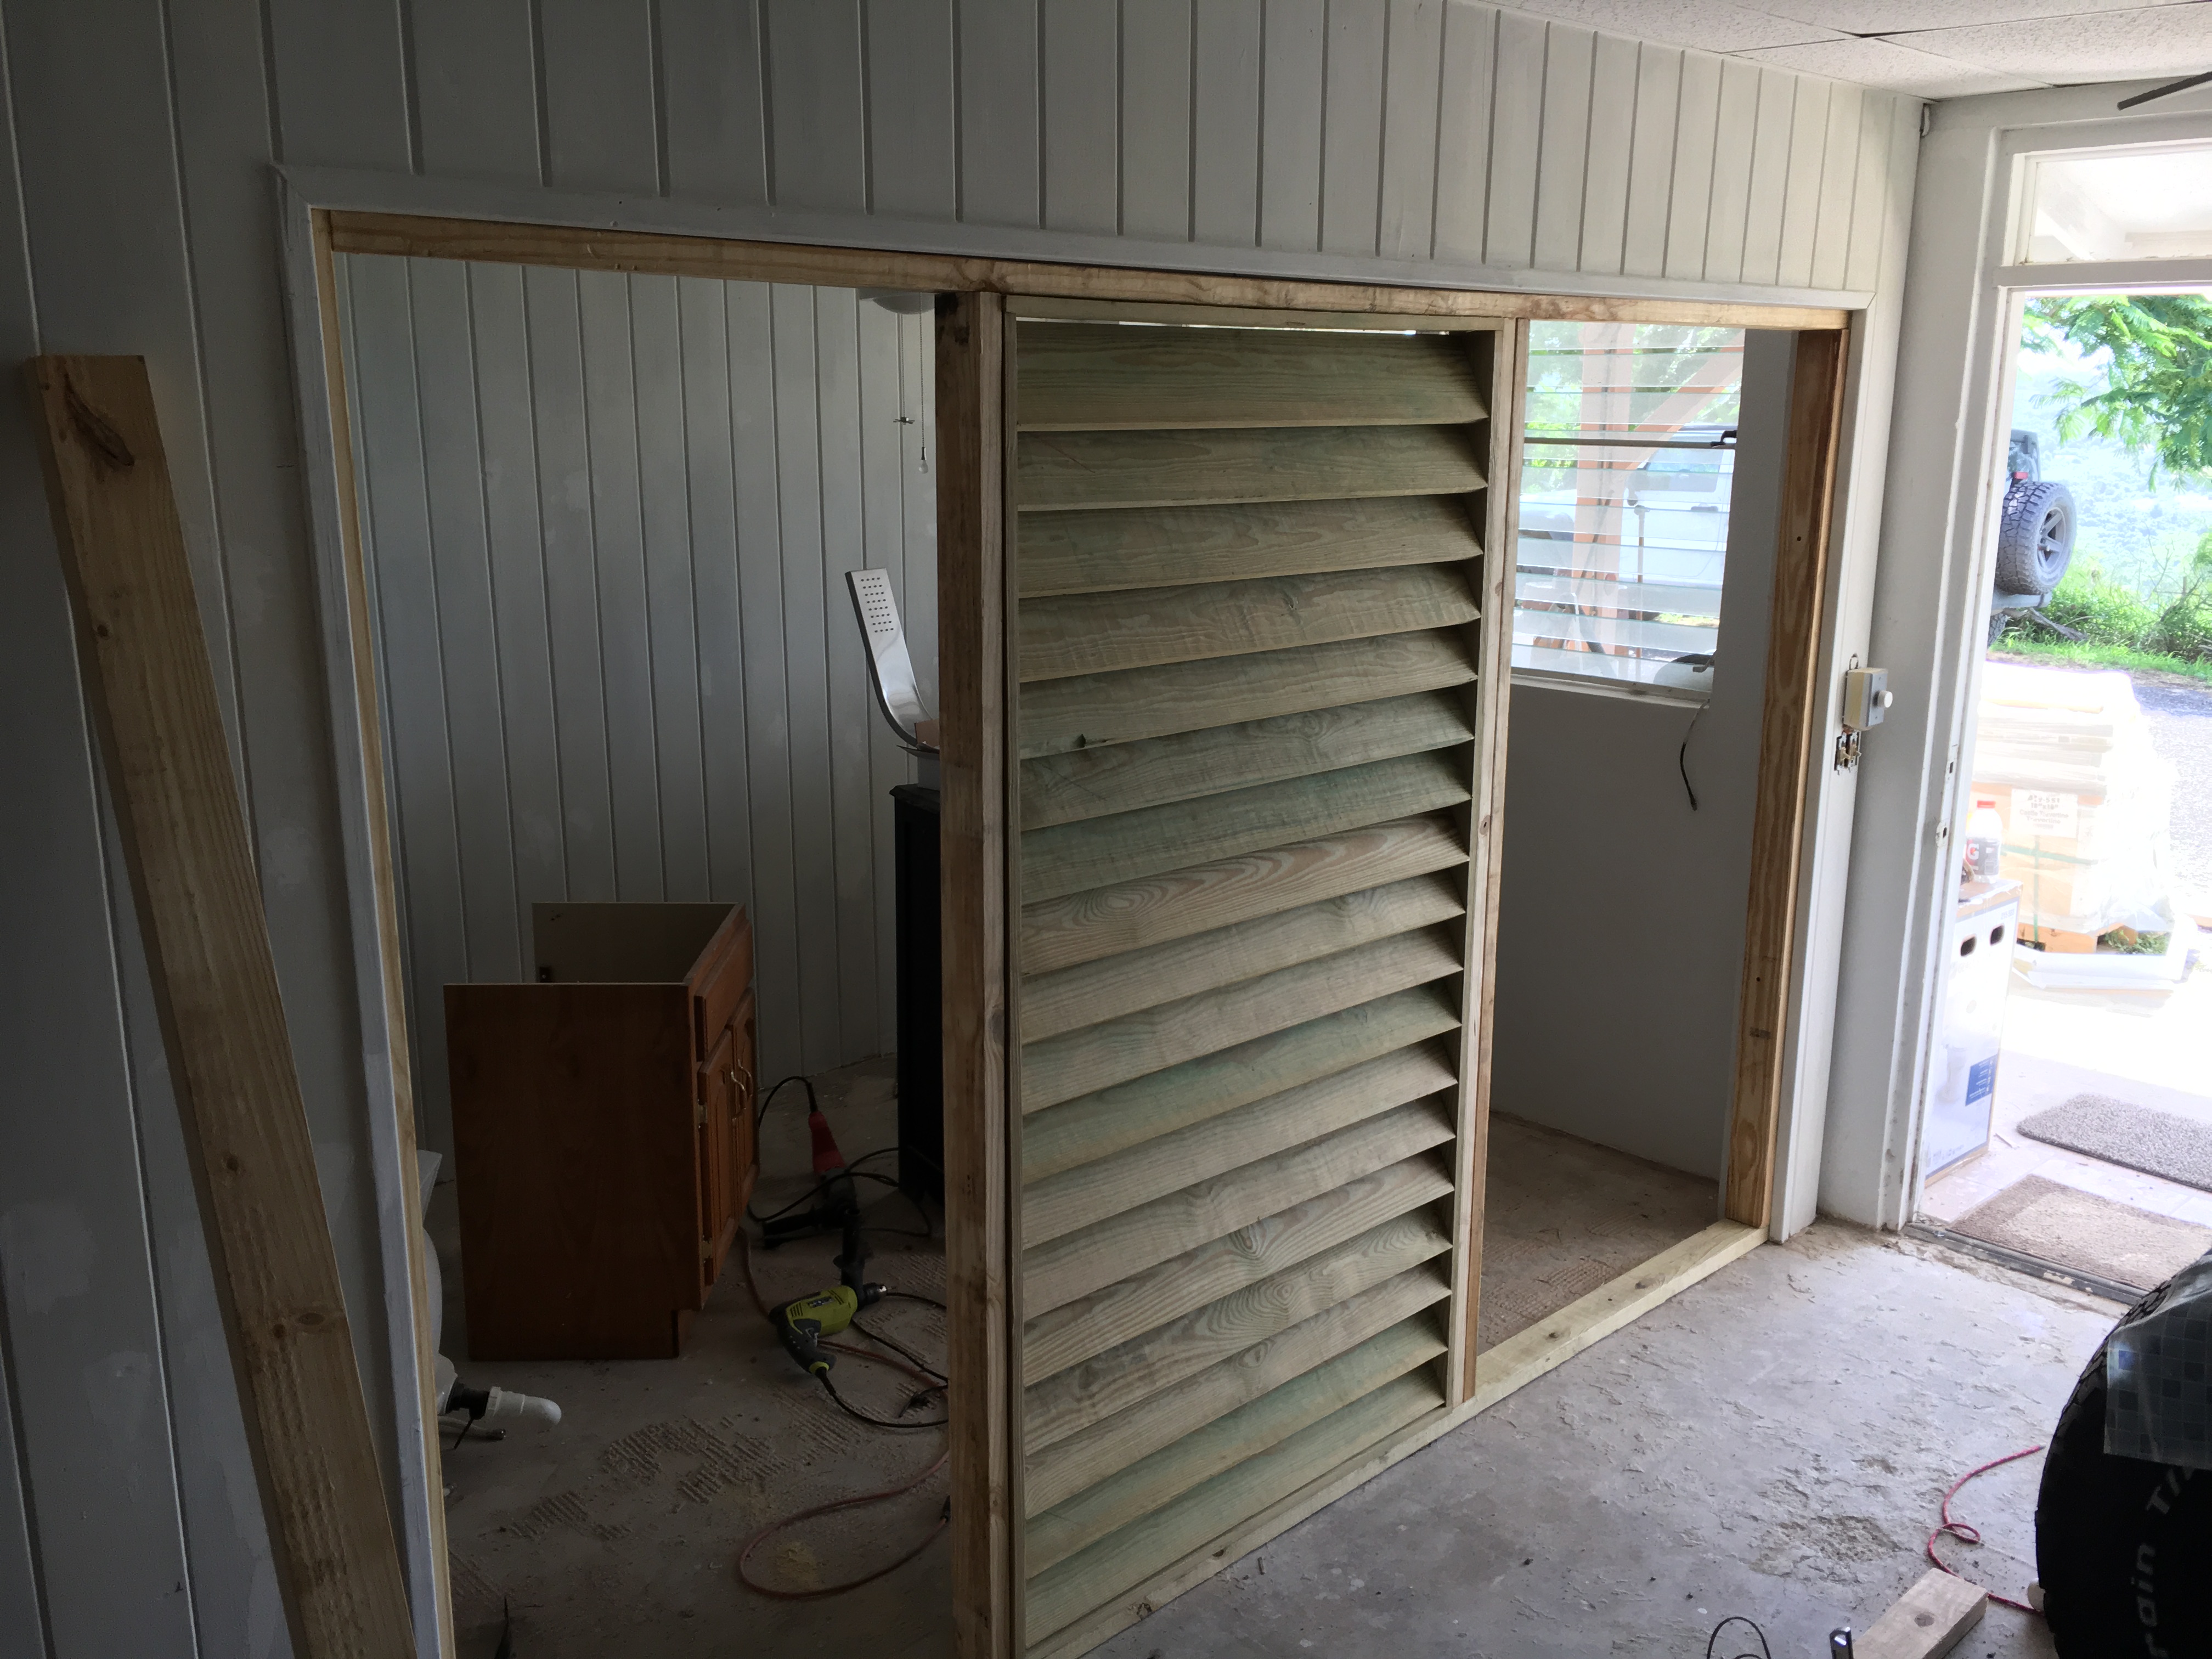
The last day we switched to building the bedroom wall. This was a project completely from scratch, made with 2x4s, 1x4s, and 1x6s. We modeled it off of the wall that already existed in The View to help tie the apartments together in the house a bit. I like the wall in the View because it breathes and allows airflow through while creating privacy that one cannot see through. The one we built came out beautifully. It was incredibly easy actually, with the exception of hammering in the panels into the wall’s frame at the very end. It was a very tight fit so it took some strength to get them in their slots. If you want to replicate a wall like this, it is essentially the following process. I’ve included larger pictures below as well:
Build a 2×4 frame which will hold as many panels as you need. Size it appropriately so that the panels will fit in the wall frame.
Measure out your 1×4’s for the outside edges of the large panels, and cut them to size.
Mark the lines with a pencil where you will install the angled 1x6s on them 1x4s. The 1x6s, if marked and spaced at exactly 4″ apart along the 1×4, can be installed at a 59 degree angle to get the other side of the 1×6 to lineup on the back side of the 1×4 border. You may have to look at the pictures to see exactly what I mean.
Screw the frame together for the panel, and then screw on your 1×6 pre-cut pieces on the pencil line at the 59 degree angle at 4″ apart into the frame of the panel.
Once you have the panels done, insert them into the larger framed wall you pre-installed. A couple screws will hold them in. Caulk, paint, etc.
We did a ton this weekend and made great progress. Super happy to be doing it with Dave as well as he’s got a great positive attitude and is super easy to work with. He’s got a place to stay in the Caribbean as long as we’re here… that’s for sure!
Can’t wait to update you in November with completed photos of The Mermaid!
Wall We Replicated in The View
Wall in The Mermaid We Built
Installing the 59 Degree Slats
Building the 2nd Panel
The Wall Framing
1 of 2 Panels Installed
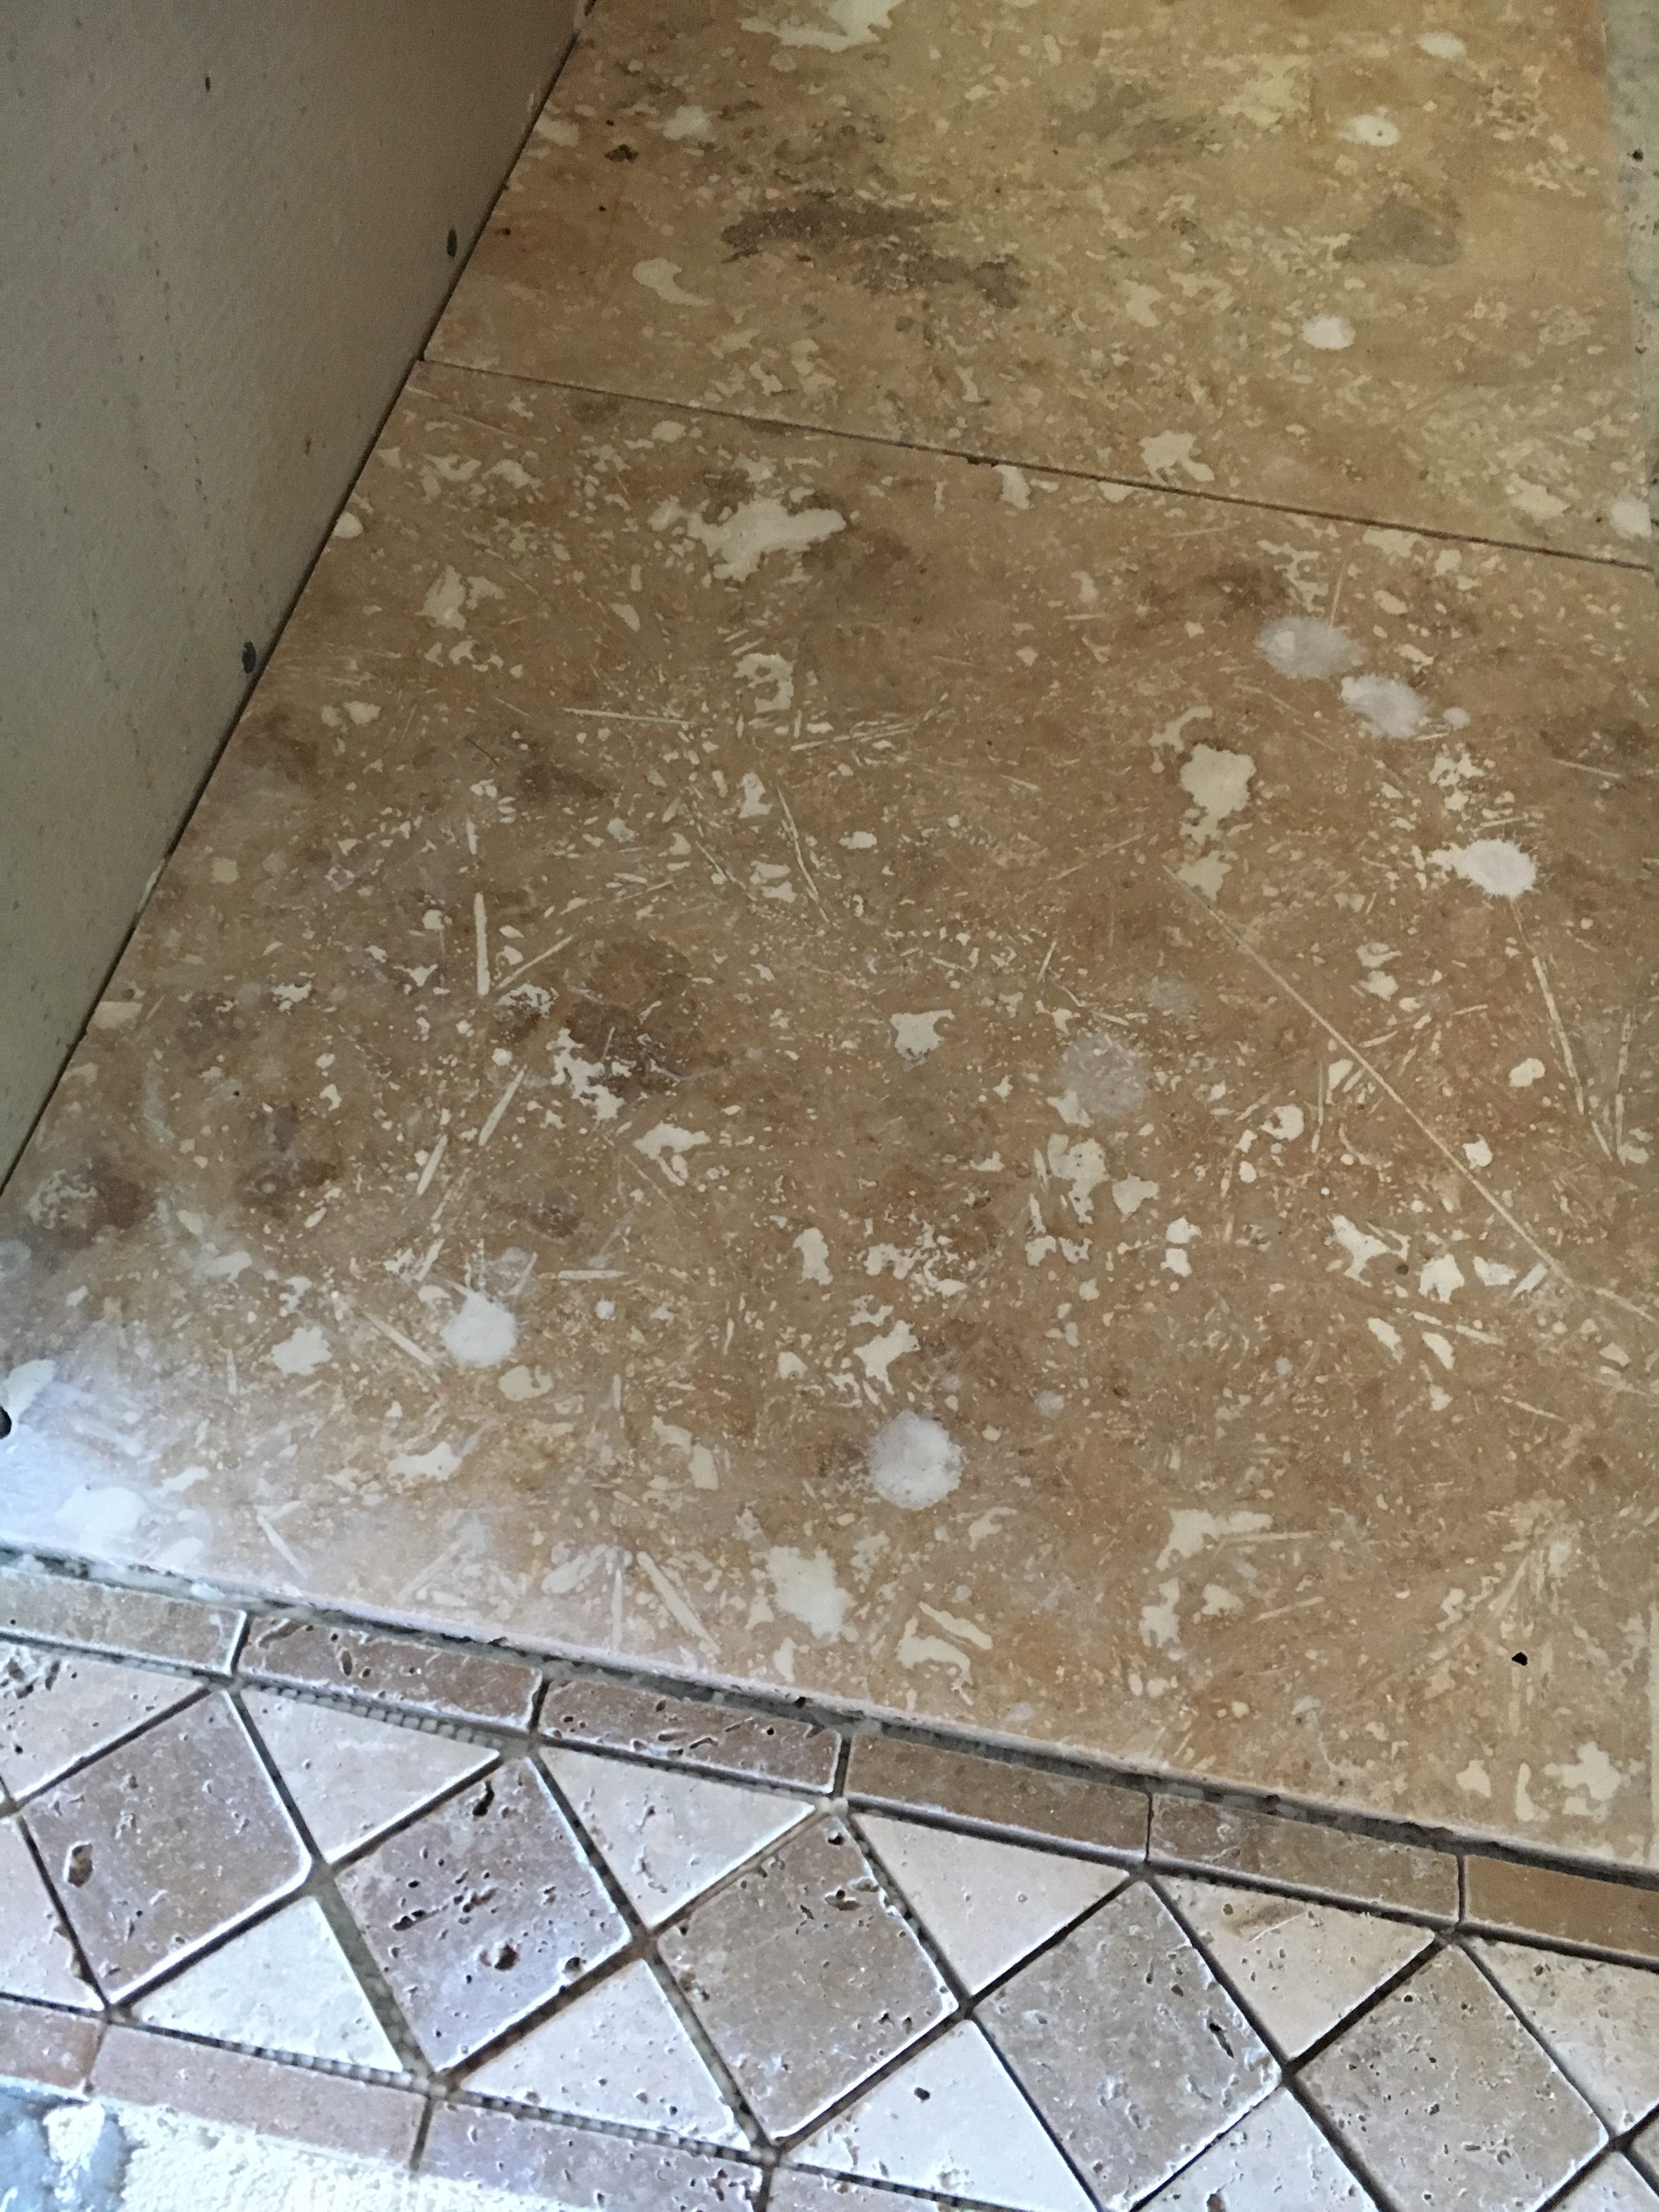
A Shot of our Granite Counters with Travertine Flooring